
https://thiccboi53.itch.io/mouse-platformer

Introduction
The next prototype I needed to make is a 2D Platformer game, with this one we need to make our own Sprites and Tiles with Adobe Photoshop 2023 and convert it ready for Unity.
The objective of this game is getting to the end of the demo, which is the little castle. But along the way, you will need to get past the hazards that await for you like Enemies and Spikes.
Currently, the only way to play again or when you die is to refresh the game in order to start from the beginning again.
Sprites – Player, Enemy, Spikes
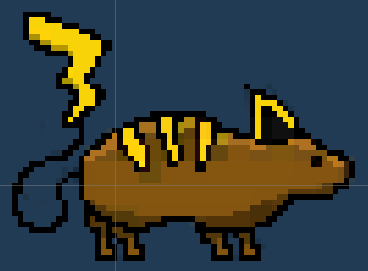
The Mouse Sprite that the Player will be controlling, the Mouse’s name is Aureline. A simple 64-bit sprite that was created in Adobe Photoshop 2023. This GameObject contains multiple Sprites for Animation that Unity is able to do for GameObjects.
The Mouse was fitted with multiple C# Scripts to allow Movement, Jumping, Killing the Enemy and the Camera to focus on the Sprites and follow it.
The Mouse Sprite is fitted with a Rigid Body 2D, Box Collison 2D and a Ground Checker with a C# Script to check when the Mouse Sprite is on the Ground. The checker was added to then the game will know the Player has hit the ground and reset the Jumps the player can use
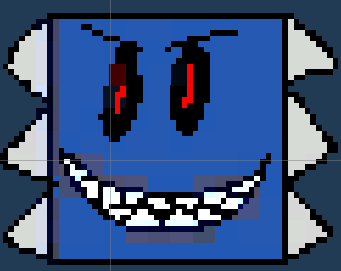
The Enemy Sprite, this will be the first hazard you will come across in the game. A simple idle enemy that will get in the Players way, The Enemy was placed with a simple C# Script that would Use the Animation and kill the Player.
The Enemy Sprite has a Rigidbody 2D for physics, interaction with the environment and Box Collider 2D, to detect when the Player collides with them and killing them.
It will kill the Player when Collided with and the only way to kill the Enemy is to jump on its head, Mario style. This is the last Sprite with multiple Sprites for Animation.
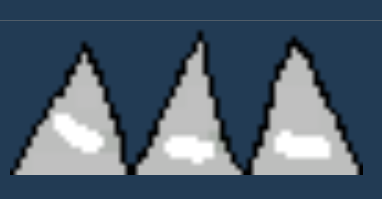
The Spikes Sprite is the last Hazard the Player will encounter, another idle hazard but this one can’t be killed and you must jump over it to get past and carry on through the Demo.
The Spikes Sprite has a Rigidbody 2D for physics, interaction with the environment and Box Collider 2D, to detect when the Player collides with them and killing them.
Animations – Player, Enemy
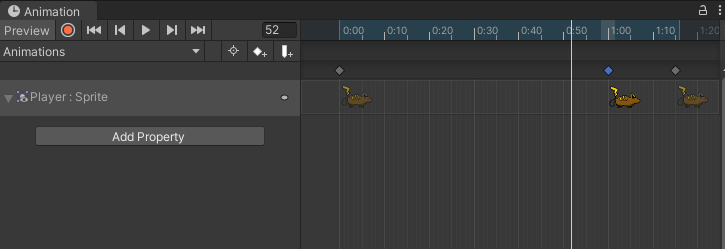
Now I have my created Sprites, now time to combine them together to make Animations for our Mouse and Enemy Sprites. Unity comes with a Animation tab that you can use to make groups of animations with only using Sprites.
You add a new property and give it a name, with your sprites open in the Project tab, drag and drop onto the timeline to start making an Animation. With this, I have made a Player Idle, Walk Left, Walk Right Animation and for Enemy, Look Left and Right Animation.
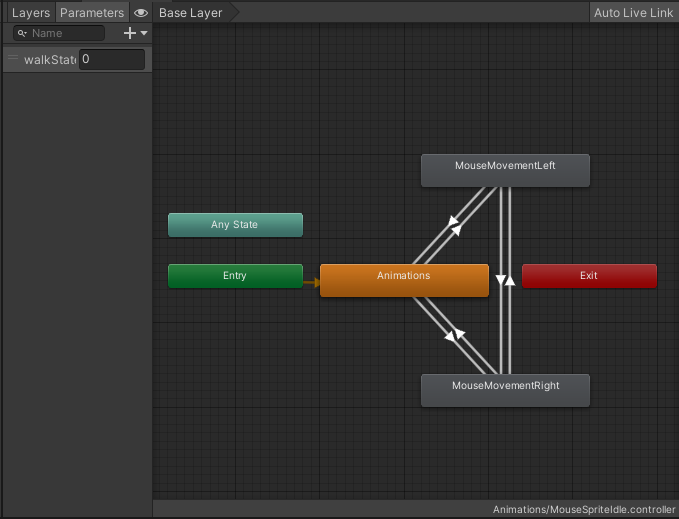
The Animator was only used for the Mouse Sprites since the Player is in control of this GameObject. When you open the Animator, make sure to be on Parameters and click the + symbol to start making a Layer of Animations for the Player.
I have placed all my Mouse Animations (Idle, Walk Left, Walk Right) onto the Animator. The Entry will be first connected to the Idle Animation, so then the game chooses that Animation for when you are not pressing any keys to move.
Then I added both the Left and Right Walking Animation. But the Animations won’t work until we link them altogether. I need to right click on the Animations multiple times and click Add Transition and make sure the Transition goes back and forth to all the animations for this to work.
Tiles – Ground, Dirt, Platform, Bricks, Slabs
All the Tiles were created with Adobe Photoshop 2023

The First Tile created, The Grass Tile that the Player would at default be on. The dirt used to be one colour but I added a darker wavy pattern into the dirt to add some detail and feel more ‘cartoony’.

The Dirt Tile, the same as the ground but I deleted the grass on top and now this means, that I am able to stack these Tiles underneath the Grass Tiles. This also makes it seems that not all bits of the world are going to be platforms.

Platform Tile, little like the Grass Tile but without the dirt detail and adding stone bricks at the bottom. This was used to make jumping platforms that would be used by the Player to jump on. This is used for both hovering Platforms and Cliff-like Platforms, to add more environment to the world.

Platform2 Tile is like the Platform Tile but without the Stone bricks. This is used when I want to put little dirt underneath but still treat it like a platform. This will be only used like a Platform but its still looks like its connected to the earth.

The Brick Tile. This is used for when I want to make Caves, Castles, Ruins, etc, for the world. This also would be used for cliffs, so instead of giving a rough stone like normal, all stone on the earth is built brick by brick.

BrickConnector Tile, used to help detail the ground more to make it look less flat or add detail to caves or cave entrances.

Slab Tile, Used for making floating platforms have more detail, add further detail for the caves, caves entrances and having the cliffs/pillars look less flat underneath, so they have some structure or shape to It.

HalfSlab Tile, like the Slab Tile, adds more detail, add further detail for the caves, caves entrances and having the cliffs and pillars look more detailed underneath, so they have some structure or shape to It.
Grid – Tiles, Environment
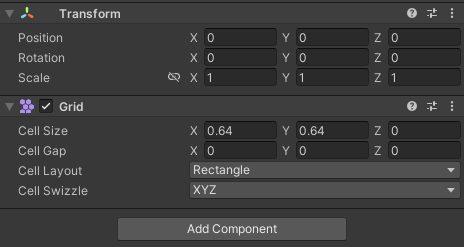
The Sprites and Tiles all are 64-bit, so that means we need to setup a way to making the game’s environment, I made a Tilemap (Comes with a Transform and Grid Component) to snap place my Tiles together to help make the world quicker.
I left the Transform component alone since I don’t need to change anything but the Grid Component will need to be changed. The only thing I changed was the Cell size to X 0.64, Y 0.64, Z 0. So now the Tiles are 64-bit and should fit perfectly.
Problems Solved

The Mouse Sprite would not be destroyed when colliding with the Enemy or Spikes, this caused a problem for some time until I found out I spelled ‘Player’ wrong, it was ‘Plyer’, now it is ‘Player’.

The Player would be able to jump endless amount of times and was a problem for around a few hours. Now I have made a limiter of how many jumps the Player can do and it will reset once the Mouse Sprite hits the Ground.

The Camera wouldn’t track the Player at all and instead will stay in place throughout the run, not allowing the Player to see what’s next on the Demo. The problem was that there was a misspell and it was ‘Player’. It was previously ‘Payr’ and now is ‘Player’.
What I have learned?
I have learned how to make my own Sprites in Adobe Photoshop 2023, Import them into Unity and make Animations with them. I learned how to make my own World by creating Tiles in Adobe Photoshop 2023, Import them into Unity and learn how to make a world with them.
I learned how to make Animation through the Animation and Animator Tab, also learned how to Transition animations together in order for the animation to run smoothly and respond to the players controls.