
Introduction – Assignment Brief
For this assignment your task is to create an environment based on one of the four main themes listed below that also incorporates one of the sub-themes beneath them. The production of the environment needs to be recorded and logged in a development log on your WordPress site.
Programme Competencies Assessed:
- PC4 – PROJECT MANAGEMENT – Amend and implement a given plan to develop basic concepts to outcomes while managing time, resources, workload, deadlines and adapting to change.
- PC5 – SOFTWARE PROFICIENCY – Explore available tools, technologies and techniques in order to solve creative problems and demonstrate basic technical proficiency with specialism-specific software skills relevant to the task (with guidance).
- PC8 – REFLECTION – Reflect and evaluate on performance in order to inform personal development and continued learning of new skills
Main Themes:
- Horror
- Science Fiction
- Fantasy
- Historical
Sub-themes:
- Alien
- Corruption
- Utopia
- Dystopia
- Celebration
- Decay
- Family
- Beauty
Production piece expectations
These guidelines are what we expect to see as a minimum within your environmental submissions:
- A small to medium environment that demonstrates a building and its surrounding area. This could be a house and its garden. A church and a graveyard. A moon base and small excavation site. A spaceship and landing area. A sailing ship and jetty. The choice is up to you.
- The central asset you create in asset design must be placed in your environment in a way that assists the environmental storytelling of your environment. The asset itself will not be graded within Environment Design.
- You must fully furnish your environment with either created or found assets.
- The environment should be fully lit, and this should help enhance the mood of the finished piece.
- You are not being marked on the assets in your environment, but the layout, presentation and attention to detail in the finished piece.
- You are also being marked on the content of your blog posts for your portfolio, so it is imperative that you update these every week.
Additional content
For those who seek higher marks, you might look to include environmentally relevant:
- HDRI Backdrop
- Decals
- Particle effects
My Environment Theme And Choice
I decided to go with Fantasy as my Main-Theme since I love anything outside of Realism like Magic (Mana) and Magical Creatures and Realms beyond our Imagination.
Sub-Theme I picked is Beauty, most ideas that fall under Fantasy will also go under Beauty like, Forest Environments, Magical Realms, Swords and Potions.. So I wanted my Asset to be under Fantasy, my favourite Theme and Beauty because I can go anywhere with this Sub-Theme like Flowers, Petals and Glowing Effects.
I Decided to go with a Glowing Mushroom Cave environment.
Colour Theme/Choice
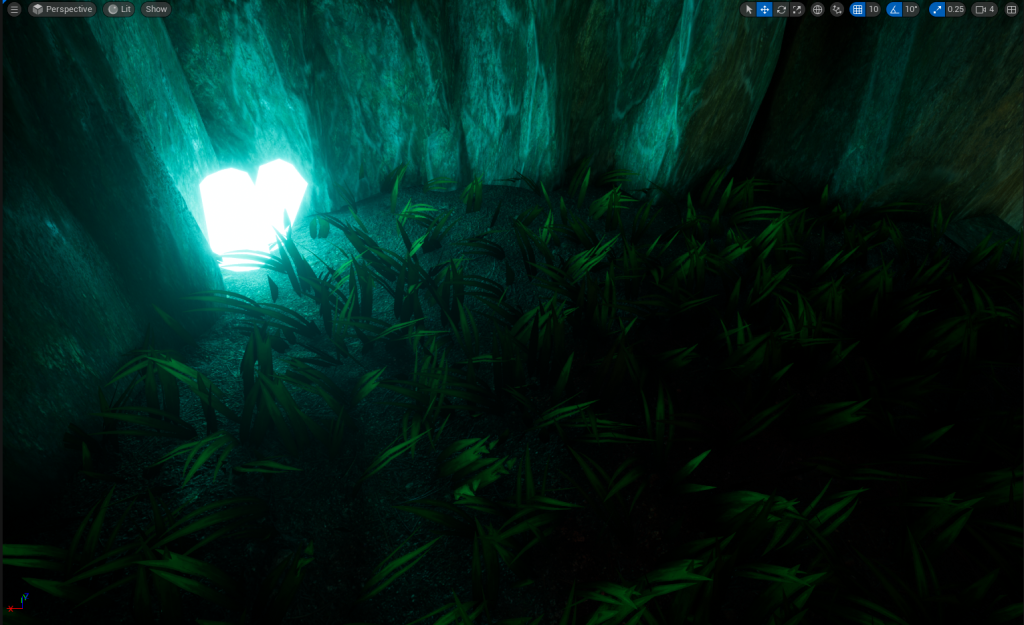
The Colour for my Environment will be a Mix of Blue and Green, this will be achievable thanks to the Props that will be glowing Bright Blue and thanks to this, the more darker parts will transfer to look Green before any pitch dark areas that will be fully Black. The water will help with bouncing Green and Blue around the environment and will fit well with the colour theme.
There will be other Glowing Colours in the environment (Red, Purple, Pink, Green, Light Blue, White, etc.), but they will not effect the overall Blue and Green colour that the environment will give off.
Environment’s Story
A person is looking for Shelter since the Sun is going down, since its dangerous for anything to stay outside when the Moon comes out and that’s when the Night Creatures come out to hunt anything they come across.
Running for Miles and still no shelter found in sight, They decide to take their last chances on going up the mountain, hoping their will be Shelter or Civilization waiting near the top. Halfway up, They come across a Cave and seeing no other safe way up and time was ticking, they decide to sleep inside the cave.
They took one wrong step and fell into a hole. Somehow still alive, they grasp the situation they are in and try to find a way out. They look down, Glowing Mushrooms? Suddenly they hear something, sounds like Mana being casted? Or some kind of Sound Spell?
Giving in to the sounds, they go through the only cave tunnel available to travel through. Little did They know, He/She was about to discover something they have never seen before.
References
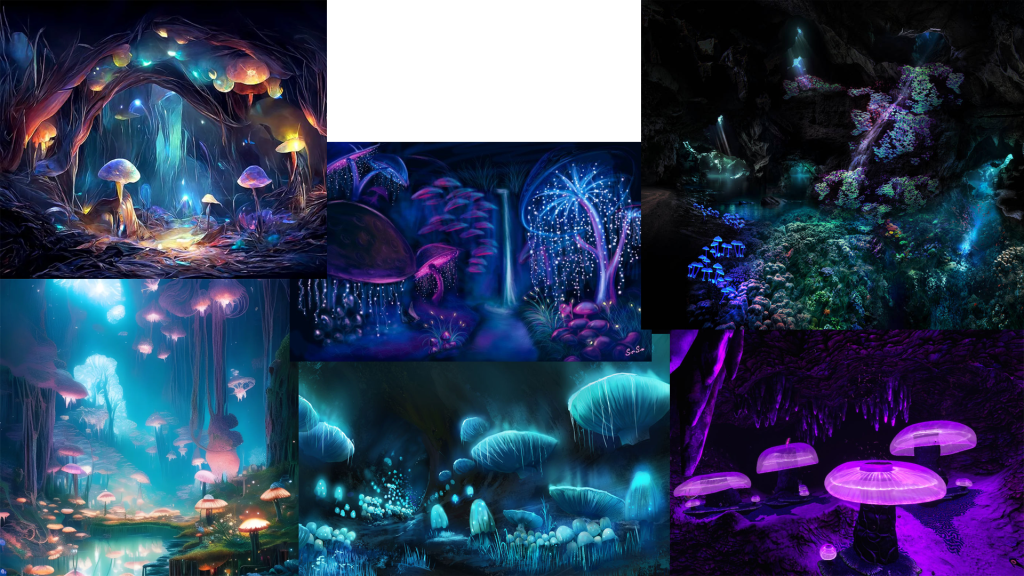
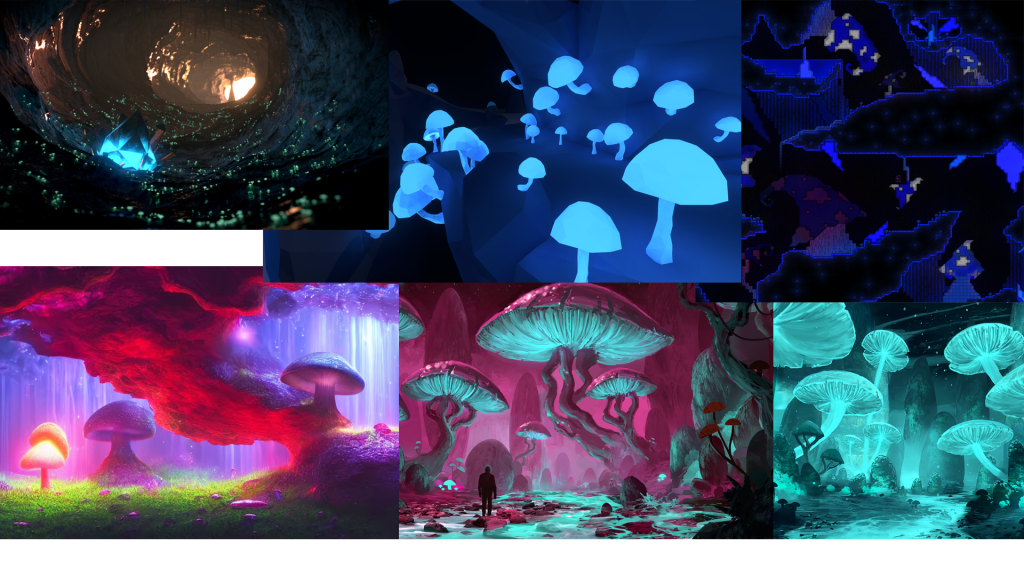
Planning And Creating The Environment
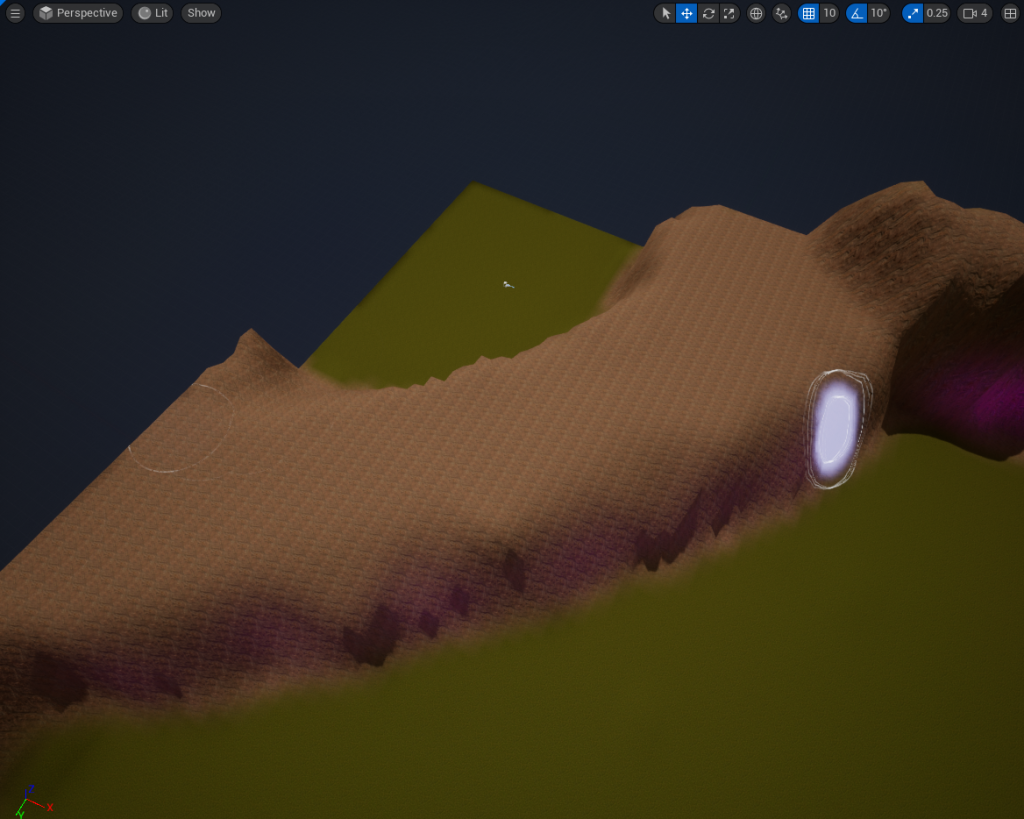
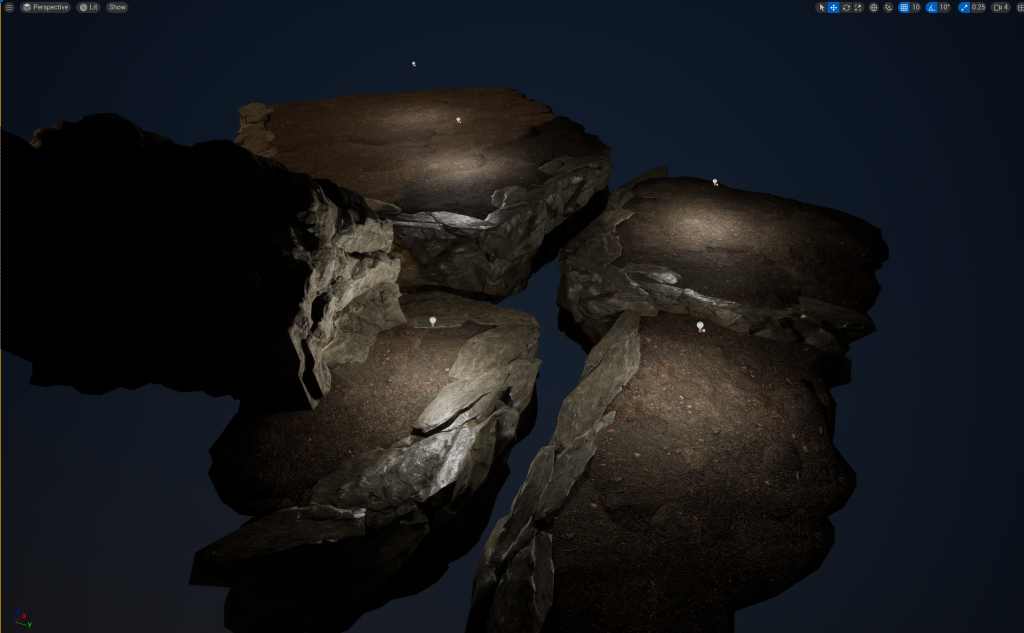
Since I am creating a Glowing Mushroom Cave, I wont need to mess around with the Terrain Tool much in order for the Environment to be created. So I made a simple and effective cliff on the corner of the Terrain.

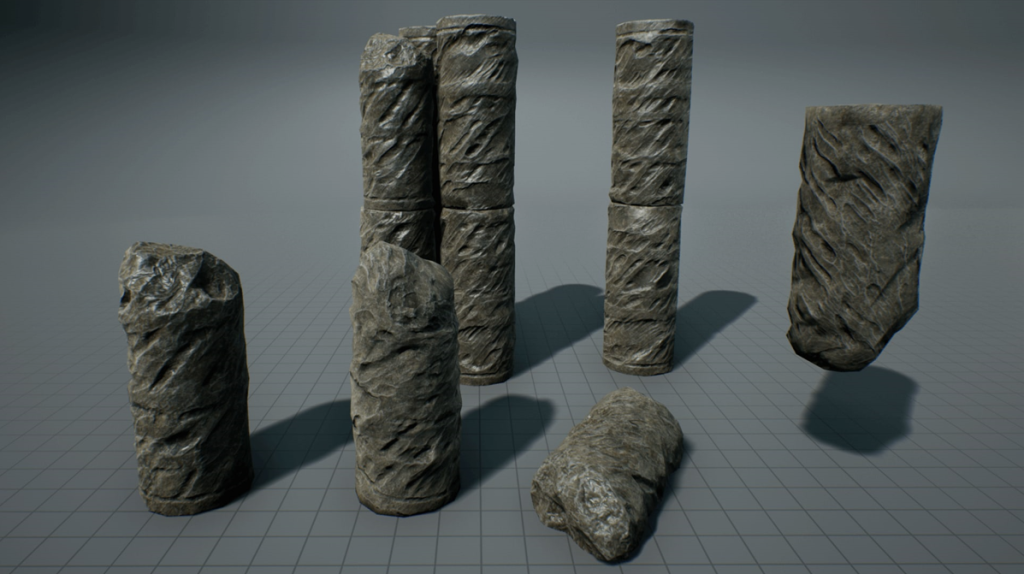
Just with a few shapes, I will make a rough estimate of how big the Cave’s Entrance will be and then cover the rest of the cliff with stone/cliff props to help blend in with the Cave’s Entrance and Environment.
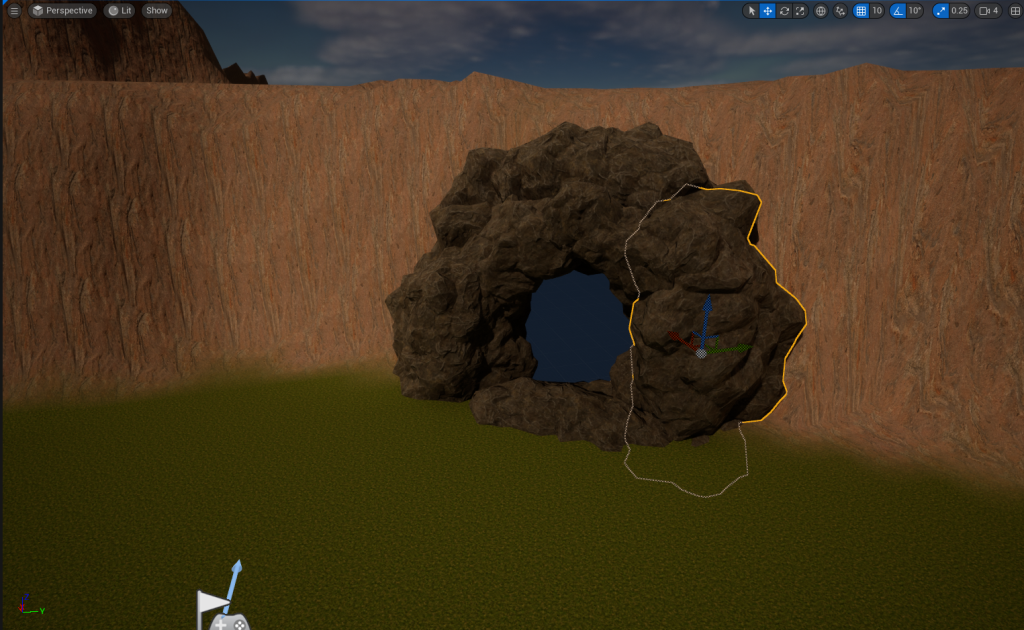
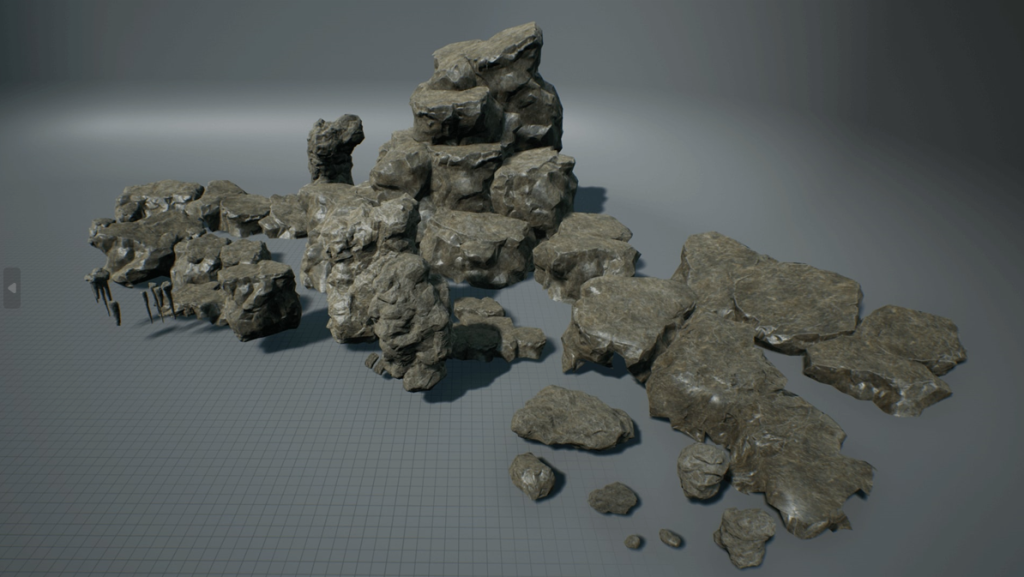
I am using a Soul Cave 2014 Mobile Pack for the Stone/Cliff Props for my Environment. The quality of these props are pretty good-looking and they look quite natural to the eyes.
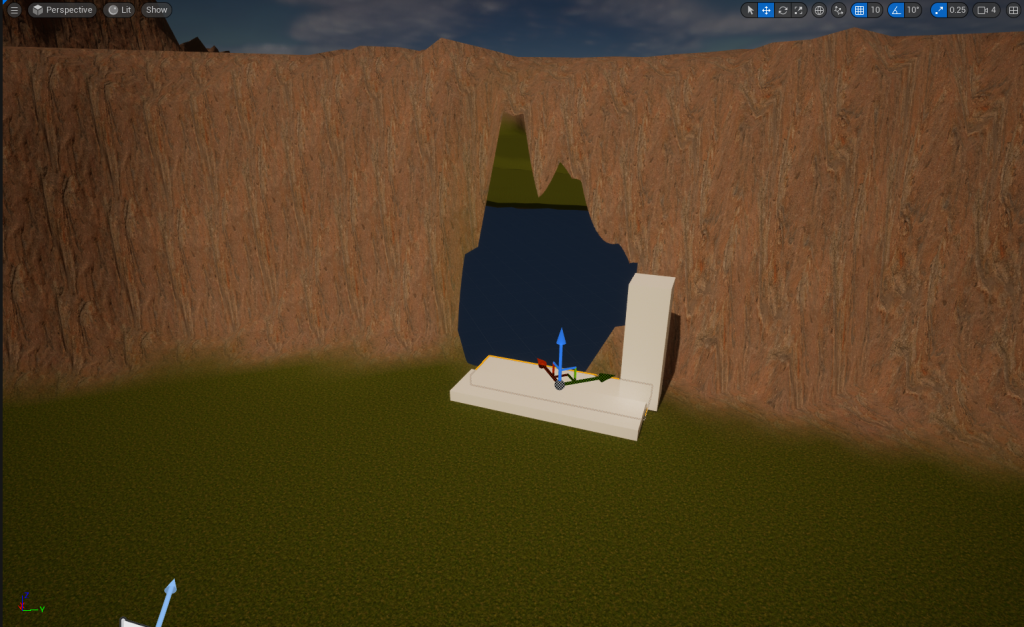
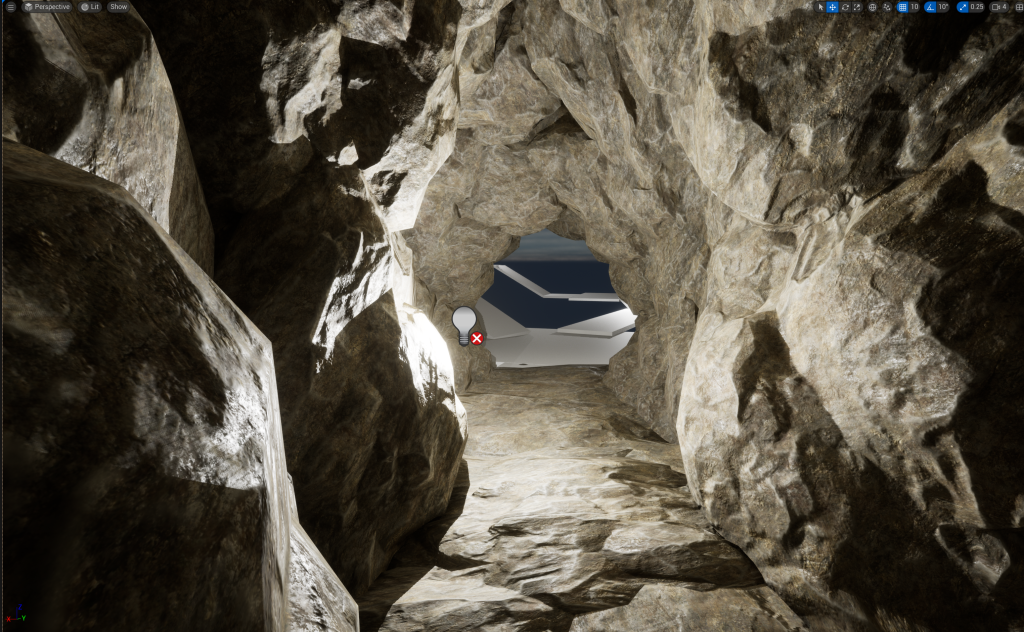
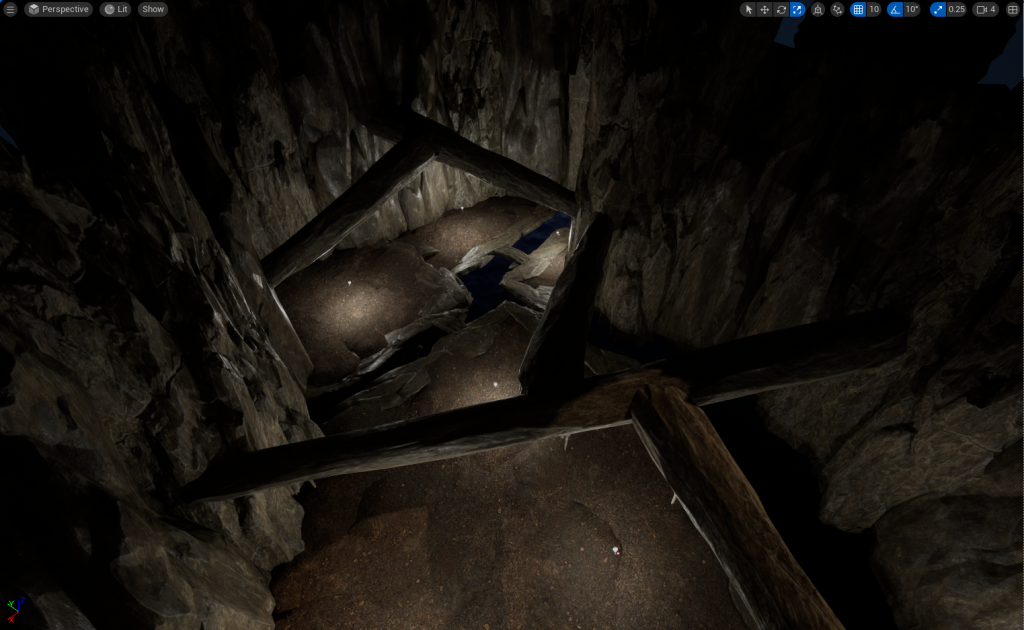
I am planning to make a simple Cave tunnel to a small room which will have a Hole where the Character has fell down in. The Environment Video will take place at the bottom of the hole so the video will now show the Outside, Cave Entrance and this part of the environment.
The Start of the Environment Video will take place in the small room, at the bottom of the hole before going into the Cave Tunnel. Inside the Tunnel, will be another drop down which you be able to get back up without equipment. Then the rest of the tunnel will lead to the Main Cave Area, where the full presentation will take place in.
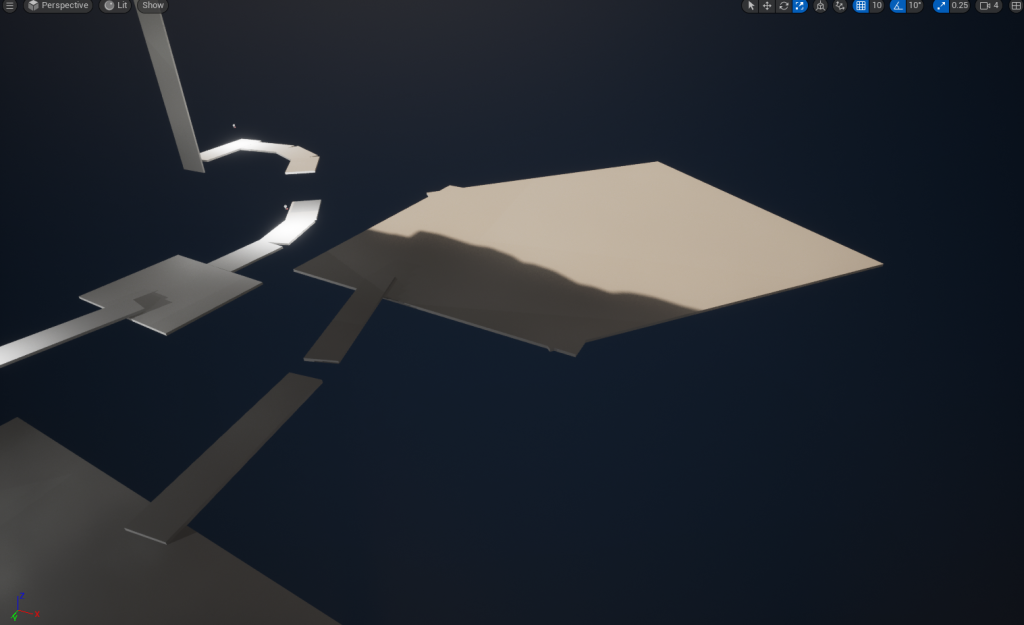
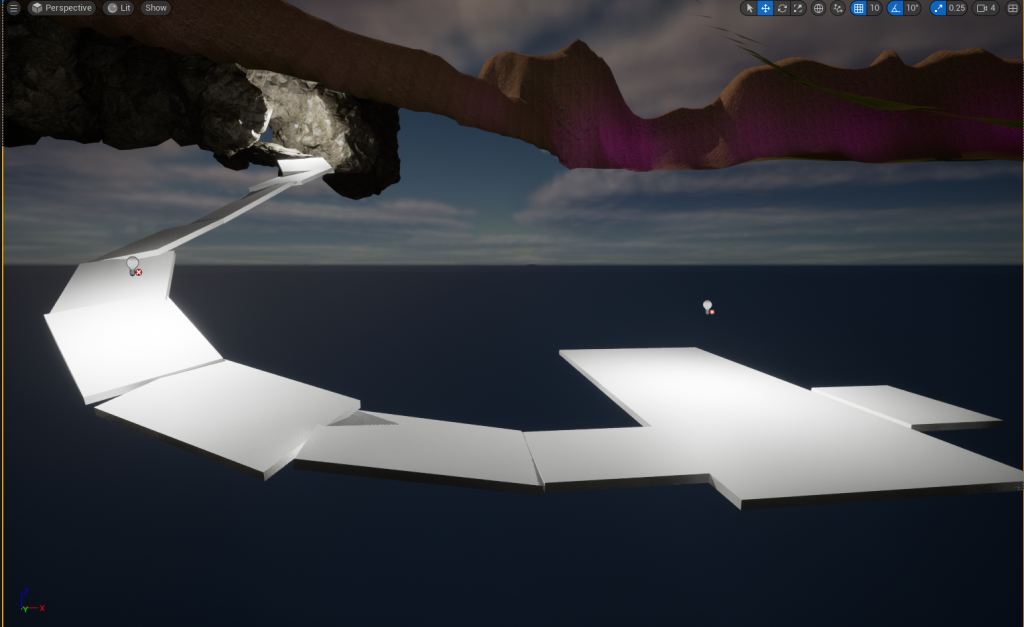
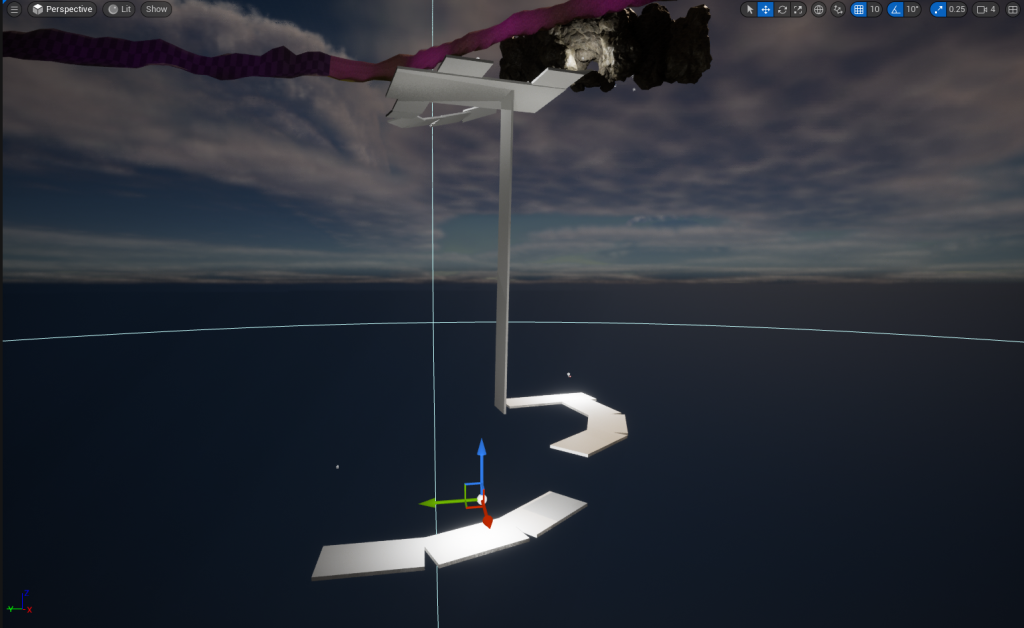
Planned out the main part of where the Environment Video is going to be taken place. Changes were made to this last part on how it was going to be built but the big part in the image did not change. The Big Area will have enough room for my props and where to place my Asset.
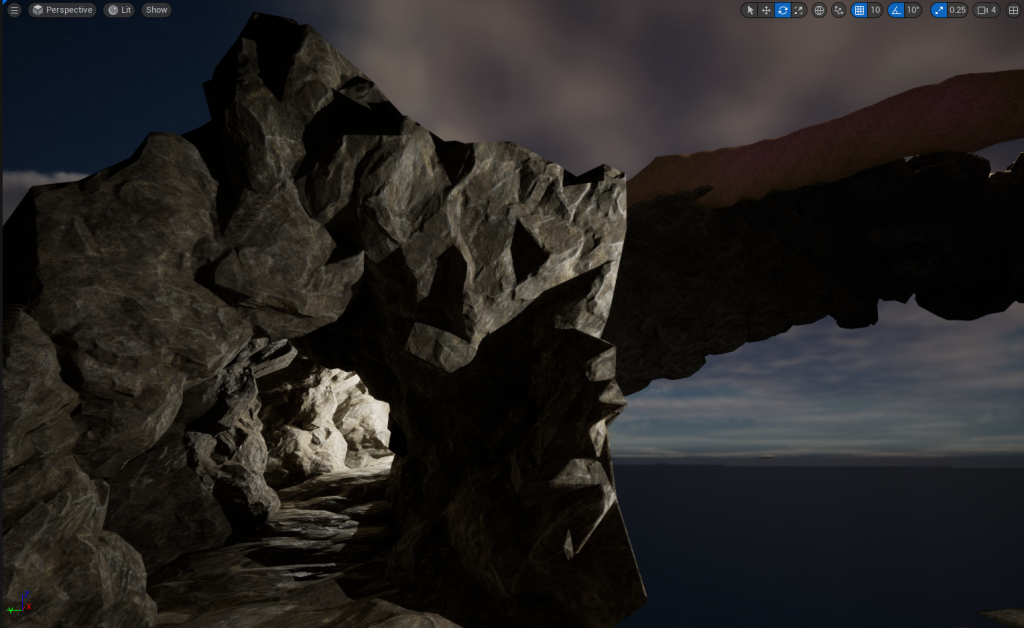
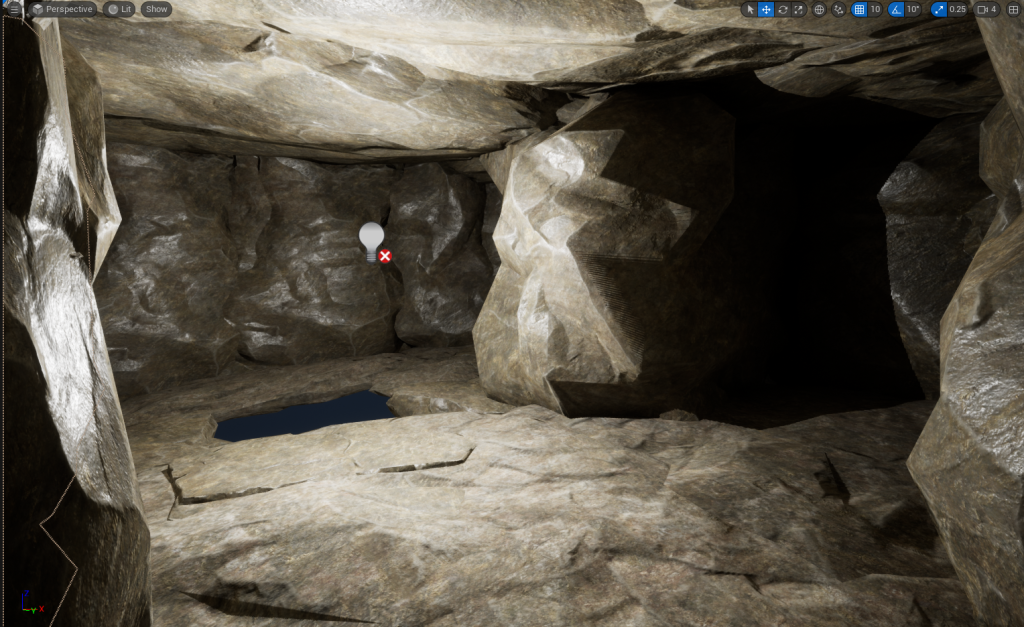
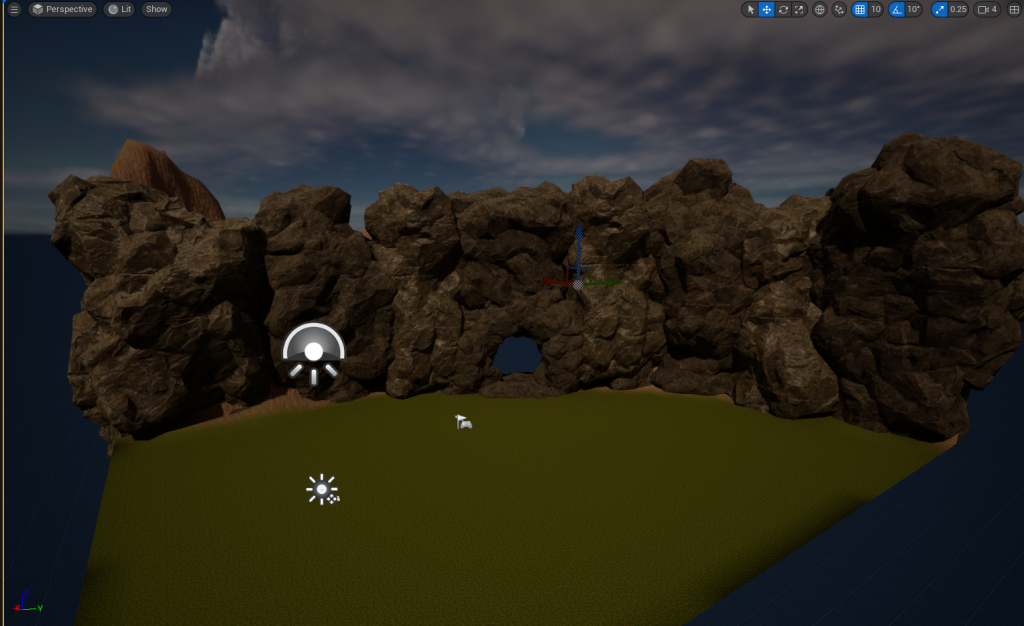
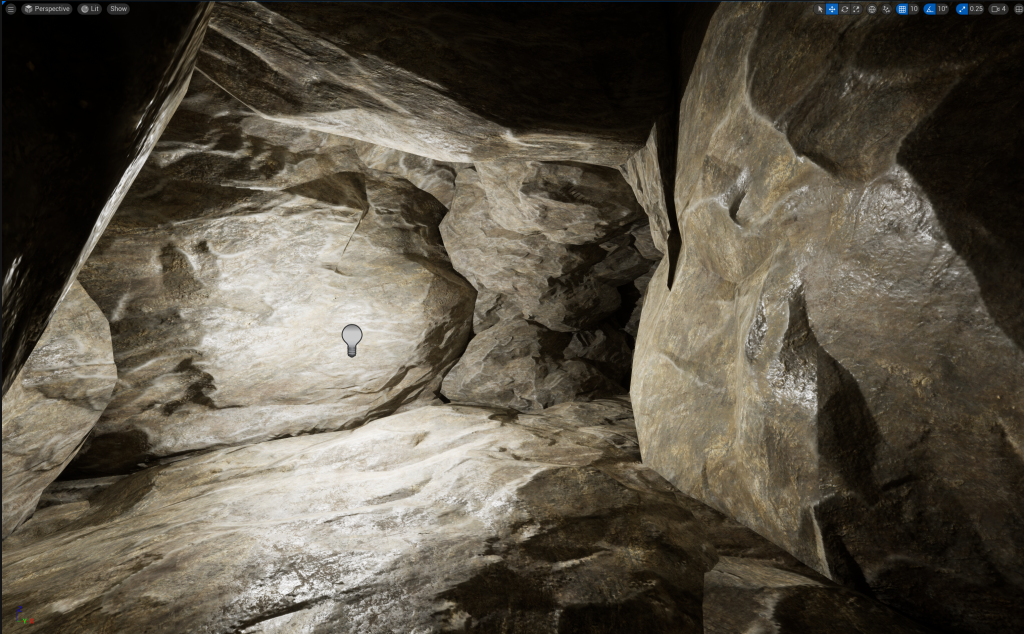
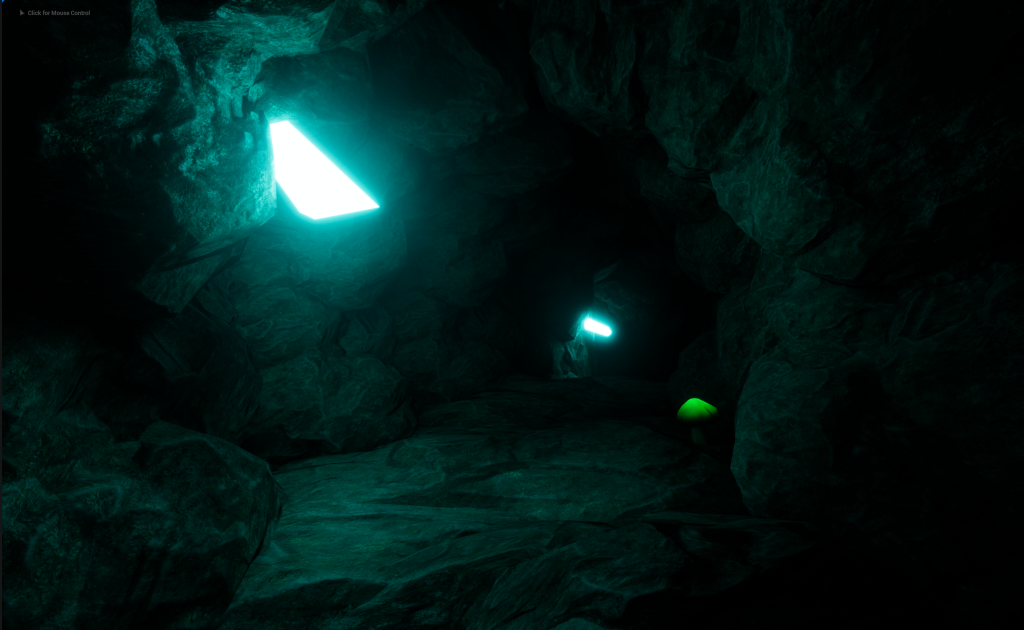
The Cave Tunnel and the 1st Small Room have got their Floors, Walls and Ceilings Done with the Rock/Cliff Props that I used for the Cliff and Cave Entrance. The hole is also in place ready to continue my extensions. The lights are not final, they are there so that I can see what I am doing and look for any holes in the structure.
Cave walls at the drop were added and this view of the hole will be the start of the Environment Video and then the camera will turn around to see the mushrooms that will be placed in the corner of the 2nd room.
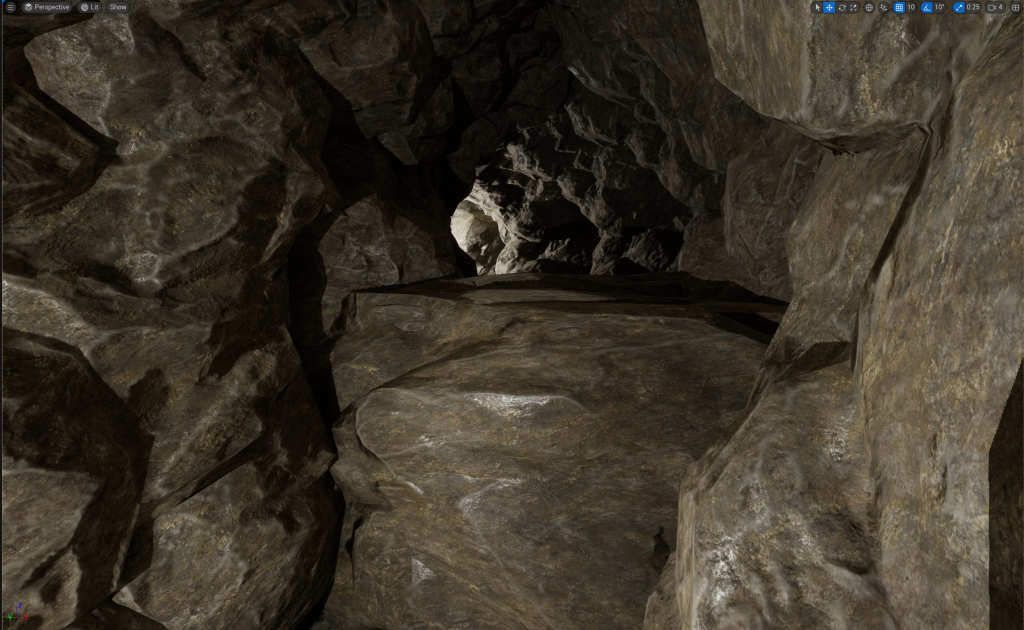
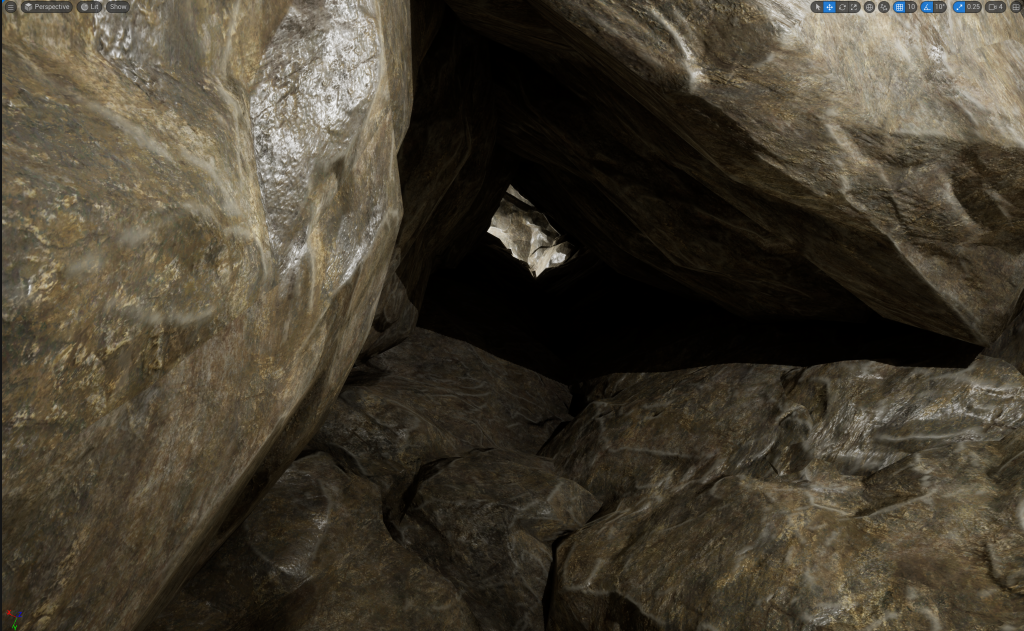
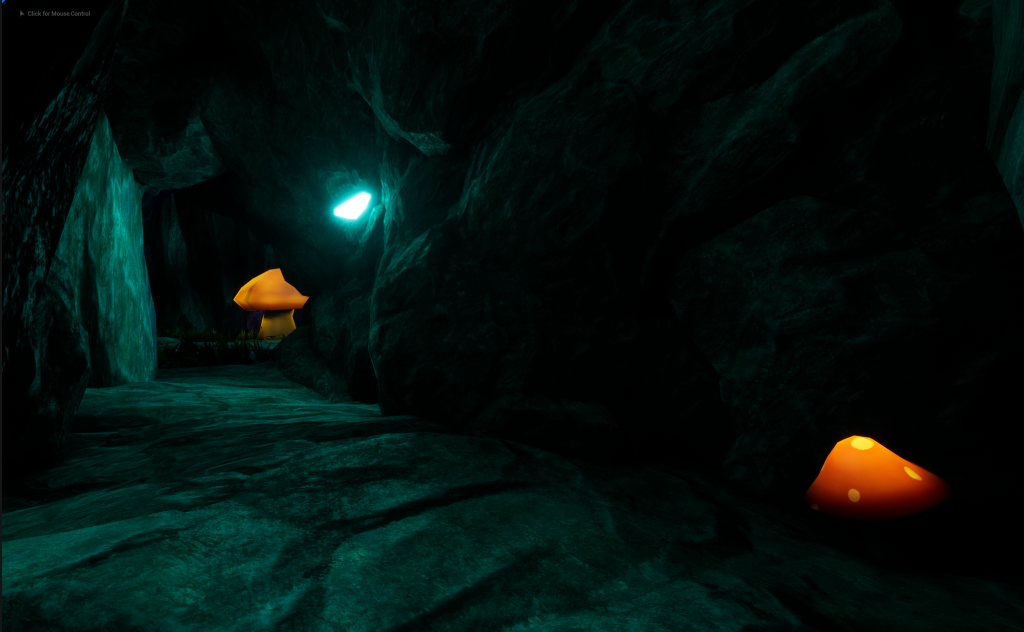
This would be the view after the camera will turn around, the mushrooms will be located next to the far wall, near the Cave Tunnel. The Cave Tunnel’s walls has also been added with its drop so that He/She can’t go back up and will have to continue down the Cave Tunnel.
The end part of the Cave Tunnel that is going to lead He/She into the Main Part of the Cave where the Asset and most of the props will be taking place. The small mushrooms will be on both sides of the walls to help with lighting up the tunnel in order to see better.
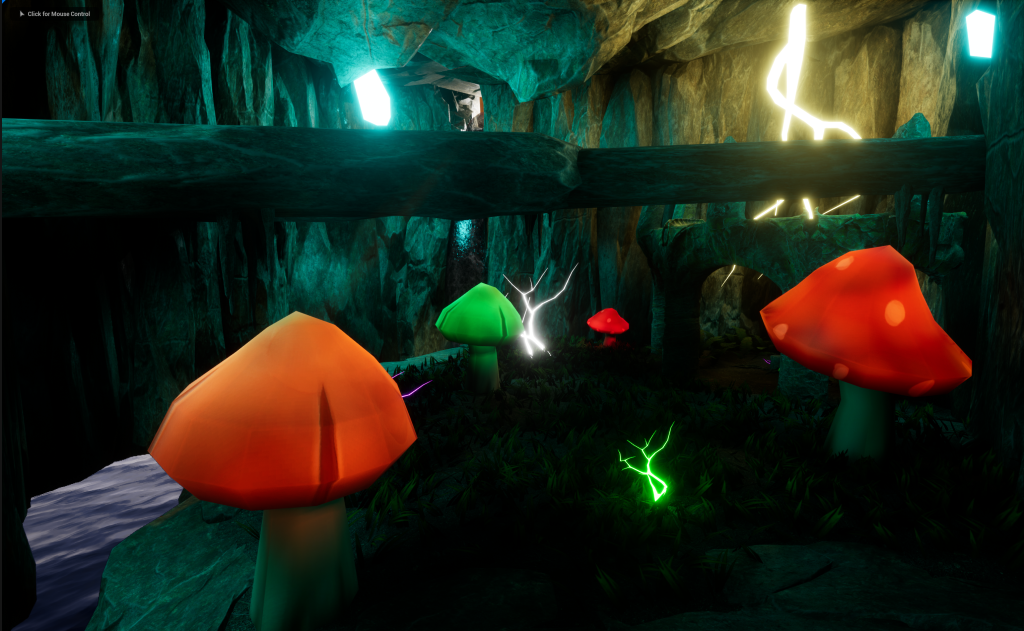
A Basic Structured layout of the Main Cave was added. A Dirt texture was placed onto some of the Stone/Cliff Props since I want grass and the Big Mushrooms to be present within the Main Cave part.
Water will be present between the sections of Dirt. This will add more life and nature in the room and gives more reasons on how Grass can grow in the Cave.
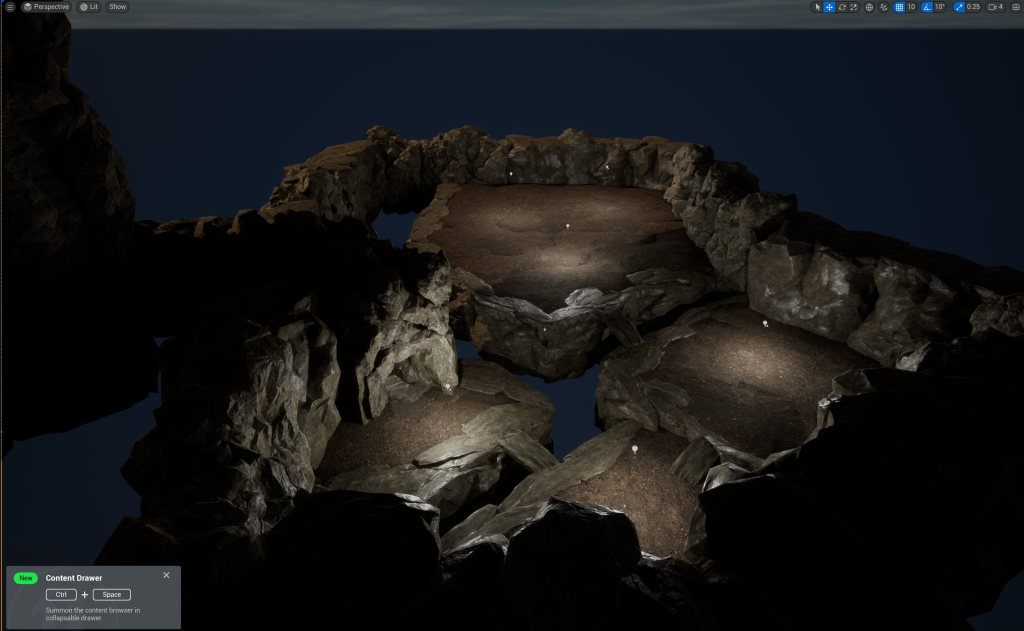
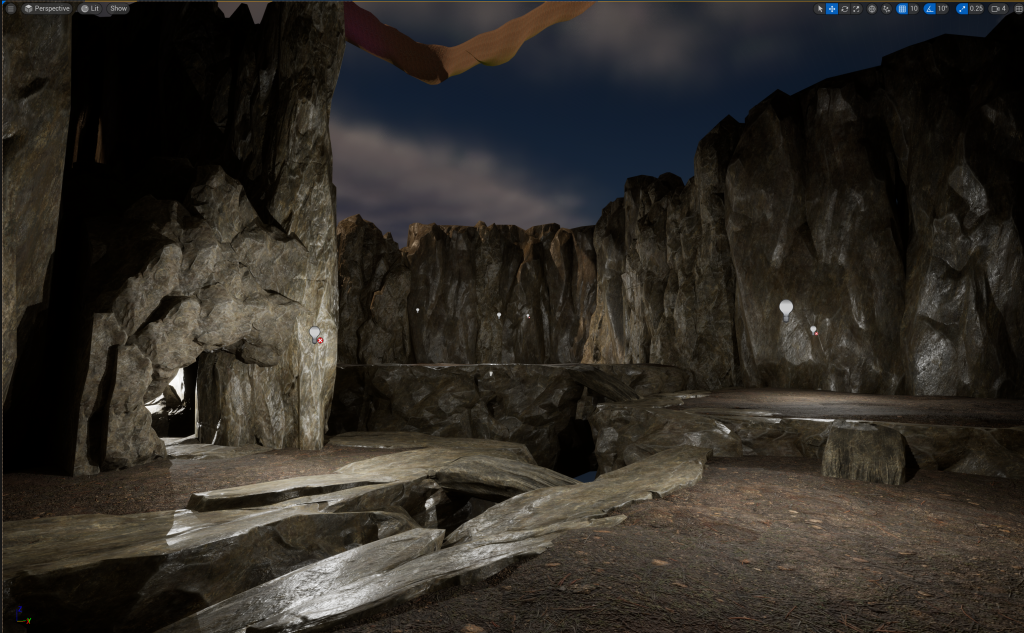
The walls have been added to see how big the Main Cave area will be. The size was increased to allows for a river of water to be placed at the back and between the sections of the land. Little stone bridges were added so that the other sections of dirt are accessible and would make sense on how to get to the Asset on the last Dirt section of the Cave.
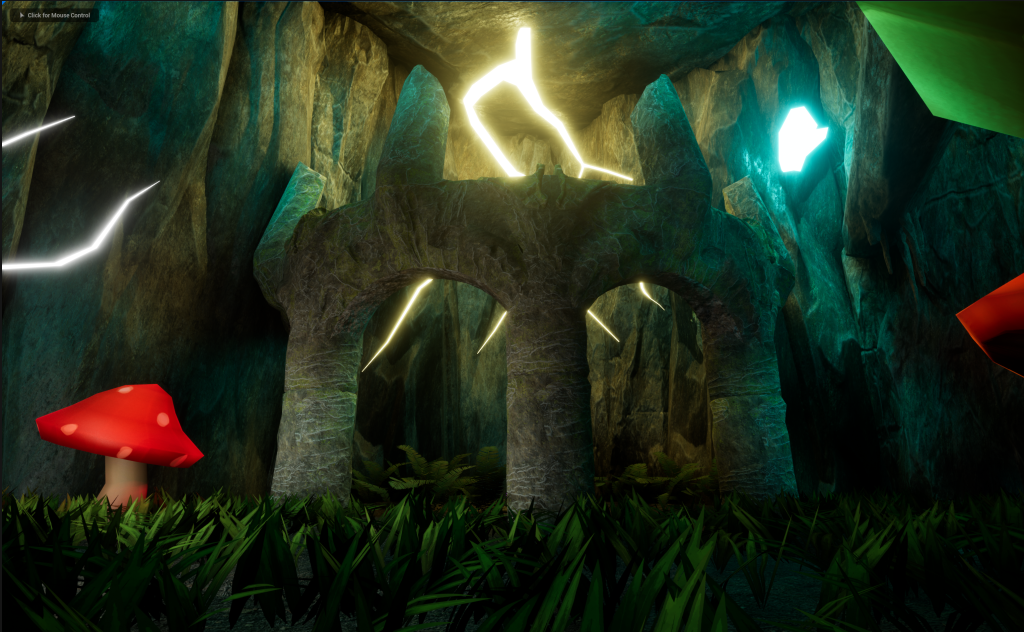
With the wall height being increased, I decided to add Pillars that will stick out of the wall. Later, I will added in Spike or Stalactites onto the Pillars to give off a more natural vibe to the cave and make anyone go through with caution because the Spike or Stalactites could potentially fall (Not really, there is no animations for it and I don’t plan to add that in my environment)
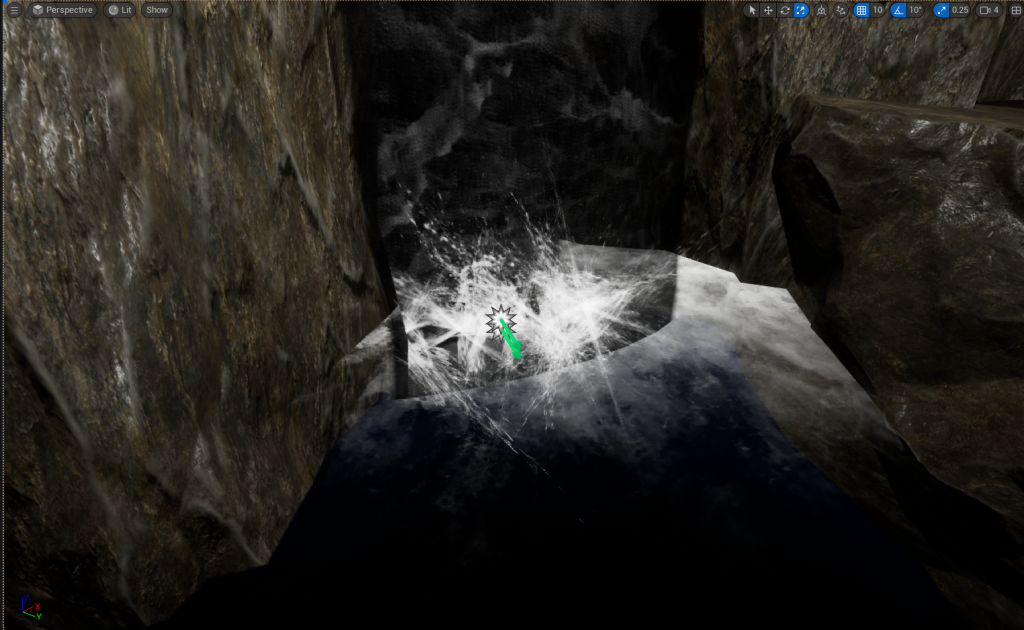

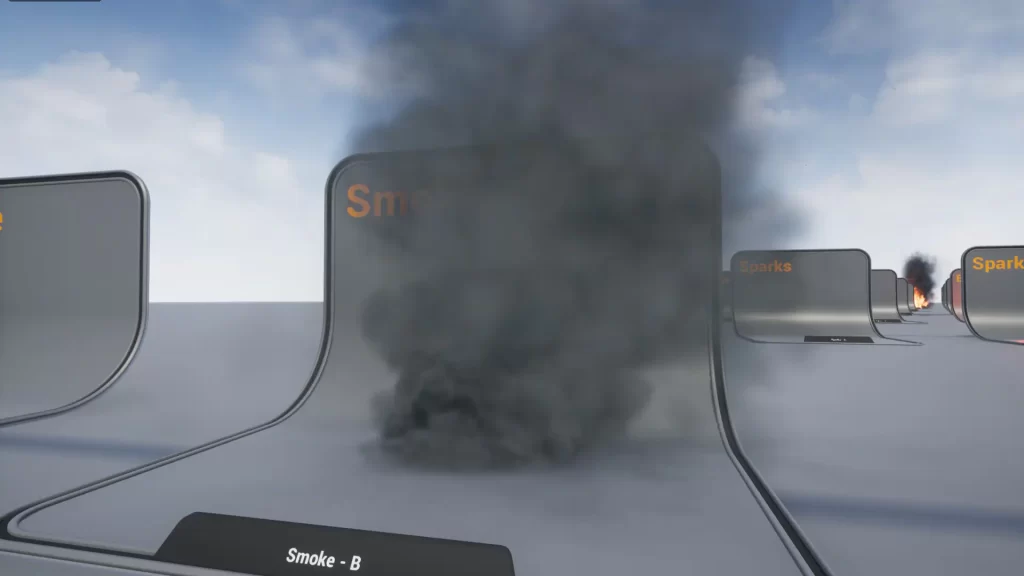
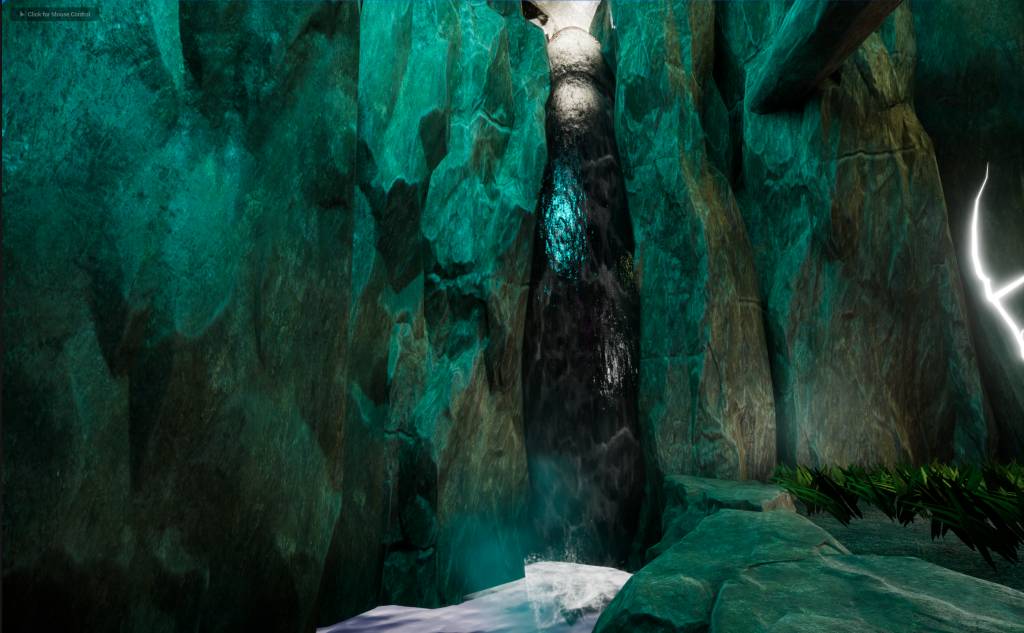
I Added in a Waterfall Prop so then there is a reason for how there is water in the Main Cave area. Particles effects were added at the bottom of the Waterfall to make it more realistic. Splashing, ripples and Steam was used to add the effect of a real waterfall and
Later, I will angle the sun to shine through the hole and activate Sun/God Rays. Then when you get close enough to the Waterfall, You will see the Sun/God Rays coming through into the Cave.
I added in some grass to all the Dirt section in the Main Cave, so then it will look more alive when the camera will go through the area. The grass does not have any animation since this cave doesn’t get sudden or strong wind coming thorough.
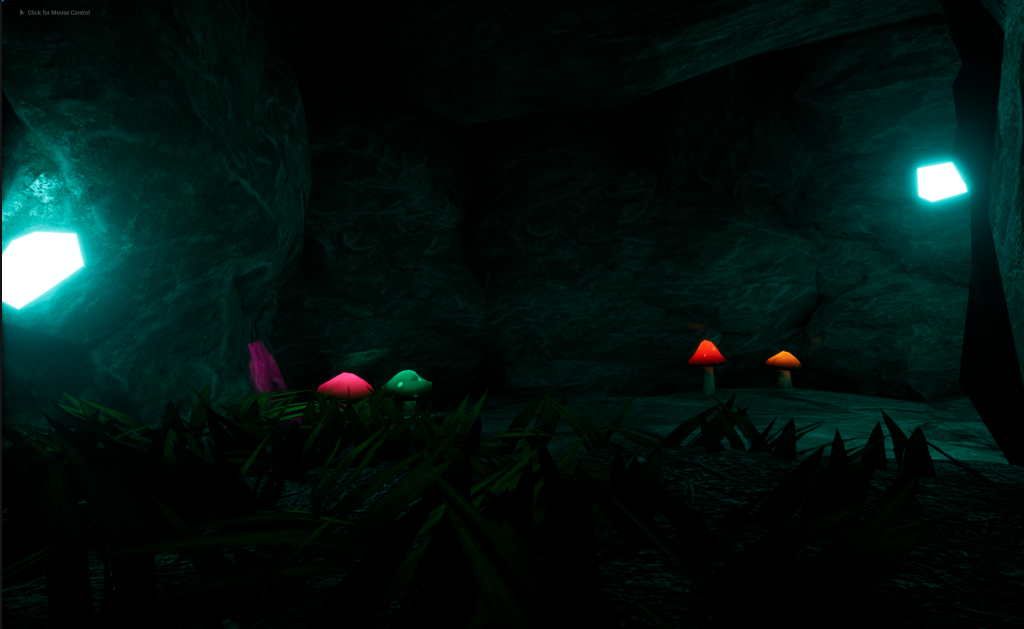
Crystals was added in as the light source for the tunnel and for the Main Cave Area, along with later, the Glowing Mushrooms. The crystals needed to glow to produce light, so I need to create an Emissive Material.
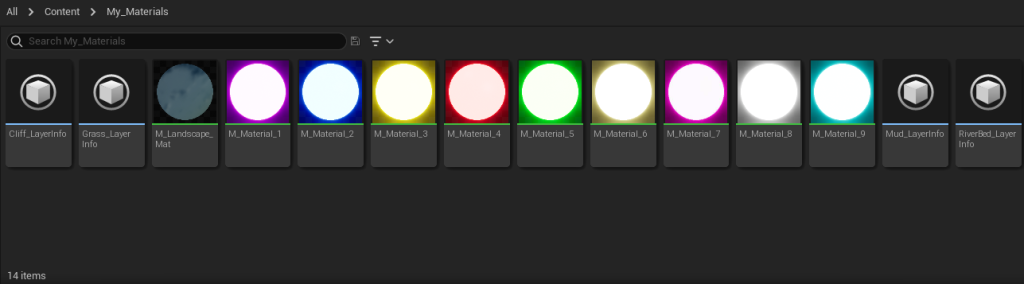
I created a My Materials Folder to where the stuff created or implemented by me, will be located all in this folder and this will make finding my stuff much easier.
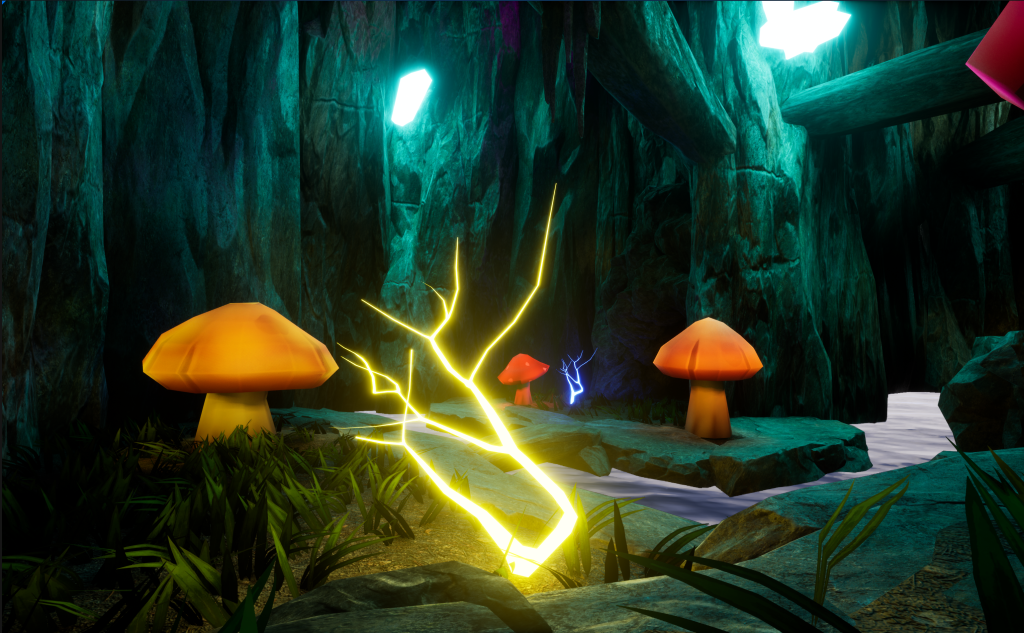
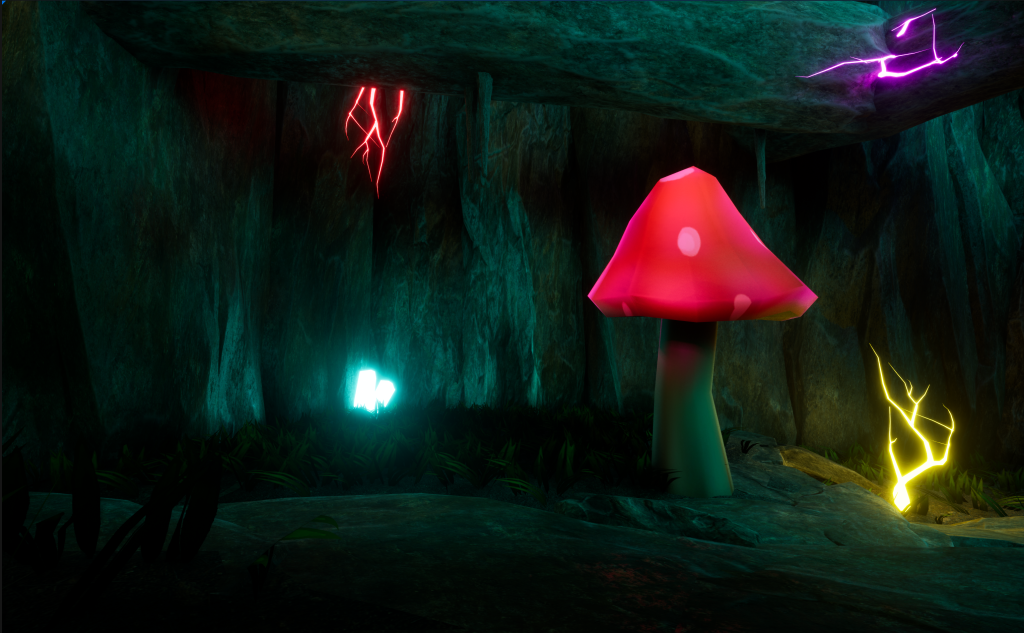
I have made 9 Different Coloured Emissive Materials for to use for my Trees, Mushrooms and Crystals. The more colours I can use in my Mushroom Cave Environment, the more beautiful and bright the scene will look.
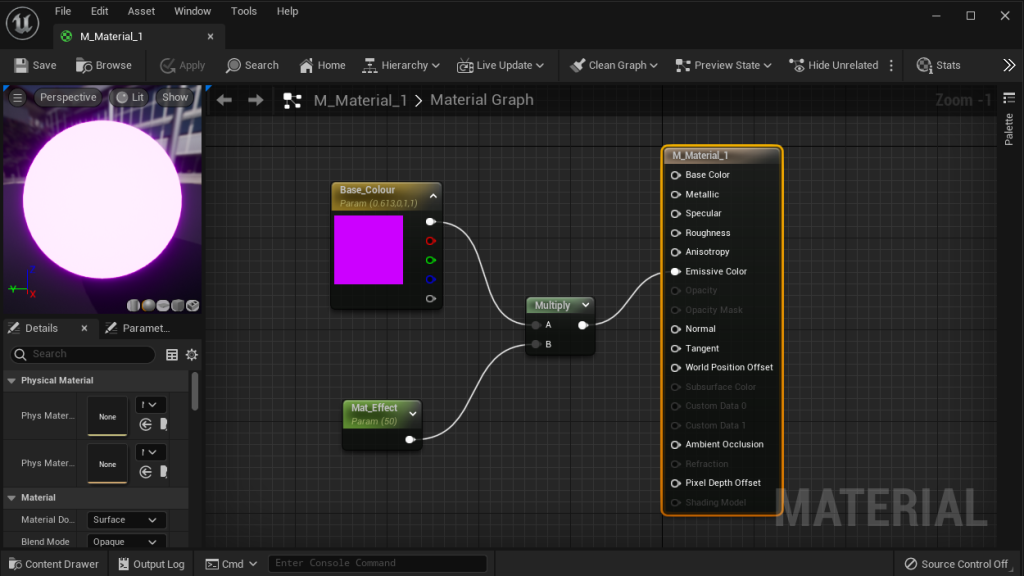
The Material Blueprint Map consist of the Base Colour, I picked purple for my first Emissive Colour. Mat Effect, this changes depending on the channel you link it to, for Emissive Colour, It increases the radius of the Glow effect on the Material.
Multiply Channel will allow up to 2 other Effects/Channels to connect to the same Main Channel. Since both my Base Colour and Mat Effect are going under Emissive Colour, they will both go into the Multiply Channel first.
Then, connected to the Main Emissive Colour Channel, it will now make the Material Glow the Colour you want for the Environment.
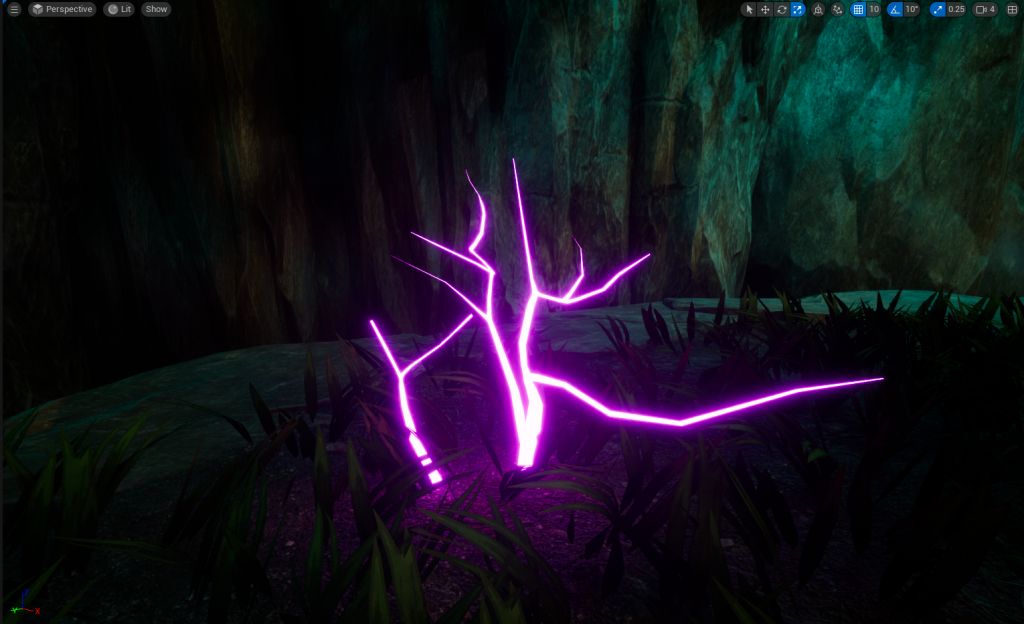
With My Material 1 Finished, I can now apply this to any Prop/Asset that is placed within my Environment. Now with my 9 Colours, I have made multiple Glowing Trees, dotted around my Main Cave Area. There is no Glowing Trees in the Tunnel because I want the Main Cave Area to be eye catching.
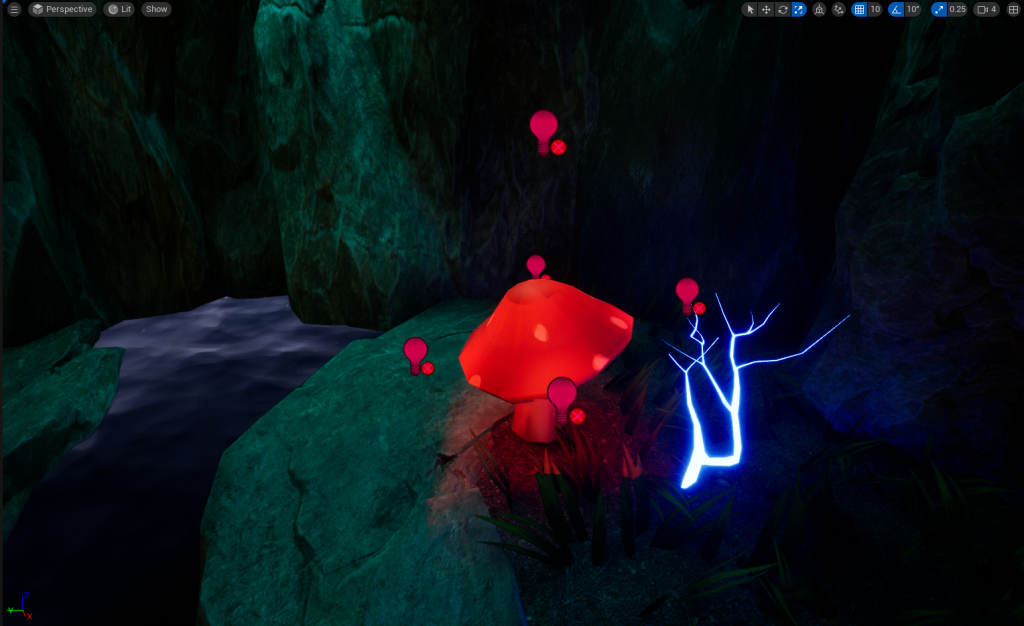

To make my Mushrooms Glow I will need to prepare a light for them, I cannot use my Emissive Materials because It will change the entire Mushroom instead of just the tip of the Mushroom.
So instead, I used Area Lights and put them around the Mushroom Tips so then only that Part looks like its Glowing. The lights are a little glitchy on some of the Mushrooms but It didn’t bother me that much. Now the mushrooms will glow in multiple Colours like Red, Orange, Yellow, Blue, Pink and Green.

Assets Used
Dragon Motion. (2017) Particles and Wind Control System. Available Online: https://www.unrealengine.com/marketplace/en-US/product/particles-and-wind-control-system [2/5/2023].
Epic Games. (2020) Particle Effects. Available Online: https://www.unrealengine.com/marketplace/en-US/product/particle-effects [Accessed 6/4/2023].
Epic Games. (2018) Soul: Cave. Available Online: https://www.unrealengine.com/marketplace/en-US/product/soul-cave [Accessed 2/4/2023].
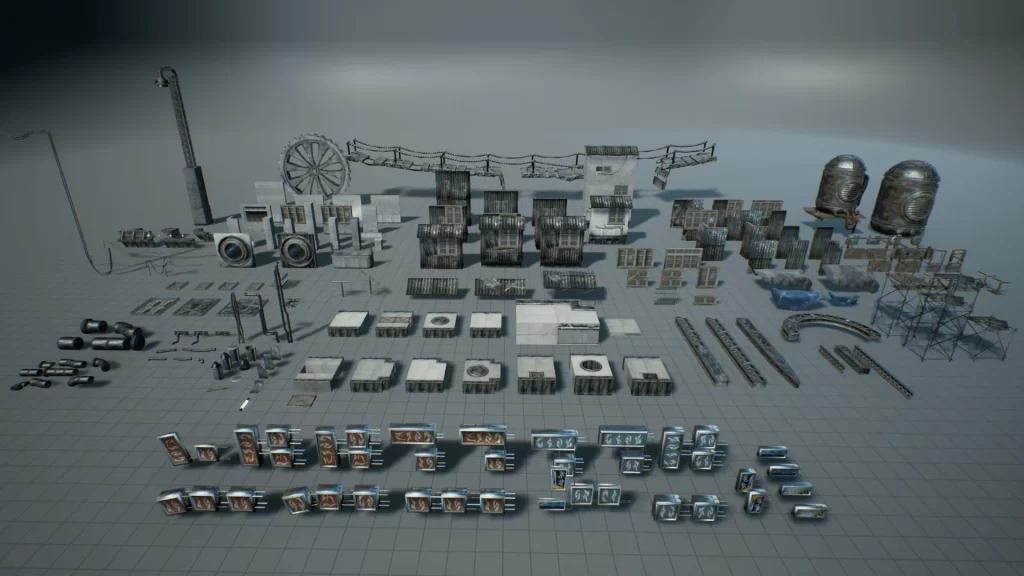
Epic Games. (2018) Soul: City. Available Online: https://www.unrealengine.com/marketplace/en-US/product/soul-city [Accessed 4/4/2023].
FX Cat UA. (2022) Realistic Starter VFX Pack Vol 2. Available Online: https://www.unrealengine.com/marketplace/en-US/product/realistic-starter-vfx-pack-vol [Accessed 13/4/2023].
Maelstrom Library. (2022) MAE Oak Forest. Available Online: https://www.unrealengine.com/marketplace/en-US/product/mae-oak-forest [Accessed 6/4/2023].
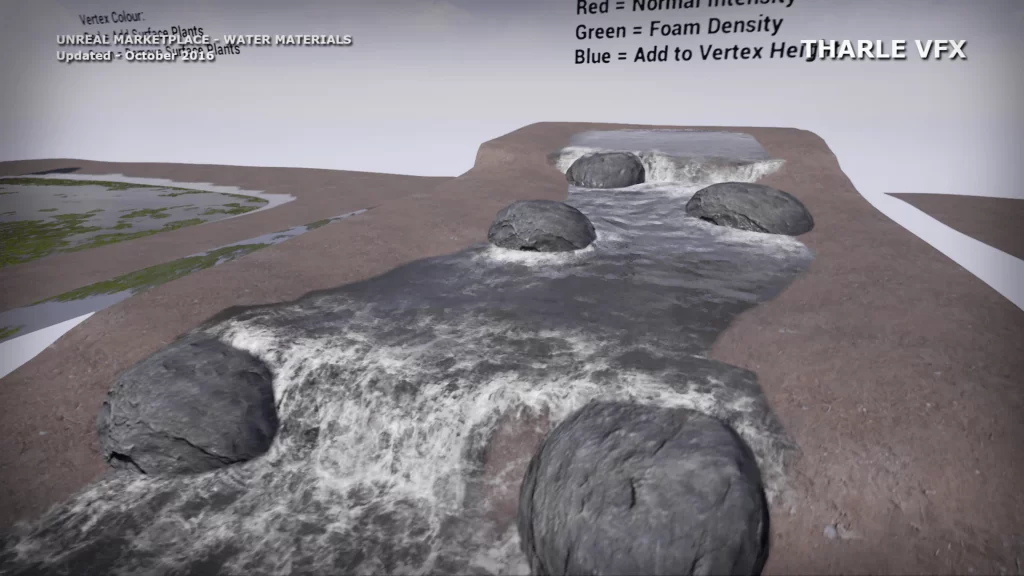
tharlevfx. (2016) Water Materials. Available Online: https://www.unrealengine.com/marketplace/en-US/product/water-materials [Accessed 12/4/2023].
Yevheniia, Y. (2015) Hand Painted Environment. Available Online: https://www.unrealengine.com/marketplace/en-US/product/hand-painted-environment [Accessed 4/4/2023].
Beauty Shots

Environment Video
Reflection
What aspects of your work went well?
The rough planning went pretty well, I stuck to most of the rough planning. The only changes to the rough planning was the Main Cave Area, this was going to be two dark pits with the only way across was two wooden planks to help get to the Main Asset.
Making the Emissive Materials and Making the Crystals the light source for the Main Cave Area and the Tunnel was a Great Idea. Having my light source mostly glowing Blue was a nice touch, especially with the Grass, River and Waterfall.
How could you further improve your environment?
Maybe adding more green or adding glowing roots would help with making the Environment more like its alive or a strange place to go.
If you had chosen another theme what would you have done differently?
Fantasy would still be my main theme but the sub-theme I could have changed to Corruption. Making the environment mostly Black, Blue, Pink and Purple instead of multiple Colours.