
Introduction
You are required to submit a link to your WordPress Portfolio site. Within this portfolio should be a range of visuals and descriptions as suggested below. It should also include a rendered video (Turntable recording of your character in a T-Pose position). This can be a YouTube embedded video within your portfolio with any visual still images you may include of your final design. Please upload your video to box and include a link to it in your hand in.
You will be marked based on a set of competencies:
PC1 GENERATING IDEAS INFORMED BY RESEARCH – Conduct thorough research, selecting a range of relevant and appropriate sources to inform original ideas, concepts and solutions to proposed creative problems or self-initiated activity.
PC2 COMMUNICATION – Clearly communicate and present complex concepts to diverse audiences through a range of specified mediums
PC5 SOFTWARE PROFICIENCY – Identify, select and assess the validity of appropriate tools, technologies and techniques in order to solve creative problems and demonstrate intermediate technical proficiency with specialism-specific software skills relevant to the task (with minimal guidance).
PC8: REFLECTION – Reflect and evaluate on performance in order to inform personal development and continued learning appropriately, identifying strategies for improvement.
Your portfolio should be a series of WordPress posts (approximate word count of at least 2500 words) demonstrating your understanding of 3D Character Design.
- Character Description in narrative terms
- Body Style and Personality
- Description of Colour Design
- Description of Accessories and Poses
- Visual style
- Rendered Images and wireframes including orthographic views showing the topology of your character
- Other Materials (concept drafts, artistic references
employed properly addressed to the source / using Harvard, etc.)
You may also include as complementary information within these sections:
- Reference to the software employed (Maya, ZBrush, etc)
- Character design sketches/ideas
- Facial Construction (If a face is used).
- Accessories Design
- UV Mapping
- Substance painting (where used)
- ZBrush detailing
- Lighting
This is not an exhaustive list but as the portfolio carries a higher split of the mark, you should take real care in demonstrating all the component steps you went through to design your character.
Research
I love Anime. No question about it. I’ve searched up tons of Anime Styles. I draw my own Manga Characters and Stories, So I wanted to grab this opportunity while the iron is hot. I wanted to use of my own Manga Characters as a reference to make a 3D Character.
With my research, I was given Two Links to help me with making an Anime girl Body and how to properly shown off the Anime Style on the characters. The Two Video can be watched below:
MoodBoard


Early Character Sketch
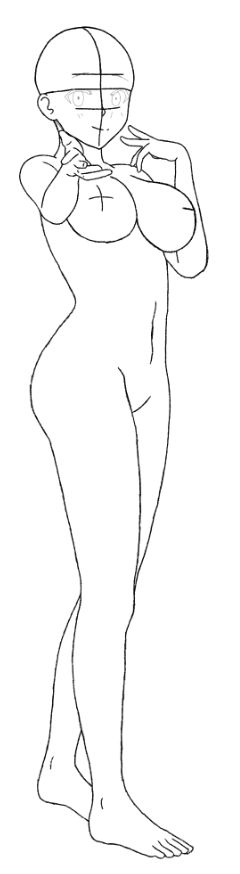
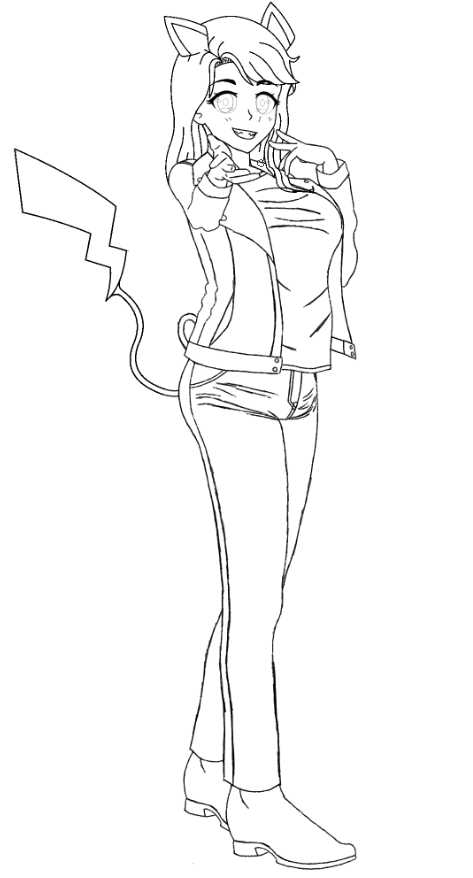
This is a Quick Drawing of one of my Characters I have created for my Manga Story that is in Development. Aureline Musashi.
On the left is the Body Structure to show the anatomy, the type of body shape and size I went with for her. Went with a Cheeky, Sassy or Intimating Pose to give off personality of the Character.
On the Right is showing off the clothes she likes to wear casually. She is a Tomboy, so she will go with any gender type of clothes that grab her tastes. She goes with a Leather Jacket/Biker Jacket, V Collar-Shirt, Jeans and Leather boots.
Character Sheet
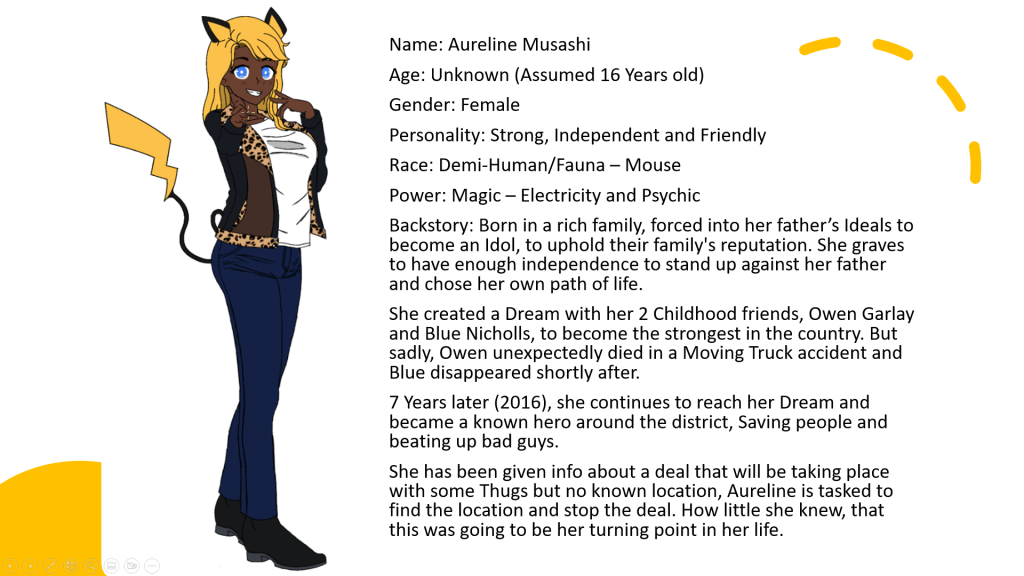
Strong, Kind, No-Messing-Around Tomboy whose dream is to become the strongest in the country, with Her friends. Even if she is a Hero, she doesn’t like to stereotypically dress like one. She prefers to stay casual, rocking more expensive clothes to fit her tastes.
Since its more of a chill day, she is wearing a Black Leather Jacket or Biker Jacket which people have called it. Long dark blue Jeans that loose at the angles and some special Black Leather Boots to look stylish whilst walking down the street, or kicking the daylights out of enemies
ZBrush Character Sheet
I made Aureline Musashi’s Character Sheet, I have been making this character, outfits, redesigning for over 4 years now. So I wanted to use Make Aureline Musashi again but this time as a 3D Character. I am very excited to start making her as a 3D Character since she has only been 2D because she is part of my Manga Story that is in development in time of writing this.
Since I made her time and time again, getting the right shape, structure and design should hopefully reduce how much time I need to spend to get the results I want. I’m excited to see her ‘Come to life’ and see what hear appearance will be like in a 3D Environment.
Getting this into the 3D Creating and Editing Software, ZBrush will give me further advantage and help with creating the body structure for the character. The video that helped me get my Character Reference Sheet into ZBrush can be found below:
Character Blockout
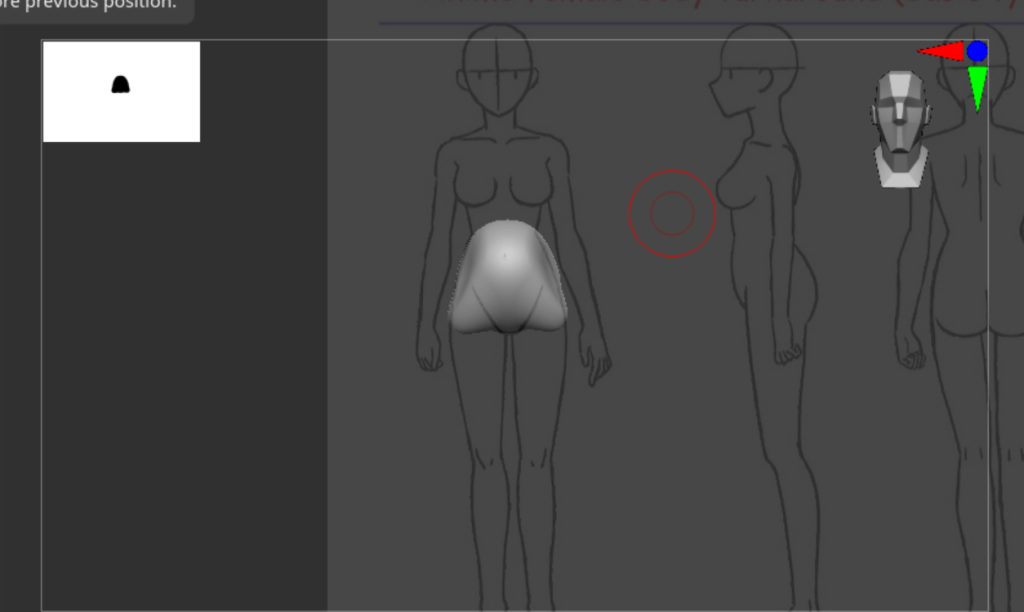
When I Started making my 3D Character, My Character Sheet wasn’t fully made yet by this point and decided to practice making the Blockout of the Body to get some practice with ZBrush Software.
Now with putting the Temp Character Reference Sheet onto a plane Mesh in ZBrush, I can get to work with making a blockout of a female body. Usually people start with making the head first but I started with the Pelvis/Hips first because I wanted to make the base of the body first. Then work my way up to the Head. Then I will work on the Arms, Legs and finish with the Fingers and Toes.
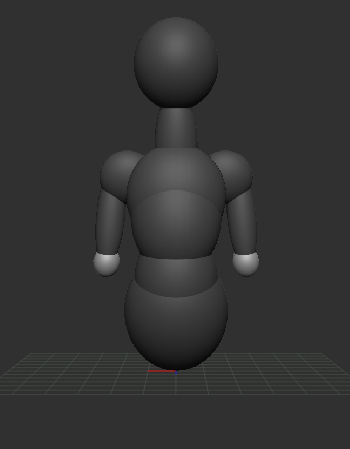
I added extra shape onto the Pelvis/Hips by using the Scale Tool (Select Mesh + S) , Increasing the Width, Height and Rotation with the Rotate Tool (Select Mesh + R). I used Sphere Meshes to make up the body parts. Since Aureline has a more curvy body using Spheres made the most sense to me and It will make forming the actual limbs more easier to do.
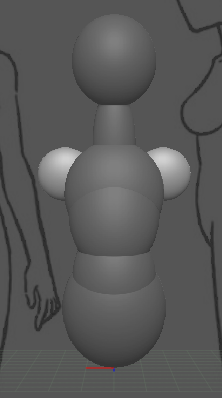
I slowly started to add more parts above the Pelvis/Hips using CTRL + W + Dragging with my mouse, whilst using the Move Tool (Select Mesh + W) to make duplicates of the Mesh shape. Using Anatomy on how our back bend, I made 3 more Sphere Meshes to make the whole base of the body.
Then I added in the Neck and Head base. Since Stereotypical Anime Girl Characters have smaller necks, I followed the same principal but made the width of the neck slightly bigger. Because Aureline is a strong character that gets into fights on a daily, her neck will be more sturdy due to the fights and from the training she puts herself through daily.
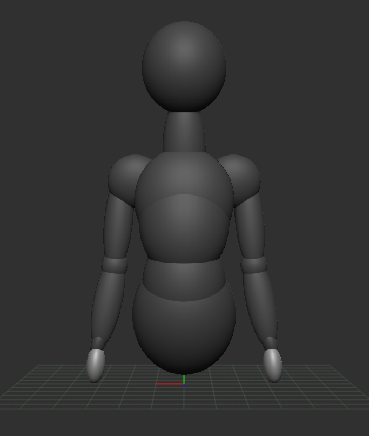

With more duplicates I made the shoulders, so then I can start developing the arms. Shoulders are usually a big connecting area on the body, having two joints connecting the Three Bones from Shoulders like the Collarbone and Shoulder Blade to the Arms.
I stretched the Shoulders inwards and slightly since they are not fully round and they connect to both the Neck and towards the middle of the Body. This helps since Shoulders are one of the noticeable areas where stretching starts to happen when the Arms start to move around and away from the Body.
Elbows, Lower Arms then the Palm of the hands were created via more duplicates of sphere meshes from the other body parts. Aureline having a more Curvy Body type, she has more Curve and fat in her Arms but not complete fat since she trains daily. So her Arms will still be in good shape but wont be muscular since its not extreme training, and its Anime, Fiction, Not fully realistic.
A Obese Anime male Character could be fat, no muscle but can level a Mountain with a flick of the wrist. But alias, not all Anime follow these rules, some can be realistic in their Worlds and their Body Types but most Anime will follow the unrealism. (Because most of the time, Fan Service…)
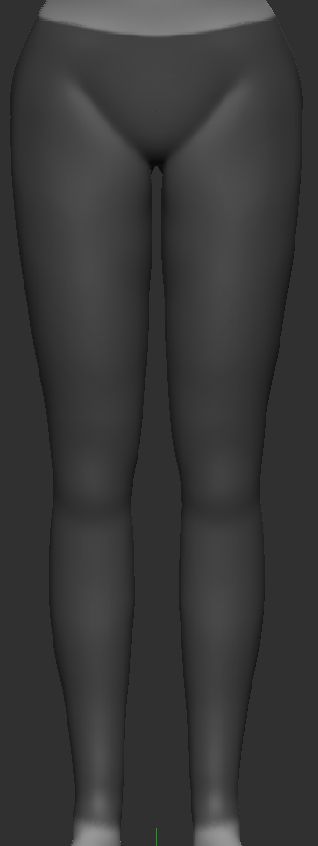
Now Added in the Thighs, She has a Curvy Body so she will have Thicker Thighs than the Average Female, also a good amount of Female Anime Characters will have Thicker Thighs.
Knees and Lower Legs were added in, the Lower Legs in the 2nd Screenshot shown to not be at the proper size, a few Students commented about this and taken that into consideration later in the Sculpting Process of the Model and will be at the proper size when finished.
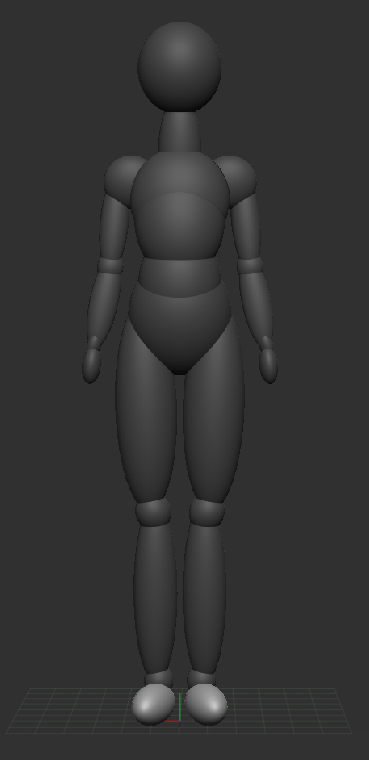
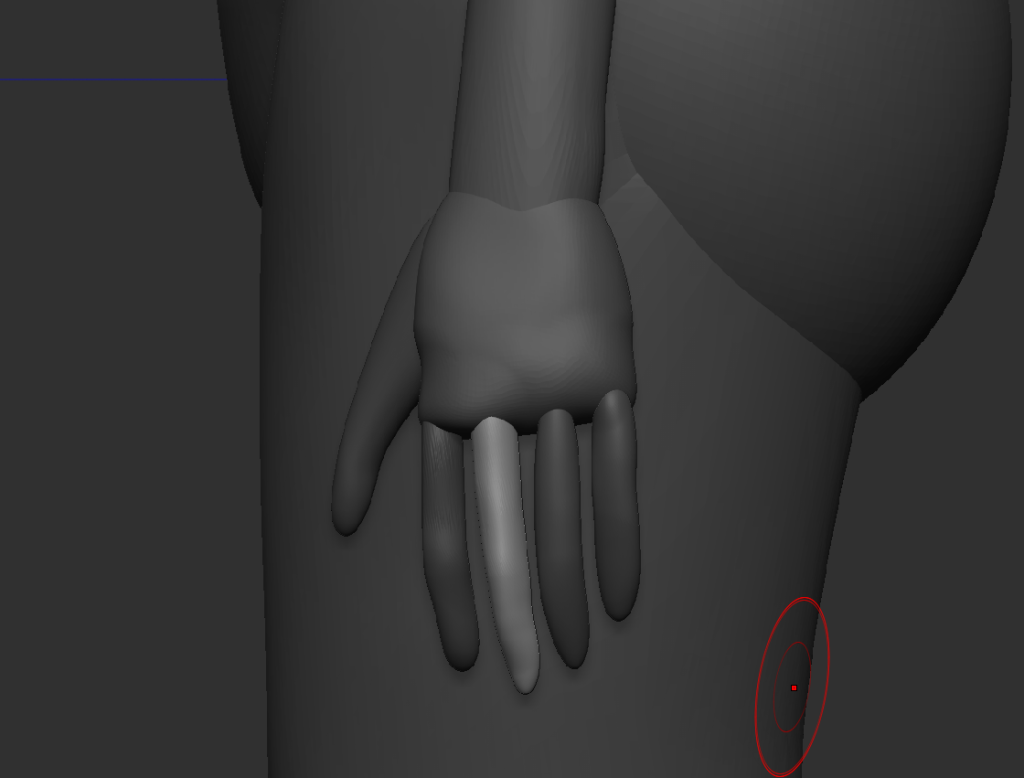
Ankles, Feet, Fingers and Toes was Added. Right now, the Fingers are ‘Floating’ around the Hands for now since it will make it easier to Edit when I get to the Sculpting Part of the Model.
I was told that wouldn’t need to add in Toes if my character was having Shoes that will cover the Toes, but I wanted to add them in because I wanted to practice the full Anatomy and I might use this Model of Aureline, outside of the Assignment to make more Outfits for her, etc.
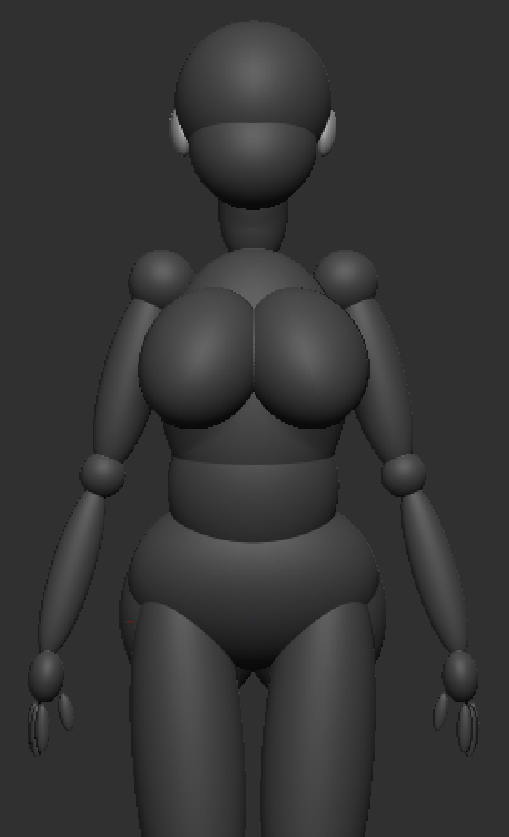

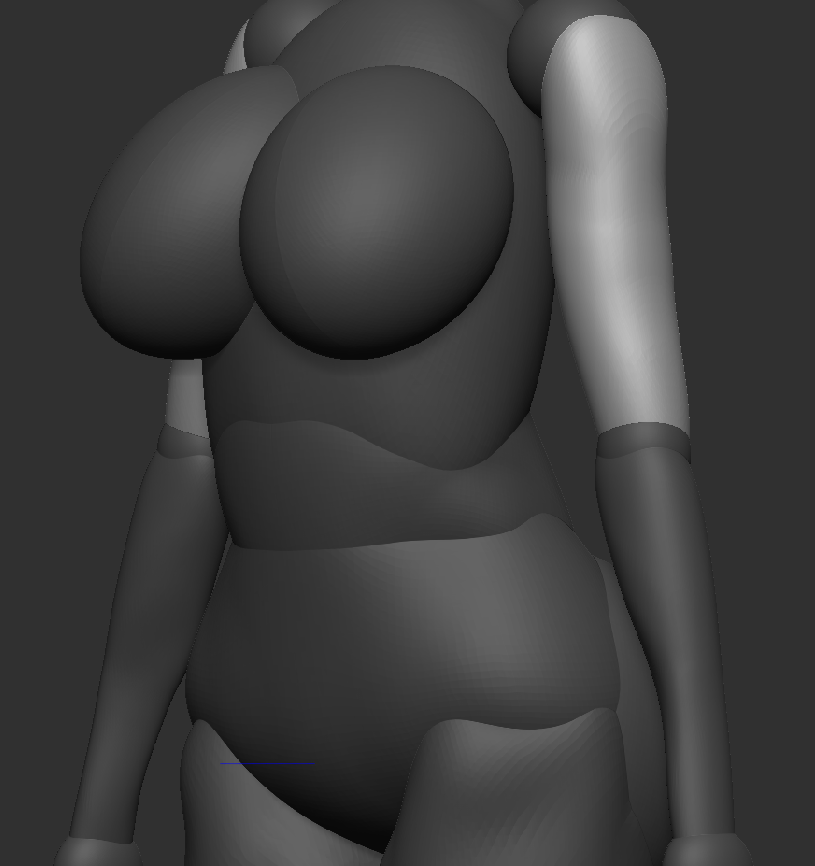
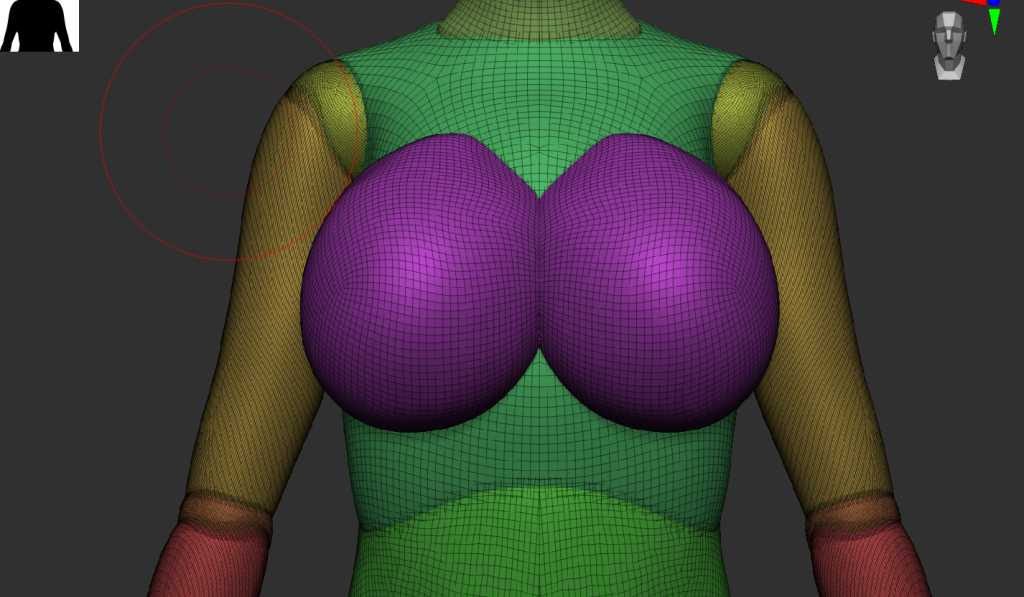
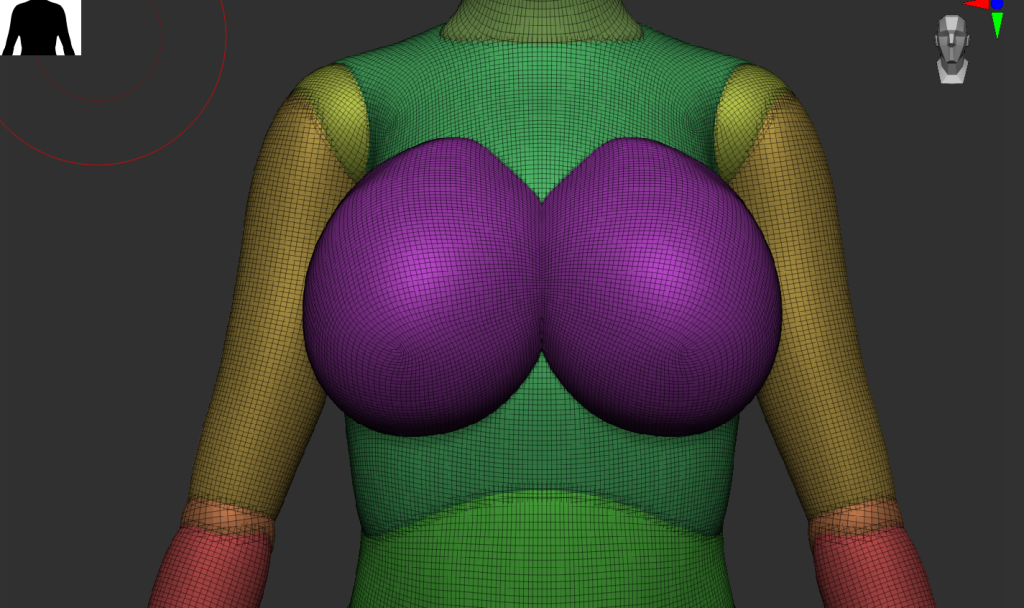
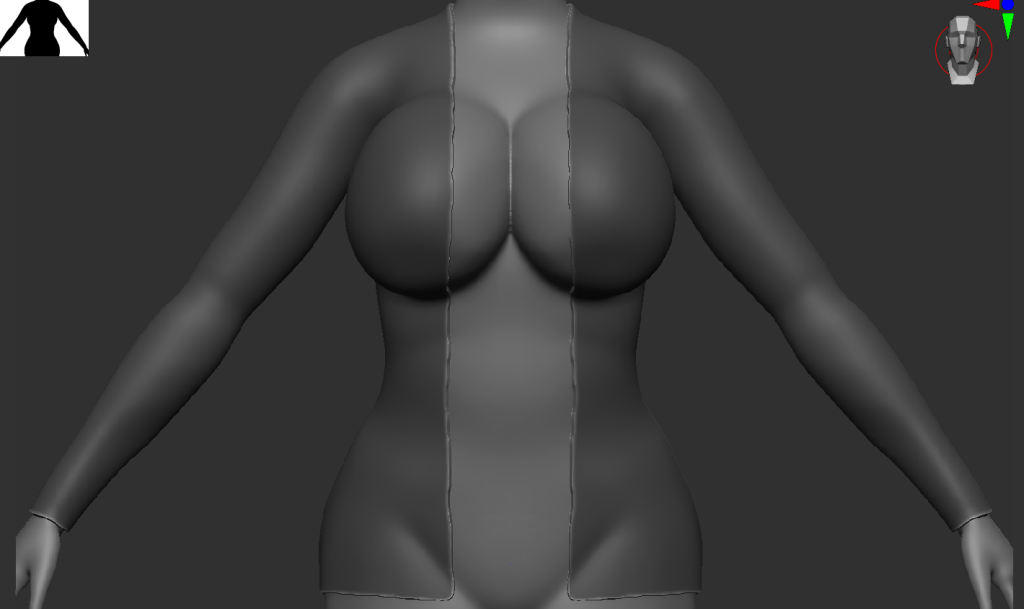
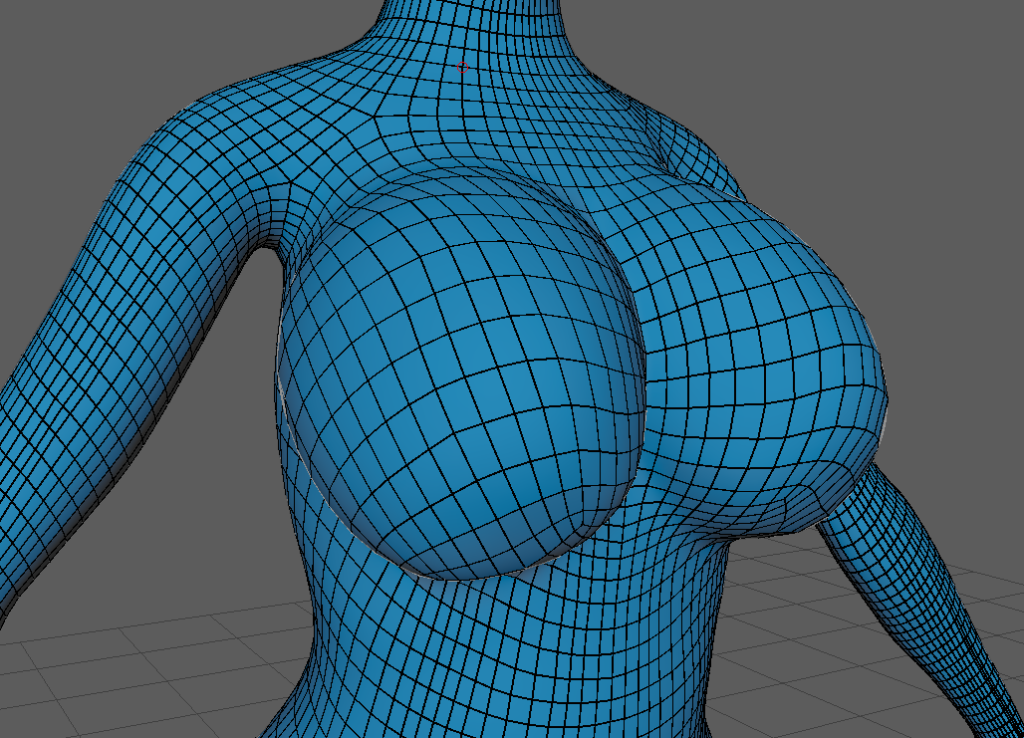
Ears, Breasts and Butt was created. Ears are a simple shape to represent Ears and this will be further pushed later in the Sculpting Part for the model.
Every Girl’s Breast Size are Different, thanks to Genetics. Some Are Big, Small or can be Flat chested and Breast Size can also differ on Age (Between the Teens to Early Twenties), Every Body is Different.
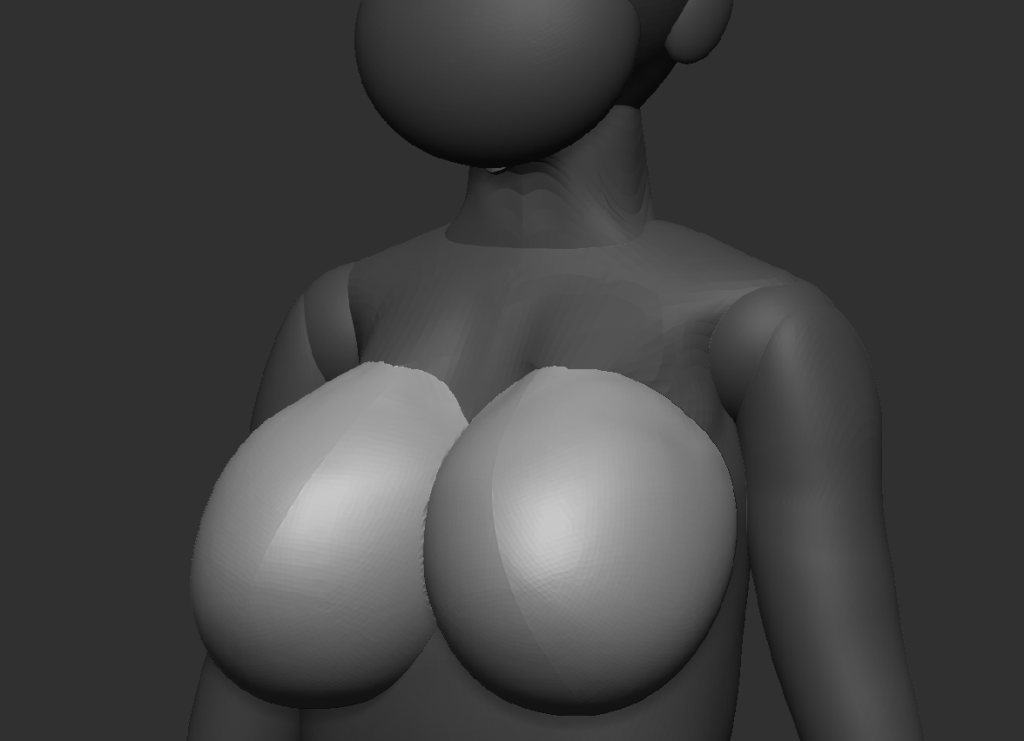
Aureline will be a Big Chested Girl, she did get them at a Young Age instead of later in her life. Breast Size comes with Advantages and Disadvantages and varies from Person to Person.
For Aureline, she got two Disadvantages. Back Ache, since she has to carry more weight and will need a Bra to help support. The size of her breasts could get in they way whilst fighting Bad guys, so she has to be careful when going into fights.
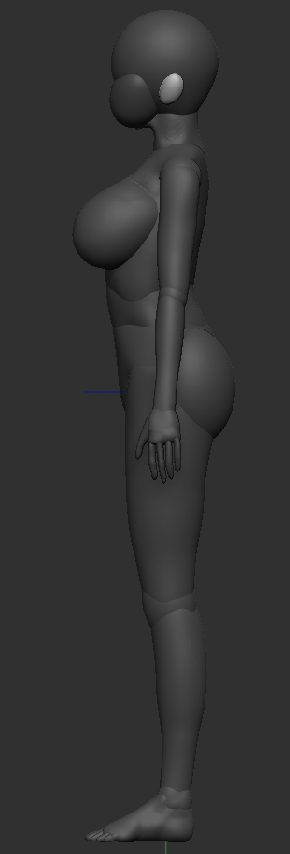
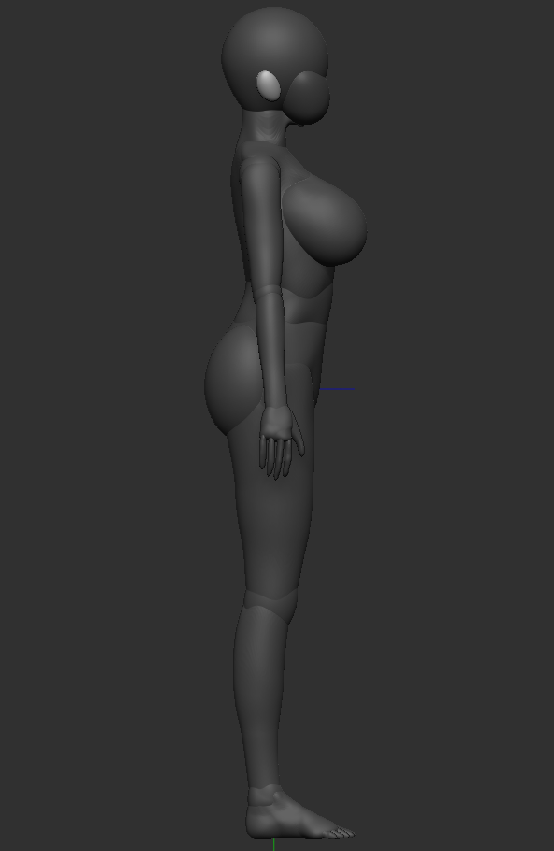
Sculpting Process
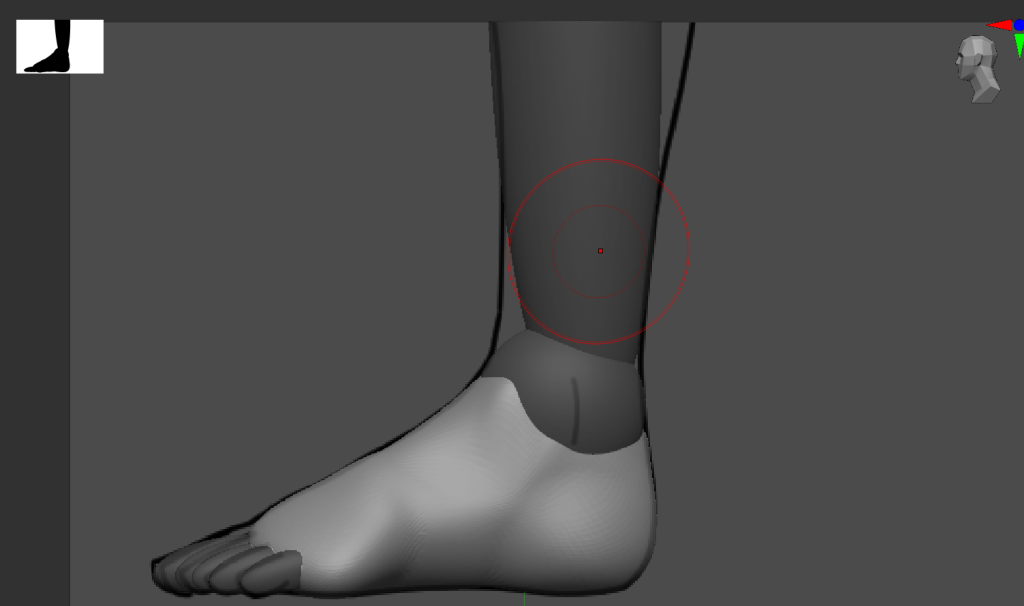
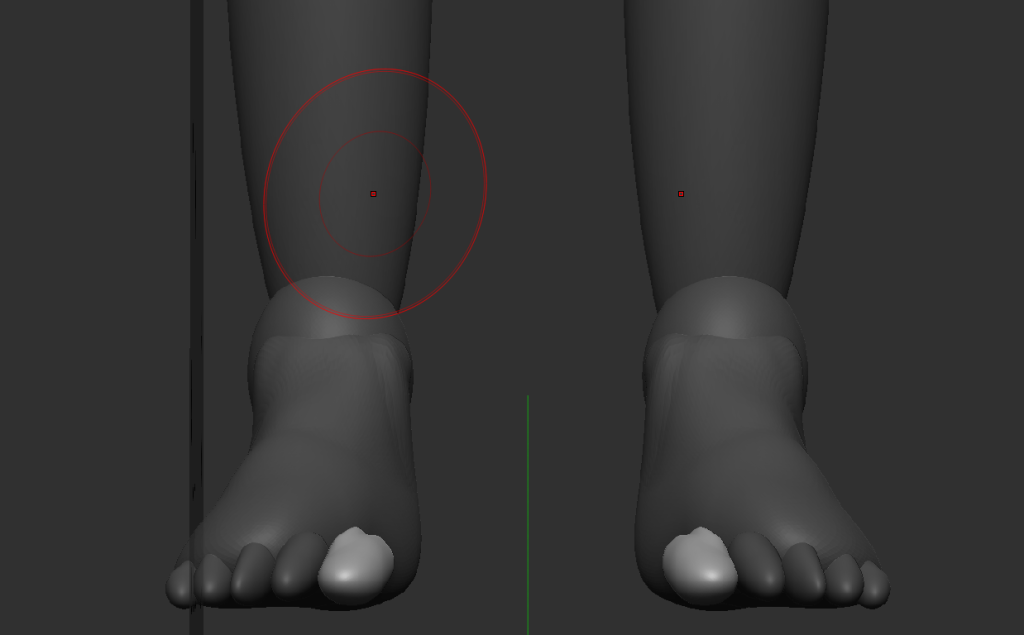
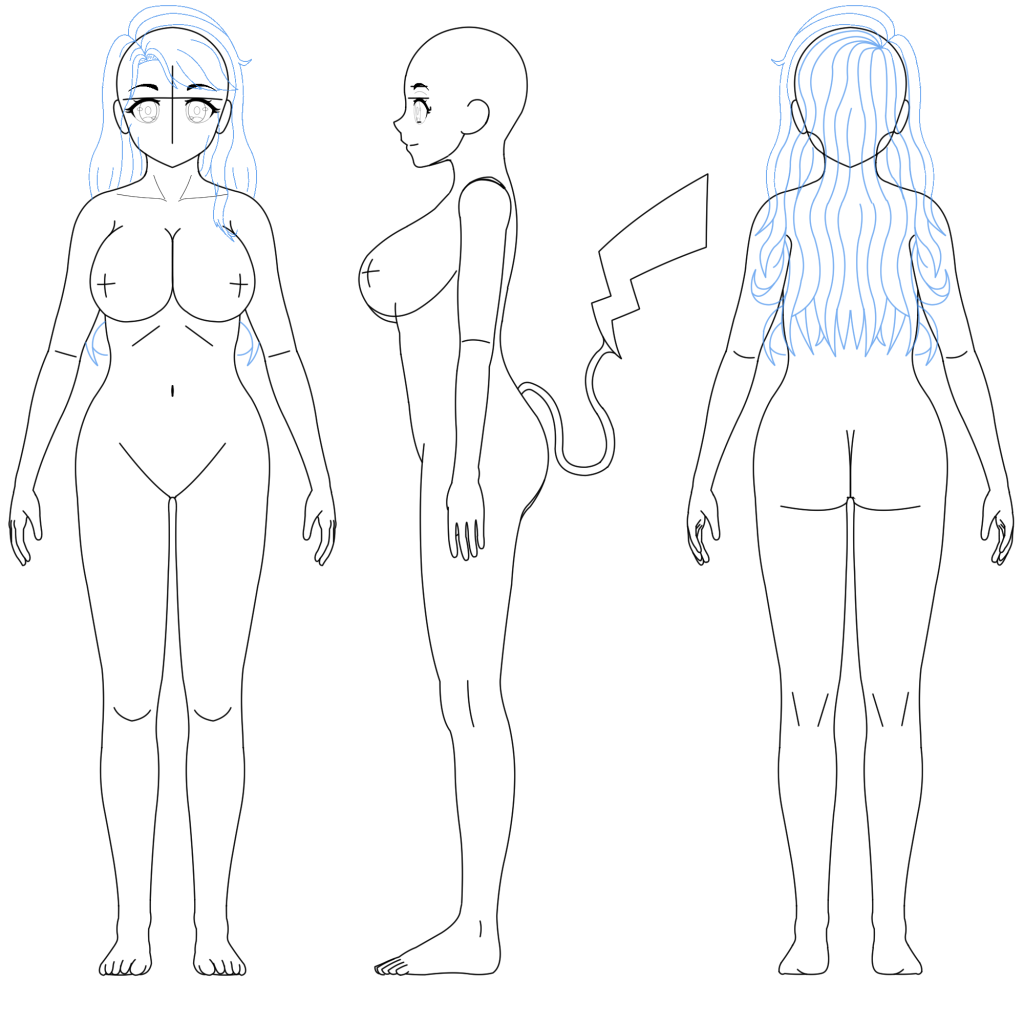
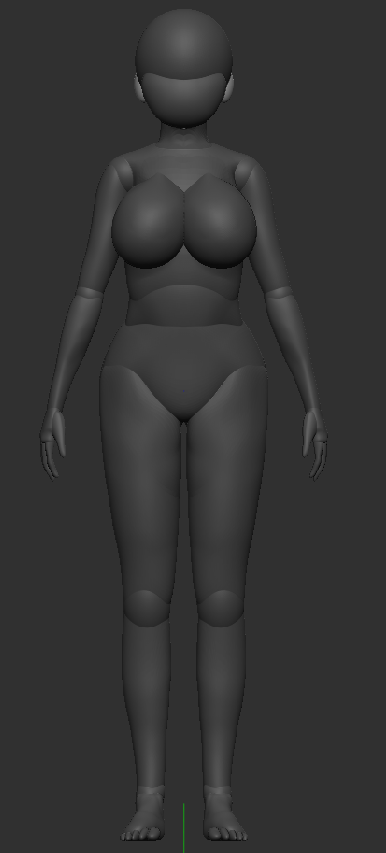
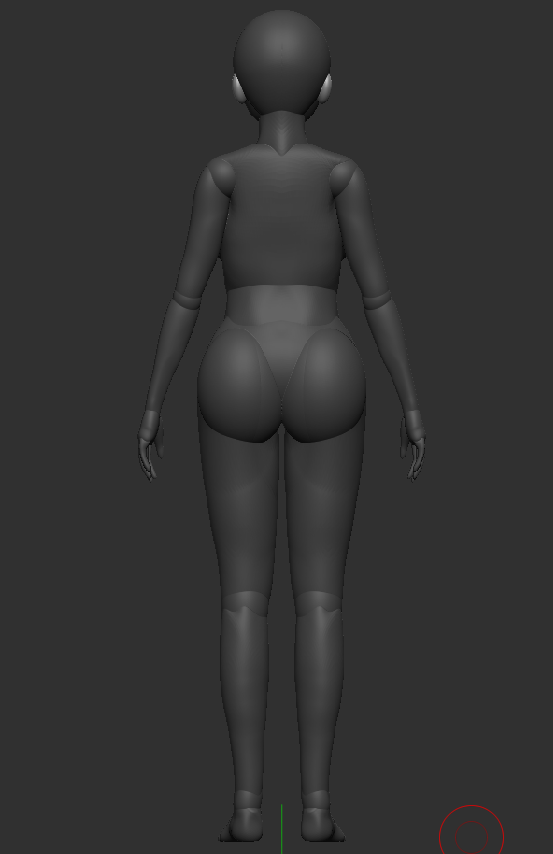
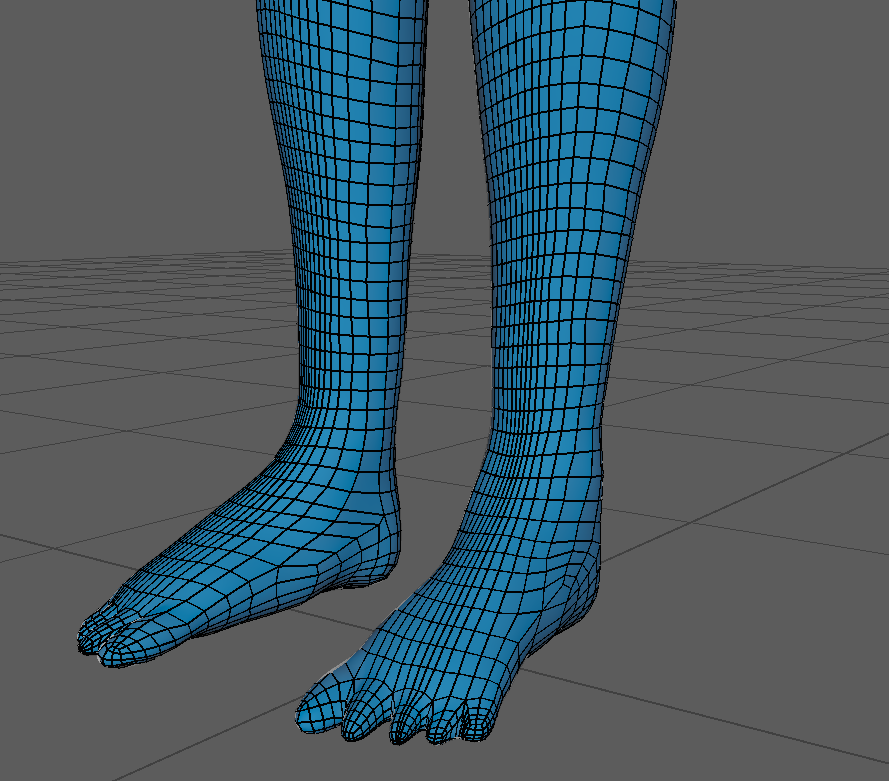
At this Point, my Character Sheet was fully done, so I have a Front, Side and back View of Aureline Musashi to help with the Sculpting Process. This time I started with the Feet and Toes and wanted to work my way up the body.
I Sculpted with the Move Brush and Move Topology brush, Sculpting the toes took some time with how fiddly and moving the camera I had to do but came out nicely. the Feet were much easier to do, making the curve between the feet, making the Heel of the Foot and finishing with the front of the Foot that meet with the Toes
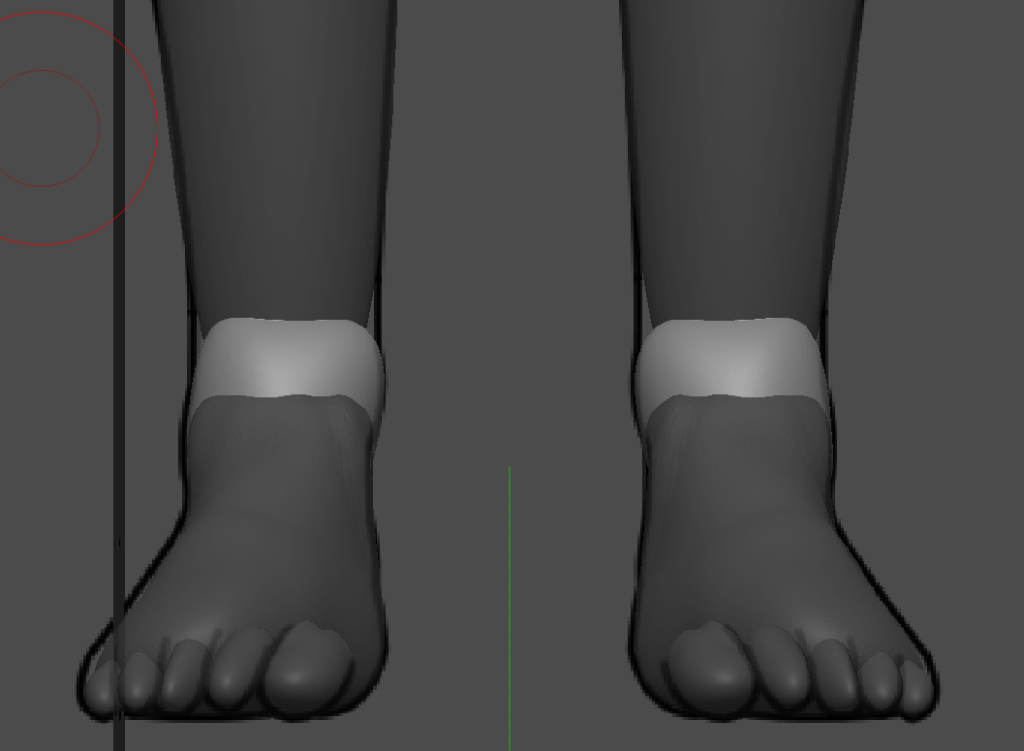
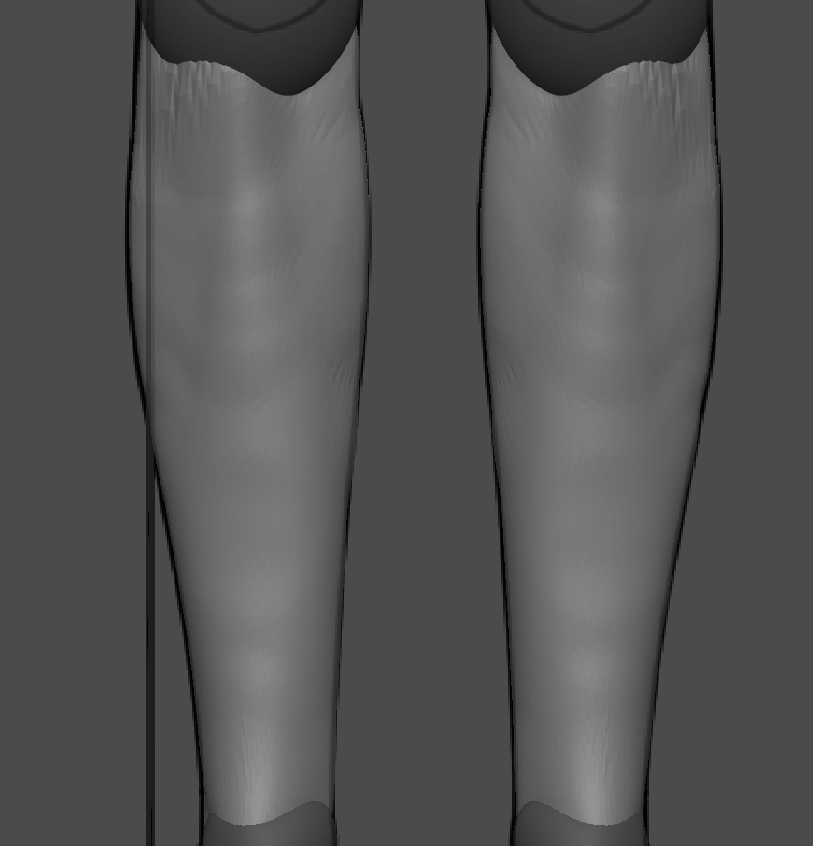
Ankles was easy Sculpting, I only need to pull at both sides and squish the top and bottom of the mesh. Lower Legs were next, stretching out both sides to add thickness to help connect with the Knees and pulled the mesh more forward to help connect with the bump of the Knees.
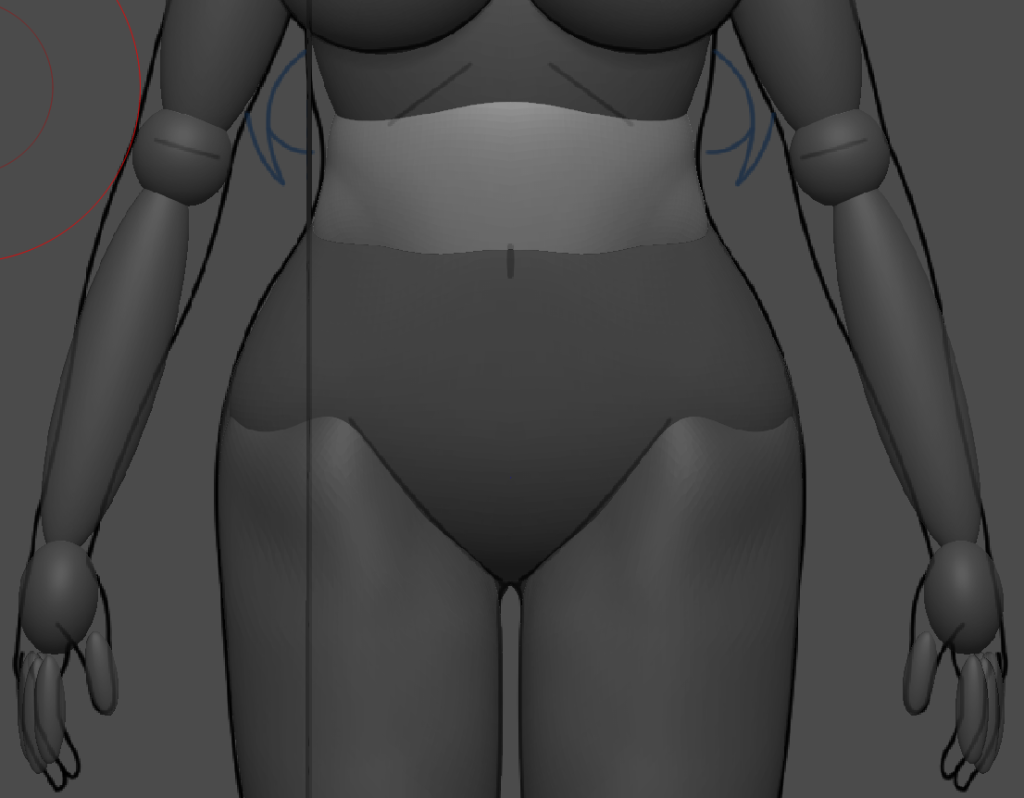
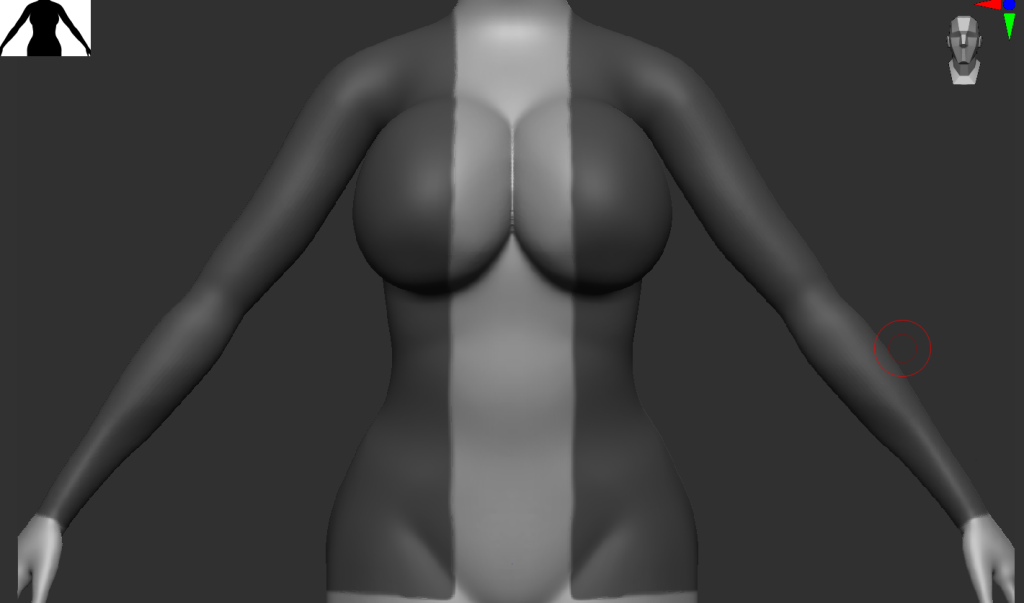
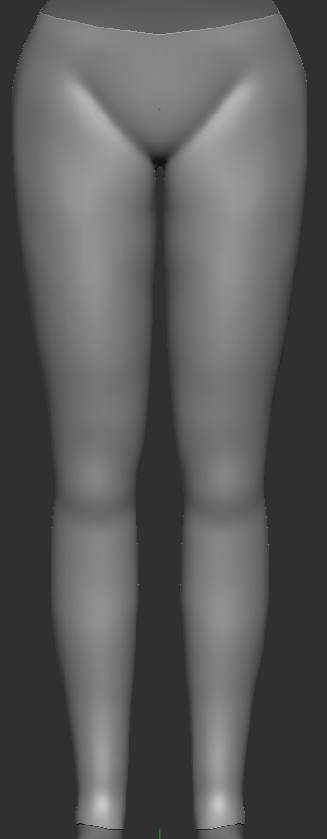
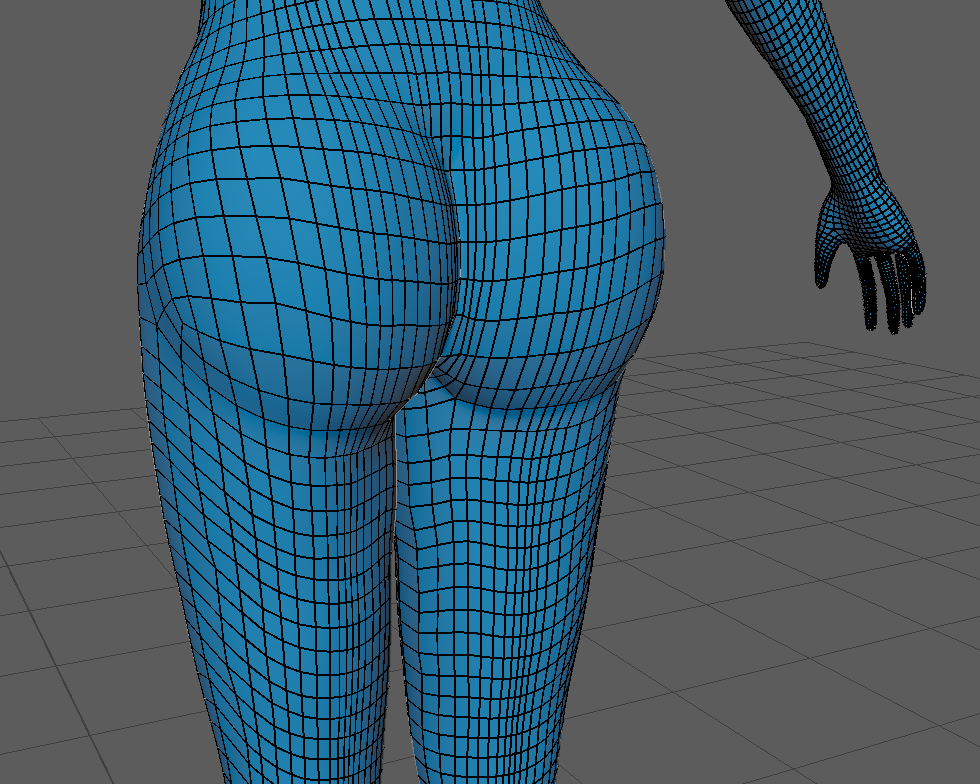
I also Increase the Width of the Upper Thighs and Waist to add as much Curve to fit Her body reference as possible. Her Butt was angled to fit better on the reference. I sculpted the Curves on the Side, Front and Back of the Upper Stomach area.
The Shoulders were smoothed out at the top to help transition from the Arm to the Neck and added more width to fit better on the Arms. Both Arm Meshes have been Increased via Width, Smoothness and with Move Topology, I sculpted the upper arm to make a ‘Socket’ for the mesh to ‘Attach’ to the Shoulder Mesh.
The Elbow didn’t change much other then that made the Bump of the Elbow was bigger to help recognise it better, and allow the Arm meshes have better shape when sculpting them.
The Upper part of the Lower Arm mesh was Increased to connect better with the Elbow and Smoothed out with the Smooth Brush to make the Meshes rounder and Smooth like Skin.
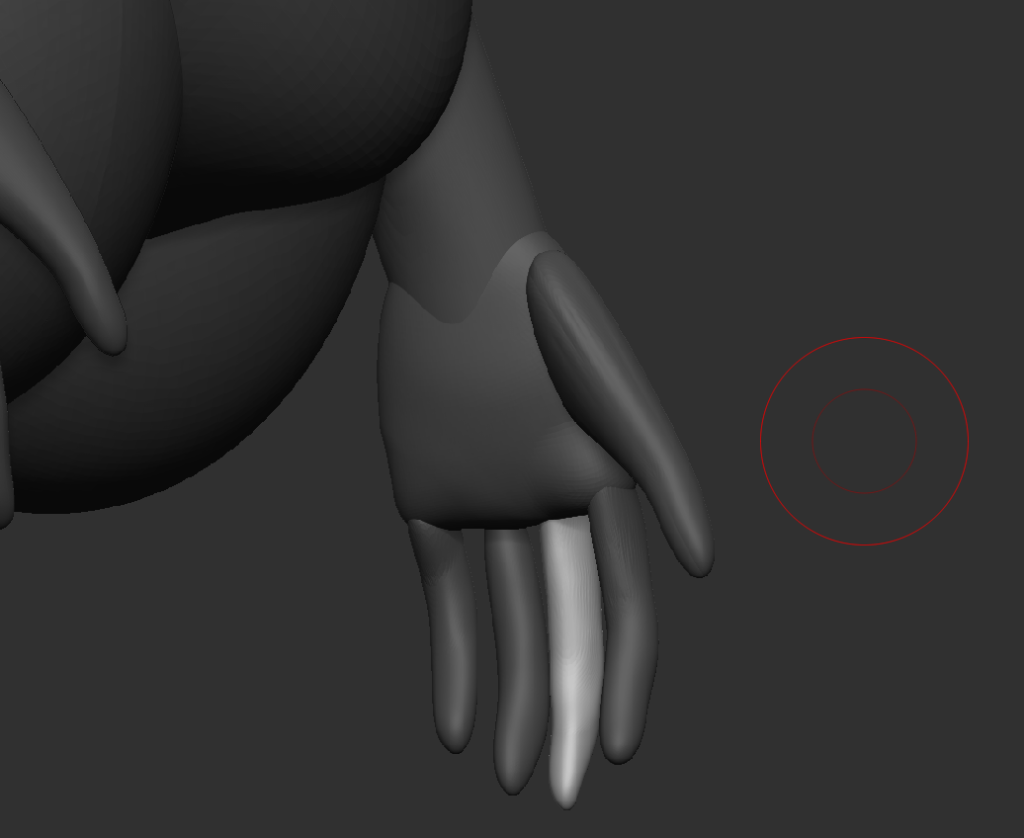
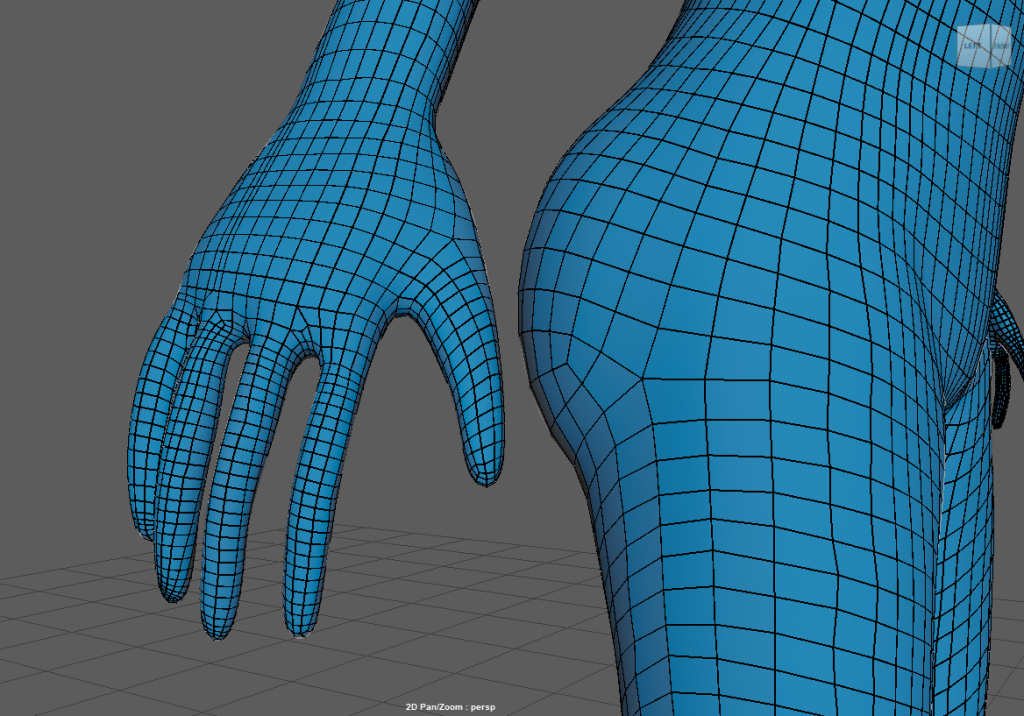
Sculpting the Fingers were just as tedious as the Toes but thanks to the Hide Tool, I could hide the Upper Thigh Mesh to get better Camera Rotation around the Mesh. I just needed to stretch them to connect with the Hand Mesh and using the Smooth brush to help round them out better.
The Thumb of the Mesh was actually pretty fun to Sculpt and Smooth out. I did take a moment though to get into place and fit to match a relaxed Hand. Since I made the Hand to be as relaxed as Possible to match my Character Reference Sheet,
It made Sculpting the Finger a tad bit Easier since I could a rough Idea the length the Fingers needed to be on the Hand.
Full Body – Basic Sculpt
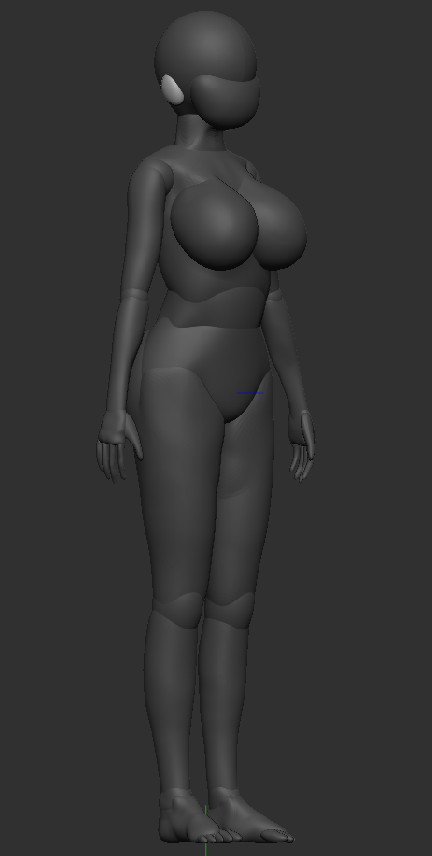
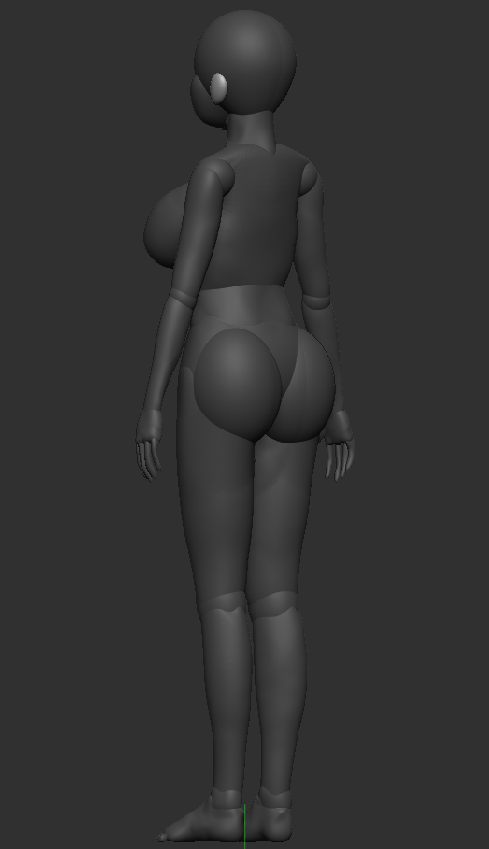
Now I got the parts to give a more curved layout of the body, with this, I can now start adding in more shape, more details and include extra stuff needed for the body. Like Knees, Elbows, Anime Chin, Mouth, Animal Ears and Tail.
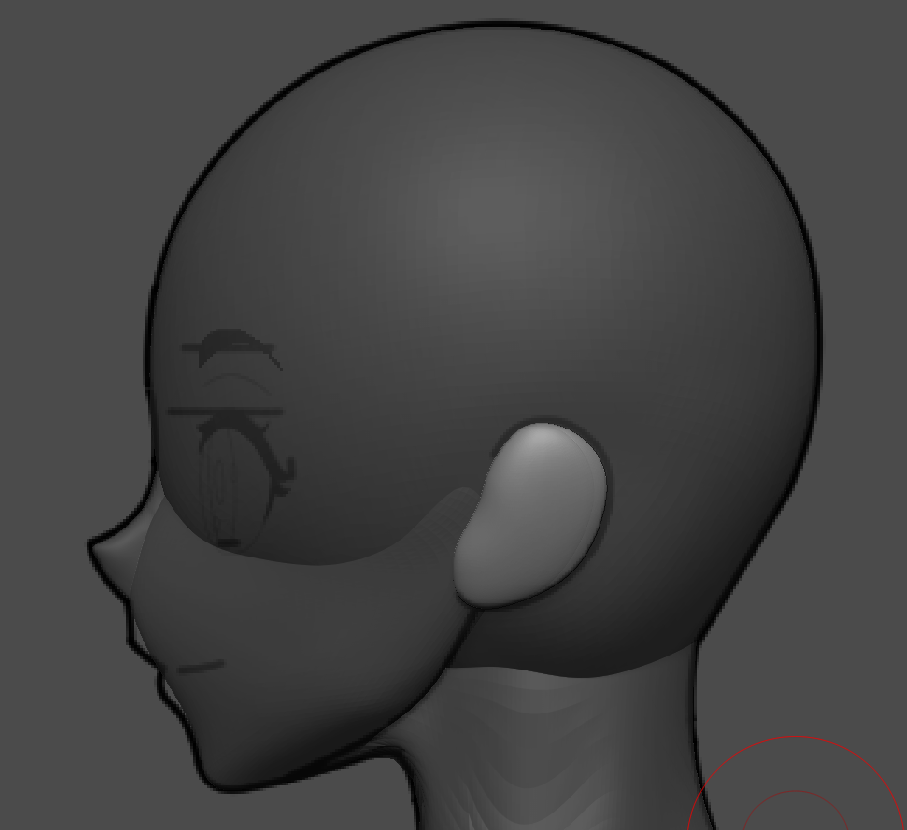
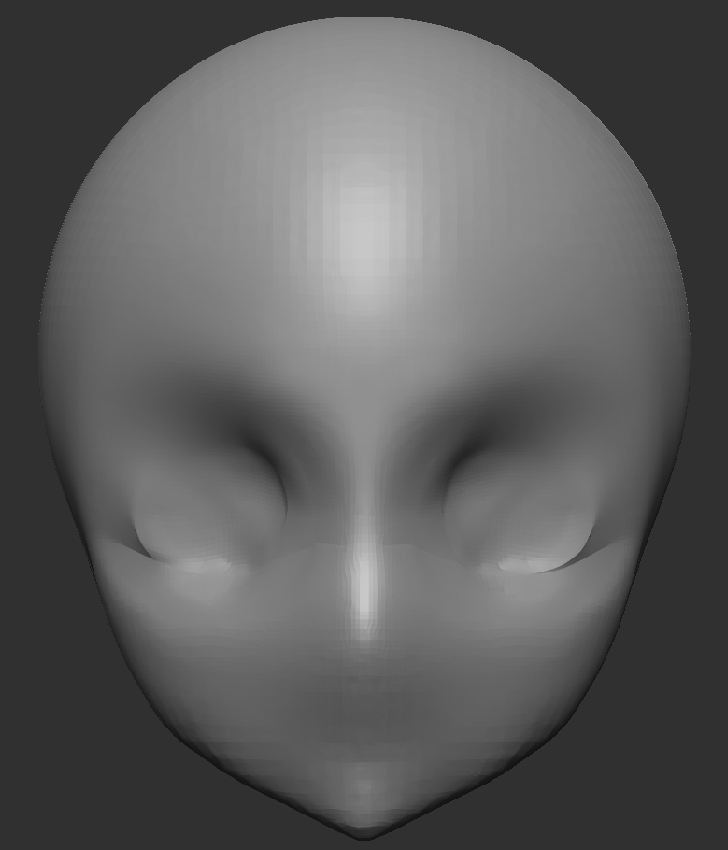
First part I start with first is making the shape of a jaw in Anime, but Anime can have different types of Jaw lines like in real life. To make it easier for myself, I will be using my Character Sheet Reference to help the out line of the jaw and make the pointy chin a few Anime Series will have for their characters.
Most Anime Female Characters will have a small triangle shaped nose to give a cutesy or adorable look. This also helps with standing out from the Anime Males, which they will have longer Heads and bigger, wider Noses unless its a young Male.
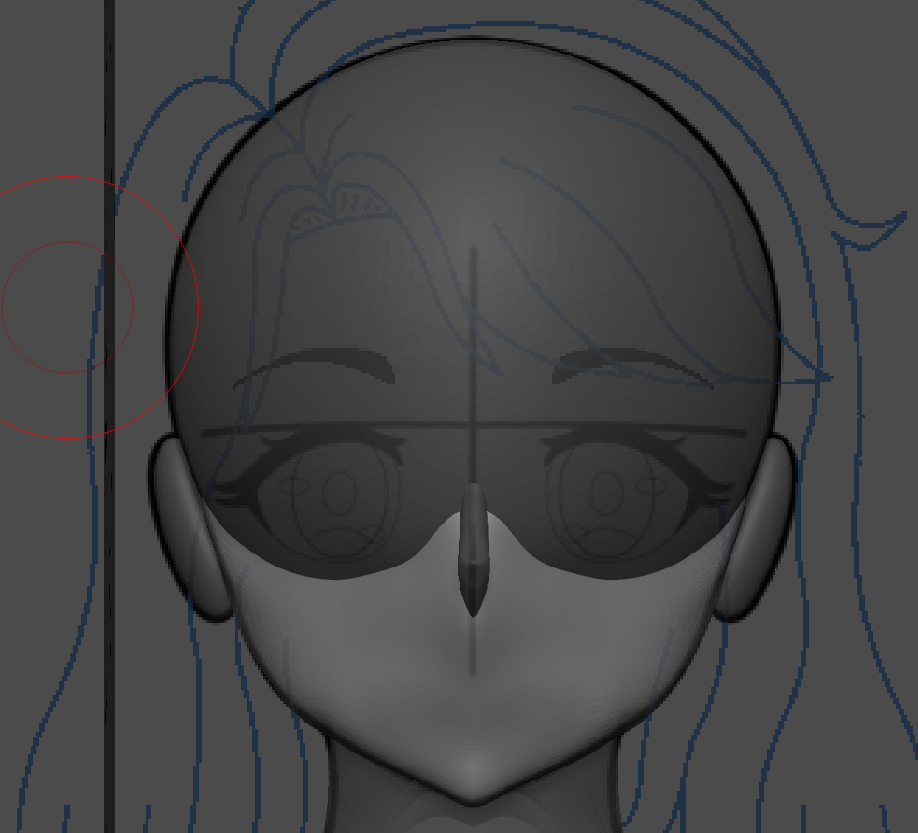
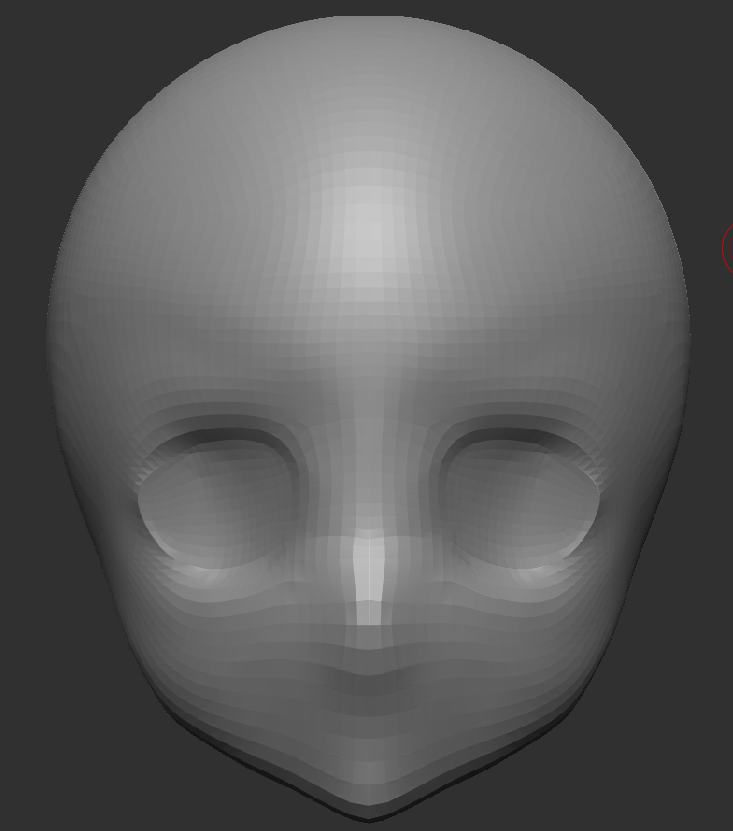
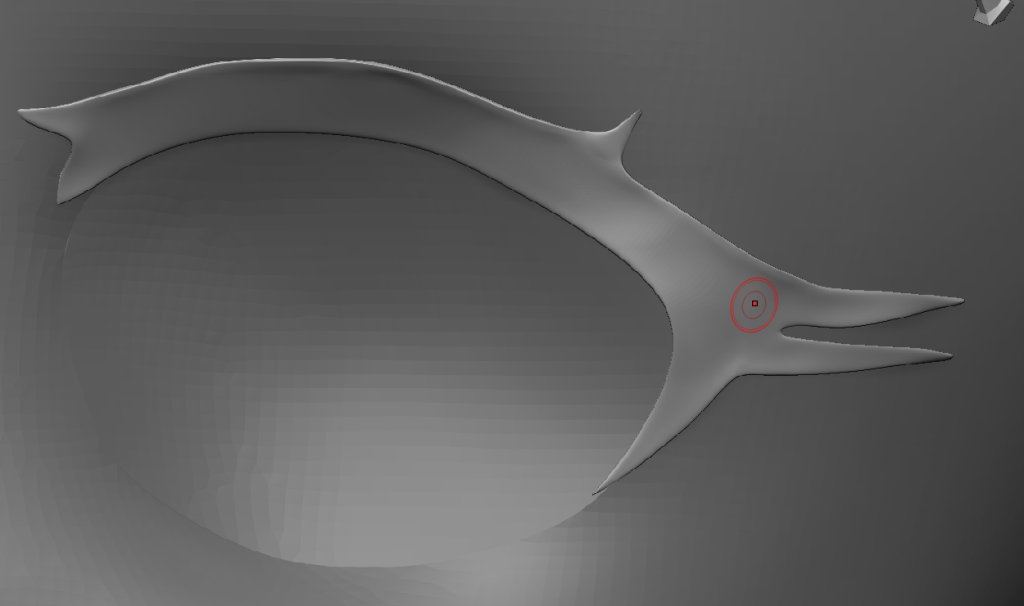
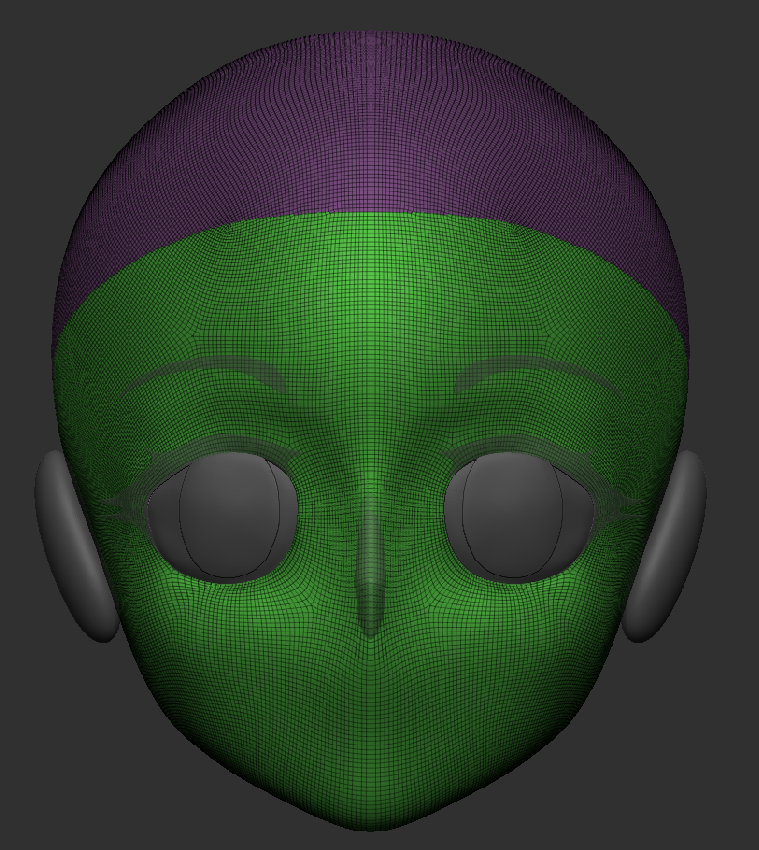
Using the Dam Standard Brush, I am able to make a quick ‘cut’ in the Head to make Eye Sockets and shape them to close enough match the my Character Reference Sheet.
After a quick ZRemesh and Clay Polish for a cleaner Head and Jaw. Using the Mask Brush (CTRL + Drag Mouse), I mask over the Eye Sockets and shape them as best as I can to match the Eyes of the Character Sheet for Better Results. Once done I CTRL + W to make the Eye Sockets its own Mesh in the same Subtool, now its easier to edit and wont change other parts of the Subtool if needed.
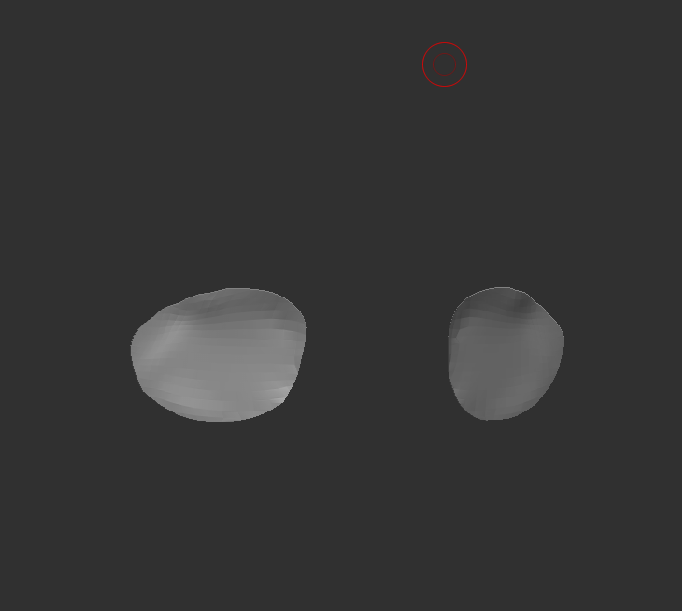
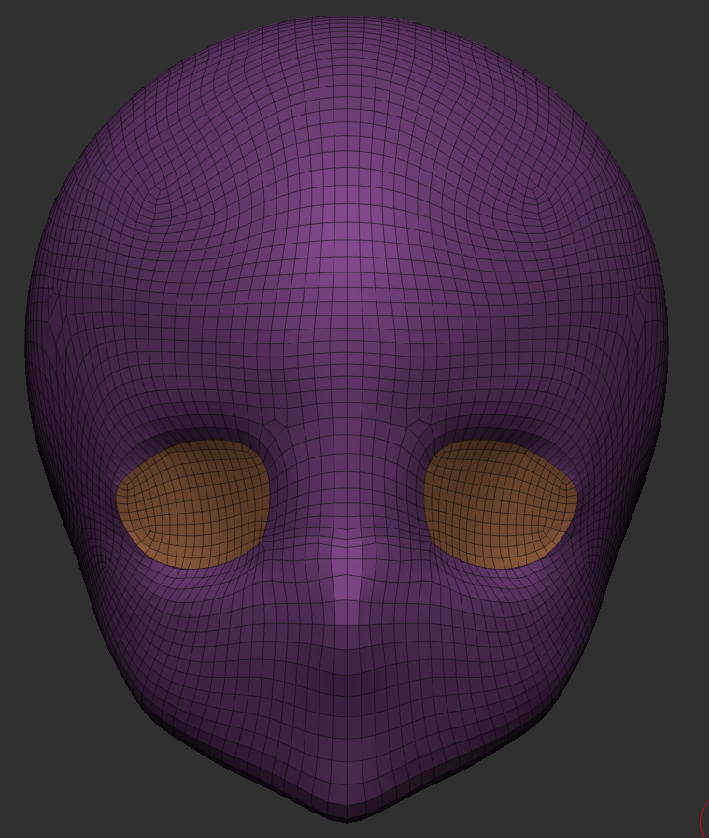
Now the Eye Socket was Separated, It is now Easier to edit without messing any the other Meshes shapes and allow me to give full focus on the Eye Sockets.
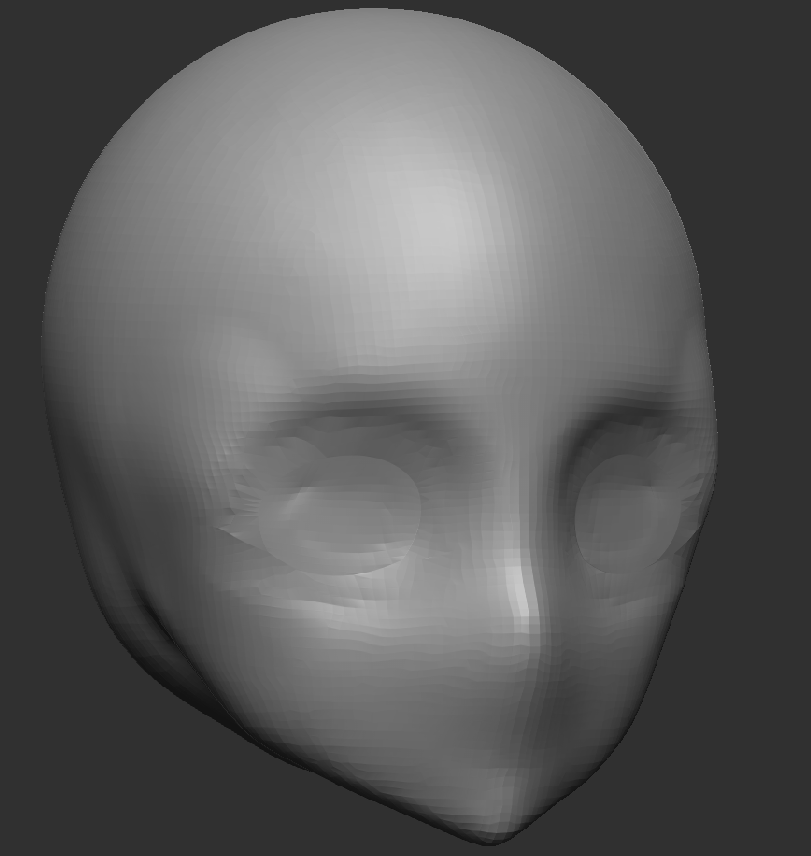
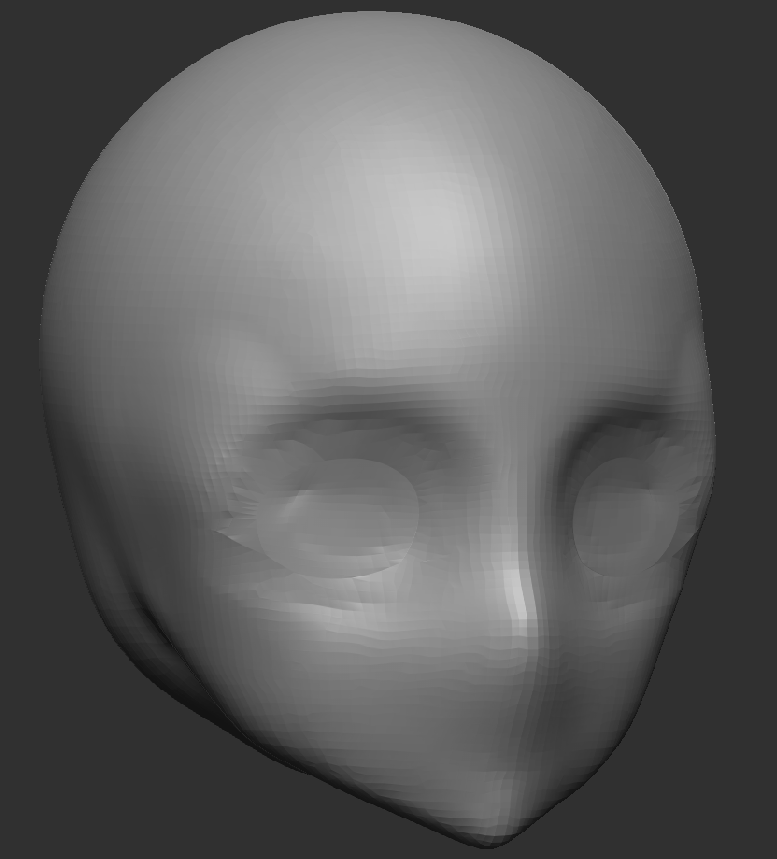
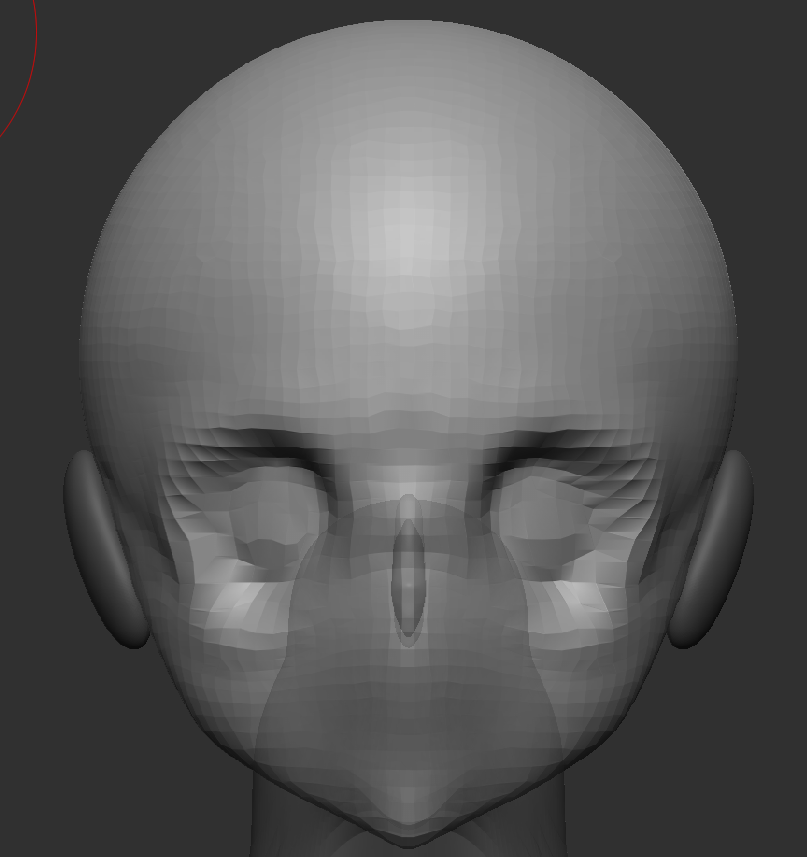
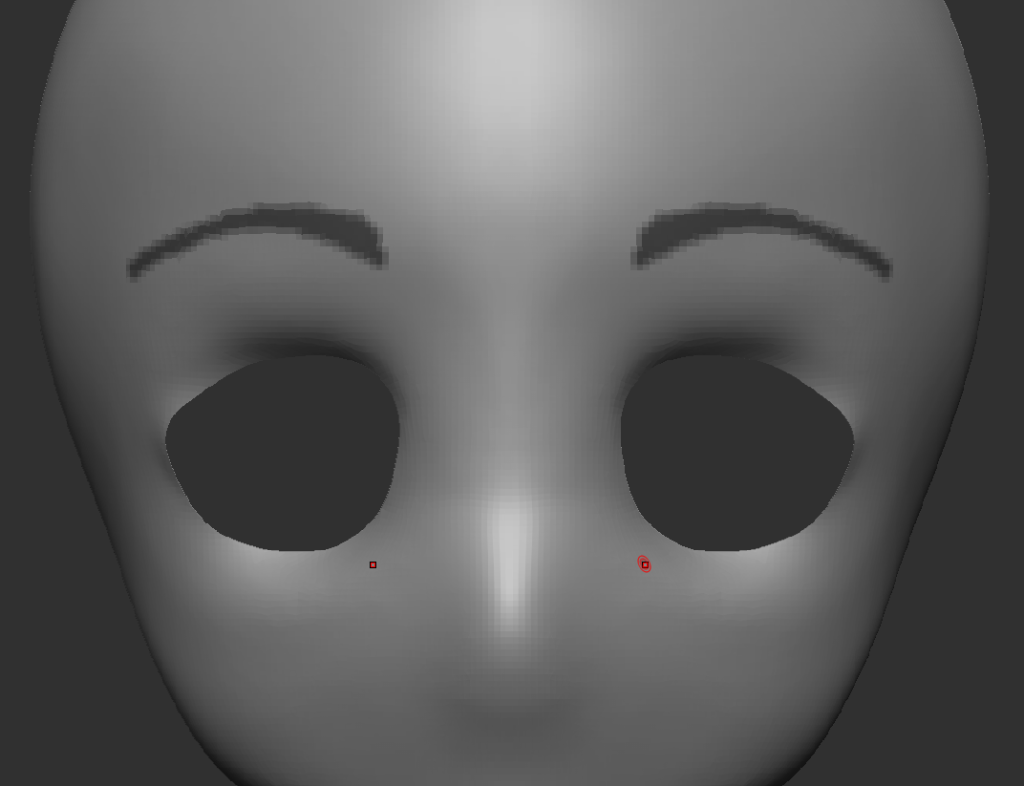
Using the Clay tool, I traced around the eyes to give more bridging on the nose and make the Eye Sockets more noticeable, I also gave Her rounder Cheeks with the Clay Tool. Using the Smooth Tool, I smoothed out where I used the Clay Tool on the Head for a smoother look and also to make it NOT look like Plasters on Her face.
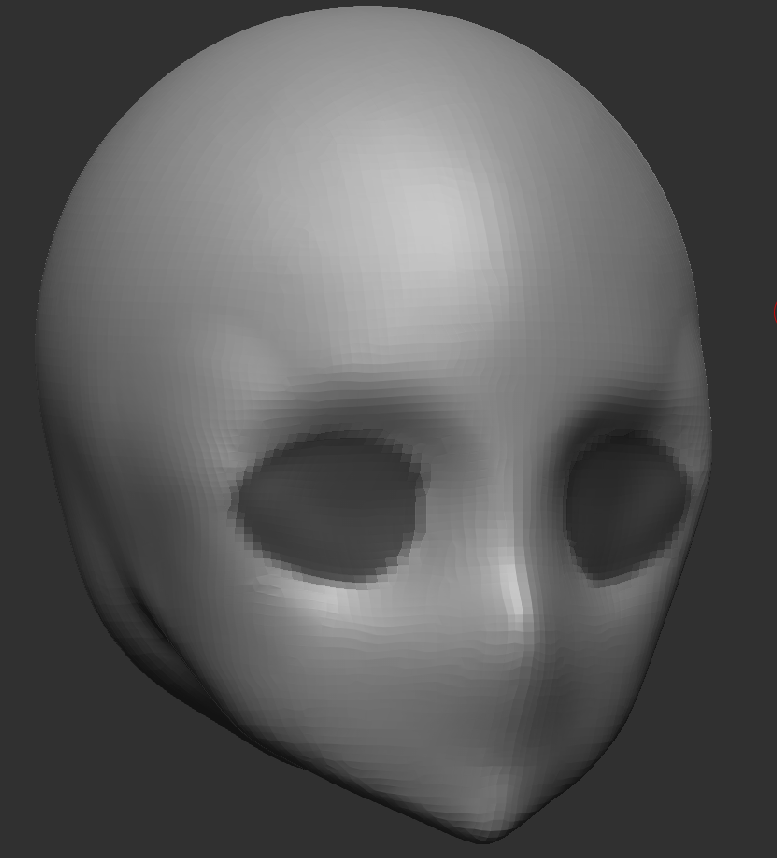
Through the power of the Smooth Tool, SubDivision and ZRemesher. I added in more Faces to the Head, Smoothed out the Eye Sockets to help fit better on the Face and Sharpened the Anime Chin to be accurate with the anatomy.
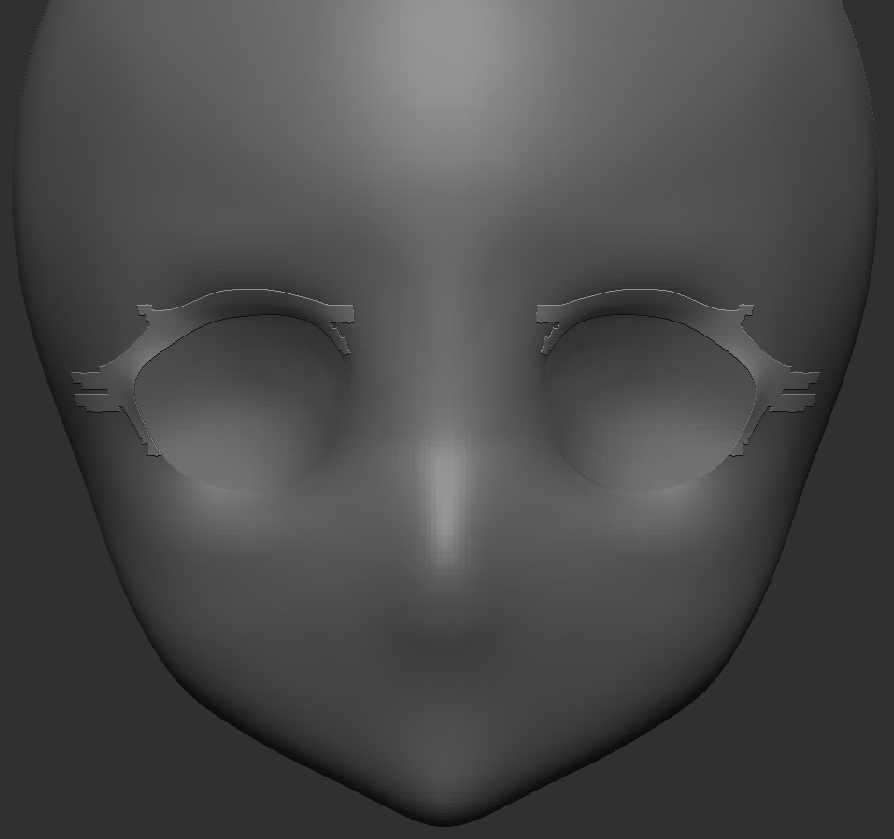
What I did for the Eye Sockets its what I did to make the EyeLashes, Using the Mask Brush, Grouped it and Extract it to make a rough shape of my characters EyeLashes, with help from Her character reference sheet.
Using the Group Tool to help with Smoothing out the Eyelashes and the Head to help connect them better. The Eyelashes got shaper on all four edges of the Mesh and then curved out the Mesh so it doesn’t look flat, curving out the sides of the Mesh.
I started to work on adding in the Iris and Pupil using the same method to make the Eye Socket and Eyelashes. Mask Brush, Grouped it (CTRL + W), Extraction (0.03) and then Groups Smoothed it to help round out the Iris and pupil Mesh to help fit around the Eyeball.
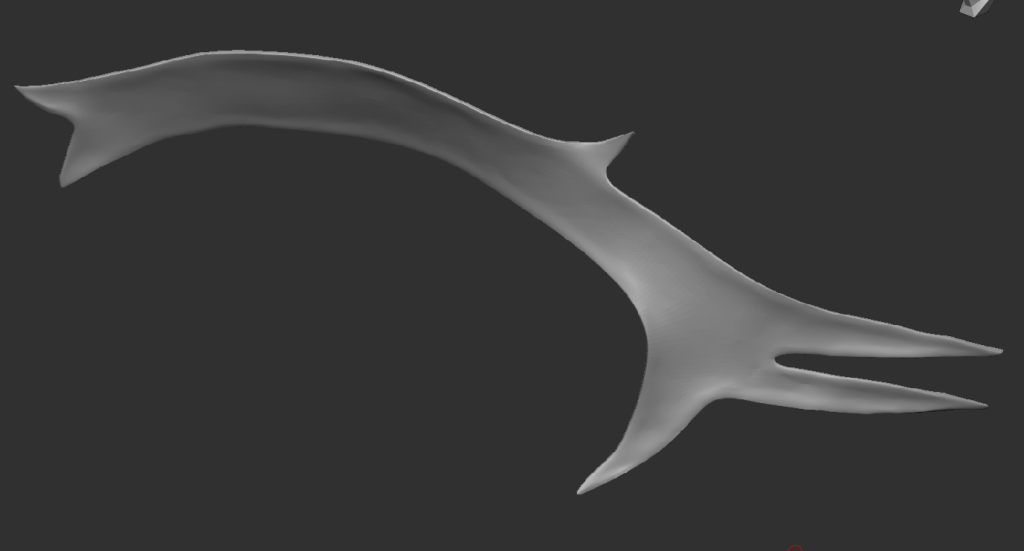
Used the Mask Brush to mask out the shape of Eyebrows, using CTRL+W to turn the Mask into a Grouped Mesh that I can edit separately from the Head but Remain in the same Subtool.
Used the Smooth Group Tool (Lightbox, Brush, Smooth, Smooth Group) to curve out the Eyebrows into shape that matches the Character Anatomy Reference. Using the Extract Tool in the Modify Topology list, to increase the width of the Eyebrow to stick out more like Hair.

Grabbing another Duplicate of the Sphere Mesh, I made a small Anime nose and placed it between the Eyes. Anime noses differ but usually, Female noses are known to be smaller then Males. This helps with making a more Cute, Innocent look whilst Males more Strong and Dominant. Here is an Example:
Place Picture Here
ZRemesher and Adaptation

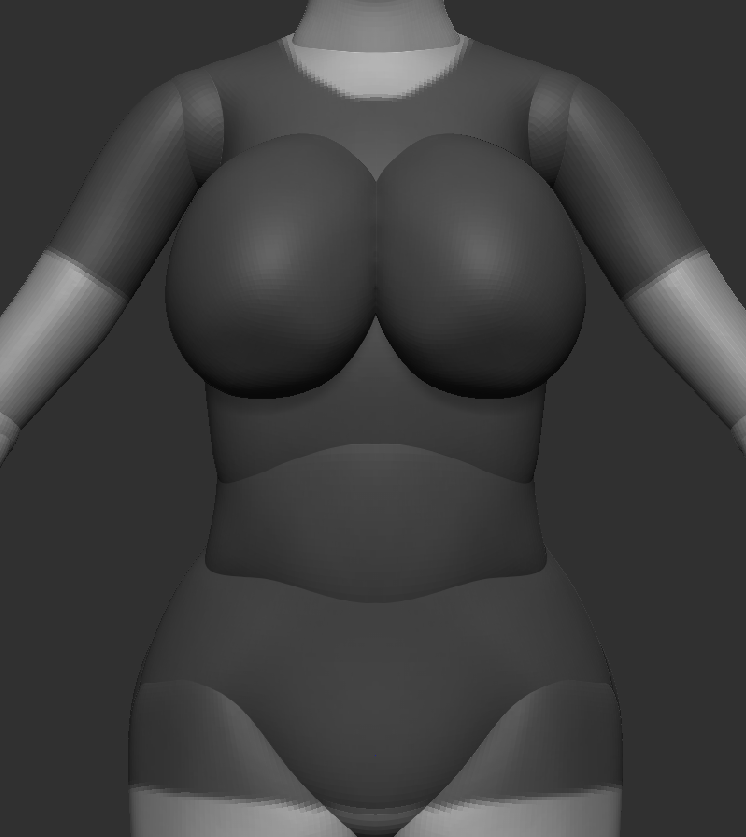
Now to help smooth out the whole body, I used ZRemesher again to help smooth out the Mesh by adding more Faces to the Model. I decided to double the face Amount and add adaptation with it.
Adapt will try its best to wrap around the mesh to use up the least amount of faces as possible but will still help keep the mesh smooth.
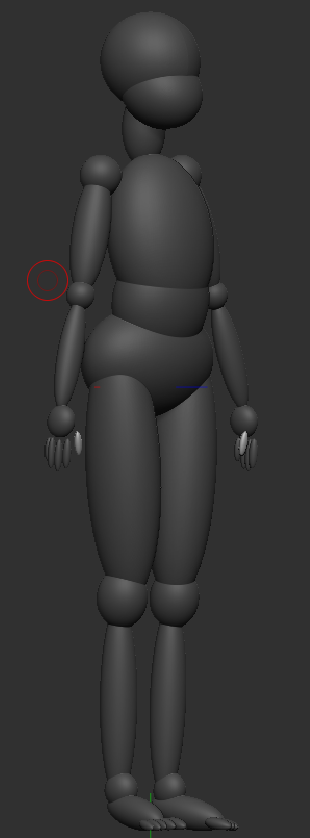
Changing Pose
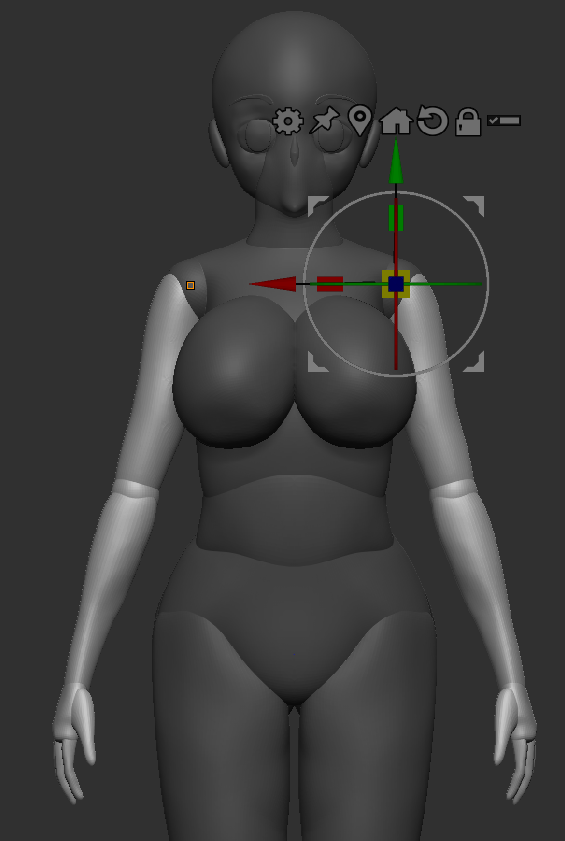
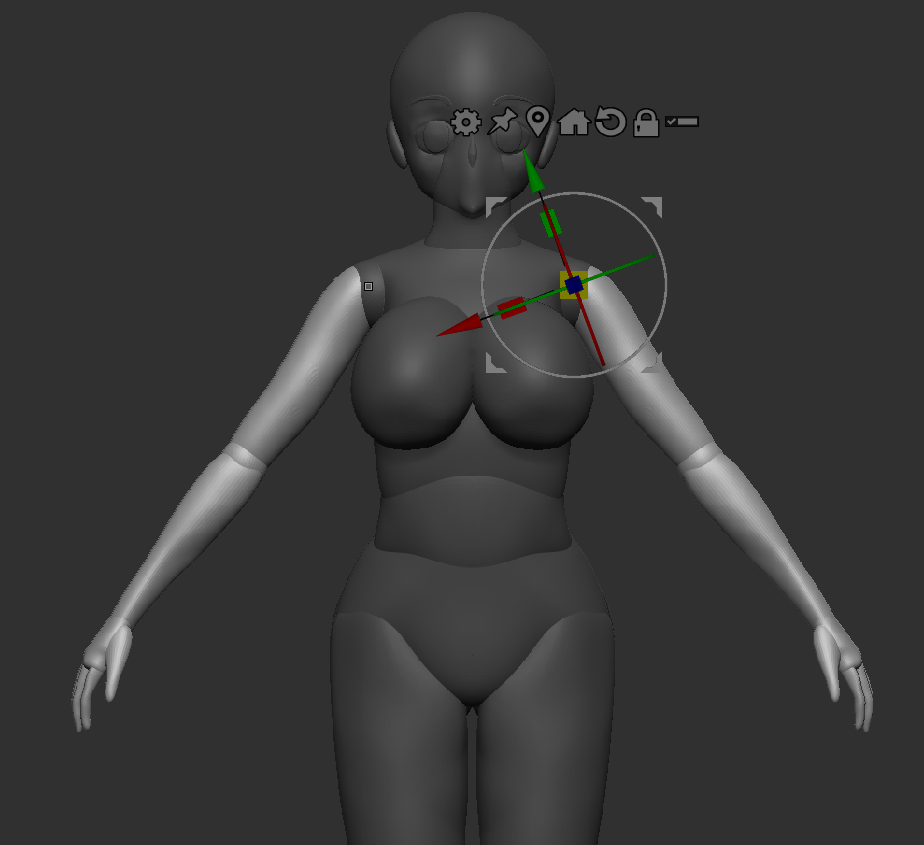
To help with further modifying the Model, I moved the arms up into a A Pose. This will allow me to edit under the arms and help with added in the Clothes better onto the Model.
Maya – Clothes
Using the Mask Tool, I make the shape of a Shirt, I chose the length of the sleeves and the base of the shirt. I chose to go with a bigger shirt type, since she into bigger and Boy clothes since she is a Tomboy by heart.
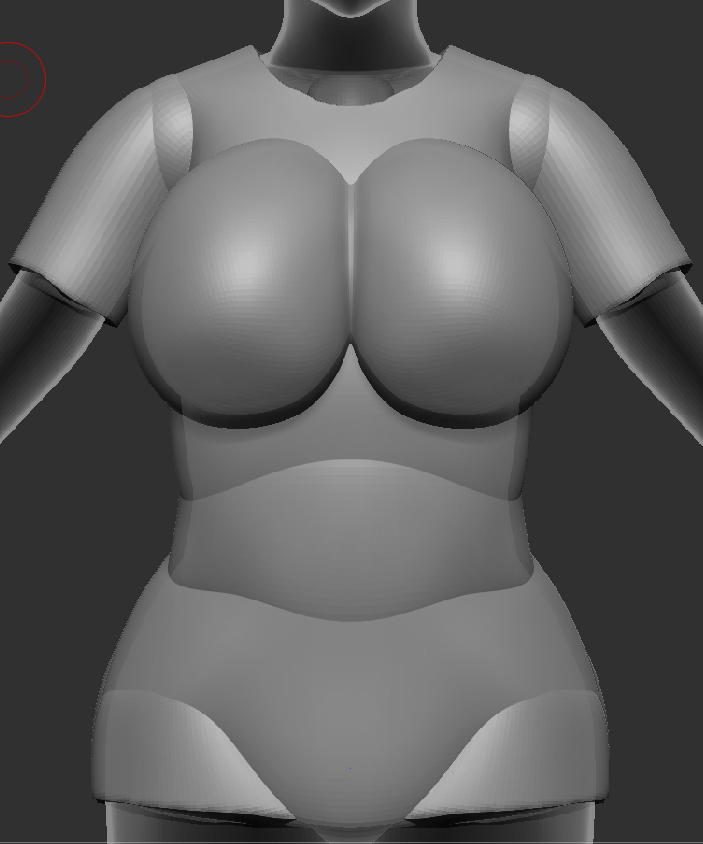
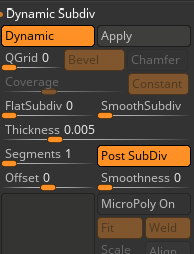
Now Grouped and Extracted from the body, I used Dynamic SubDivision to make the Shirt high quality and also, increased the thickness of the Mesh, so then its no longer a plane and looks like regular clothing thickness (Varies in Brands and person).
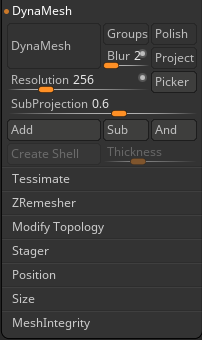
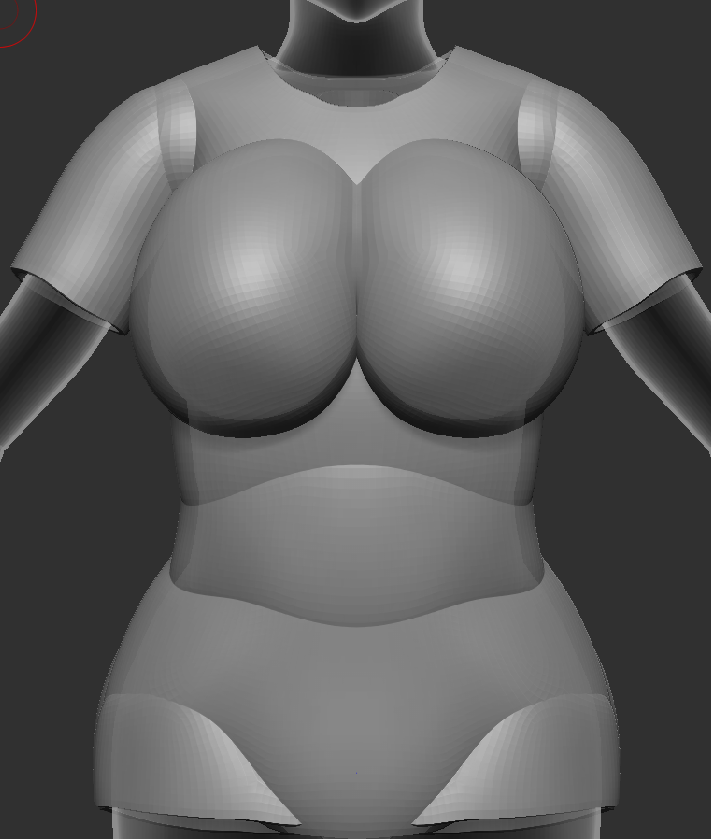
I needed to get rid of the lines on the shirt like the Shoulder Mesh or where the body joined together. With the help of DynaMesh, it instantly removes the joined area and made them into one Grouped Mesh. Thanks to Dynamic SubDivision, I wont lose any quality from Dynameshing the Shirt.
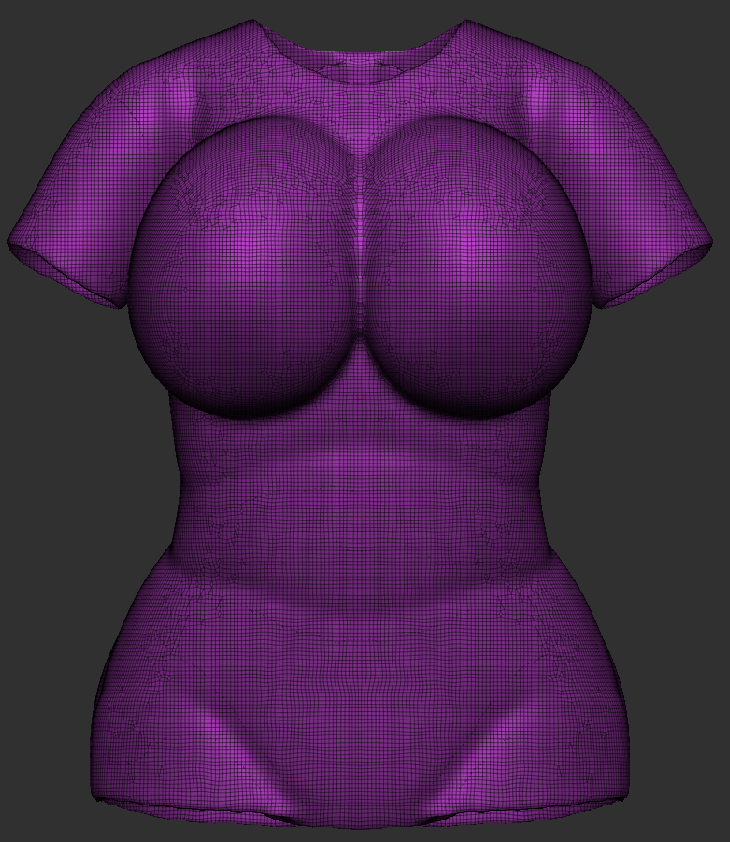
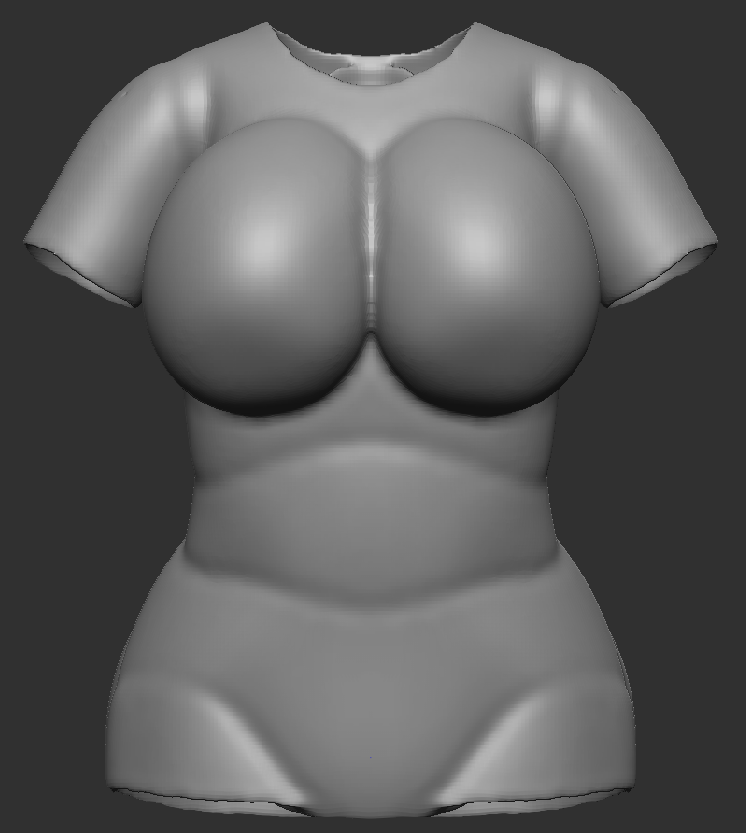
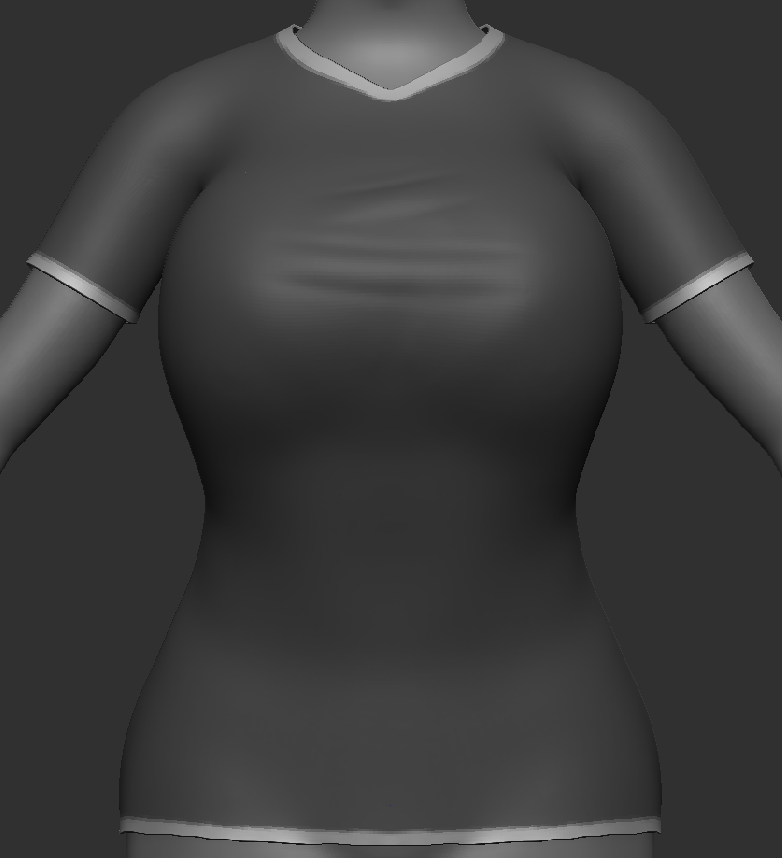
On the breast part of the shirt, I noticed that there was a clump of Faces, squishing together. with the help from the Smooth and Smooth Group Tool I will help smooth them out later.
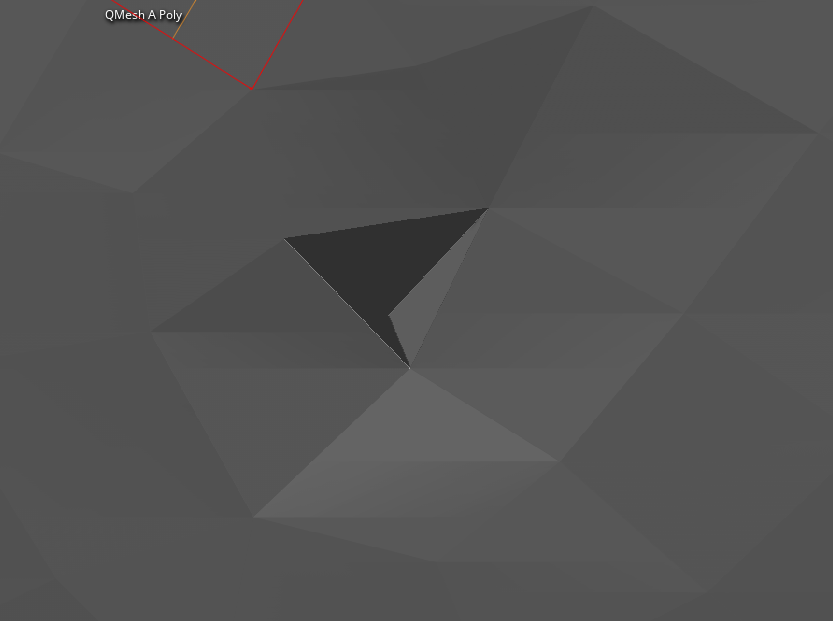
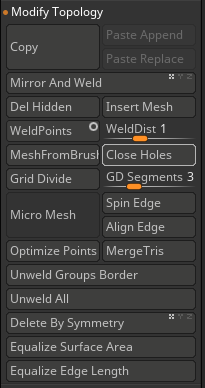
One the back of the Shirt, I had found a hole where a piece of a face that was not attached with the rest of the faces. however, there is a way to fix this. In the Modify Topology List, there is a button to ‘Close Holes’ which fix up the area where the hole was. Now the hole has been taken care of and I continue with Sculpting.

Now with a more smoothed out Shirt, I started to work on Making the Linings of the Shirt. These parts are slightly smaller then the shirt but it helps keep the Shirt shape intact. Also, It also allows designers to make different colours and pattern different to the base of the shirt Some example are below:
Add Picture Here
Although this shirt was on the bigger side and a bit loose, this doesn’t apply to her chest area. This shirt is Custom-Fitted, The Lining at the bottom of the Shirt had to be tightened so then the front doesn’t hang off her breasts, like a curtain.
That way, when looking from below, you can no longer see all the way up her Shirt. That will stop anything inappropriate from happening, especially when she is in fights with bad guys.
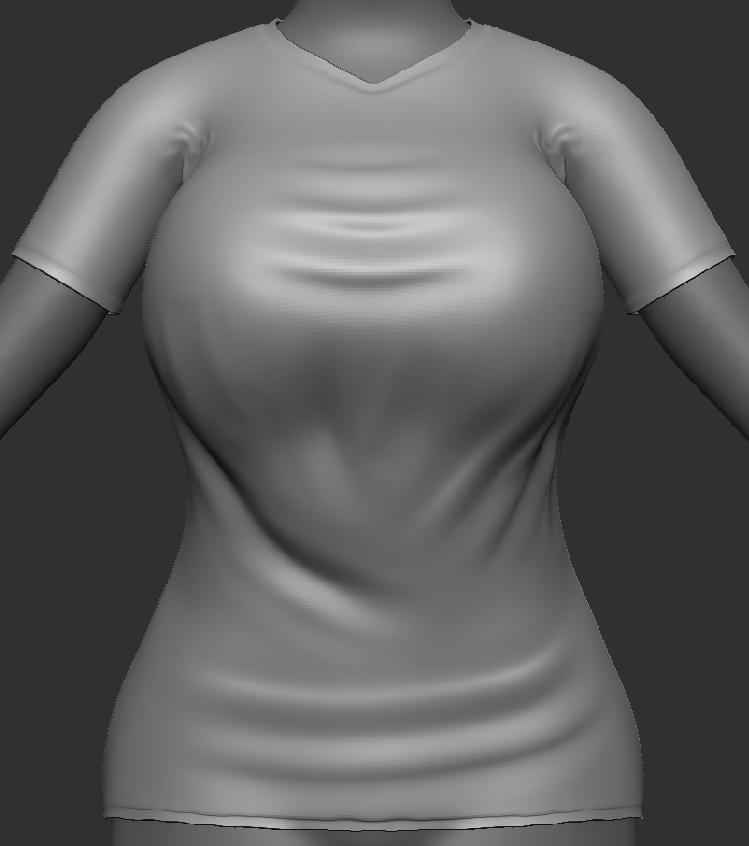
I added in extra stretching with the Dam Standard Brush, so the the Shirt looks more Pulled and stretched around the Chest Area. I also added in Stretch marks around the waist area, since its Custom-Fitted, It will be tighter thanks to the bottom lining of the shirt.
Now I started to make the Leather/Biker Jacket. But as you can see here, I did the Masking Brush the other way but with the help of CTRL+Shift and clicking on the background.
It inverted the masking and now the shape that I can extract was now the Jacket instead of the Hands, Neck, etc.
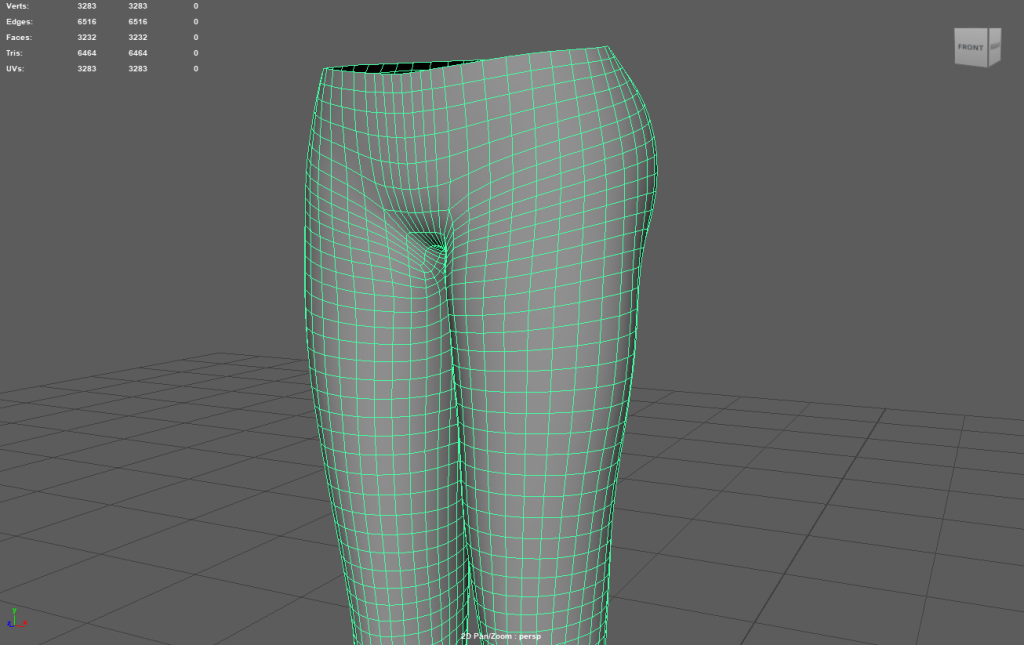
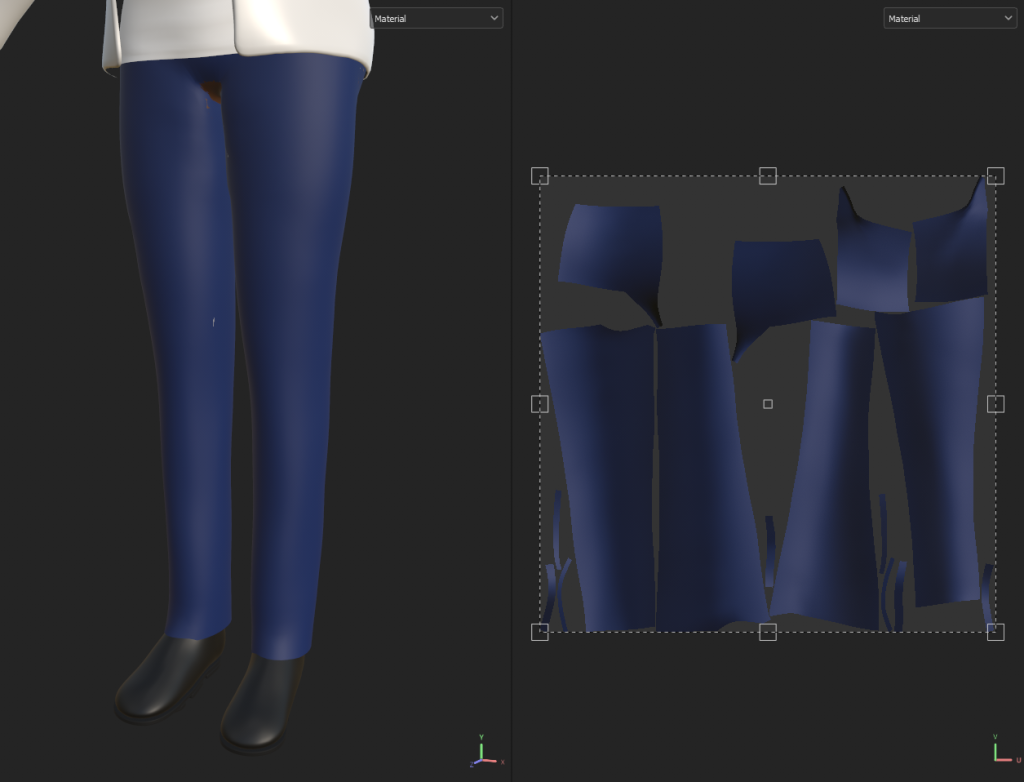
I Mask Brushed the Butt and Legs area to make some Denim Jeans. The Denim Jeans was going to be tight on the Upper Bottoms but loose when hitting near the Ankles. This will allow for room to make Boots and then the Denim Jeans will wrap around them.
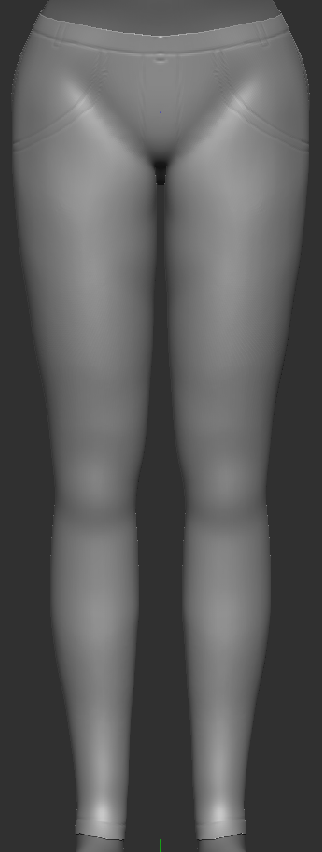
I made some marking with the Dam Standard Brush to make extra design for the Denim Jeans. Like adding in Stitching, Pockets, Jeans Linings, etc.
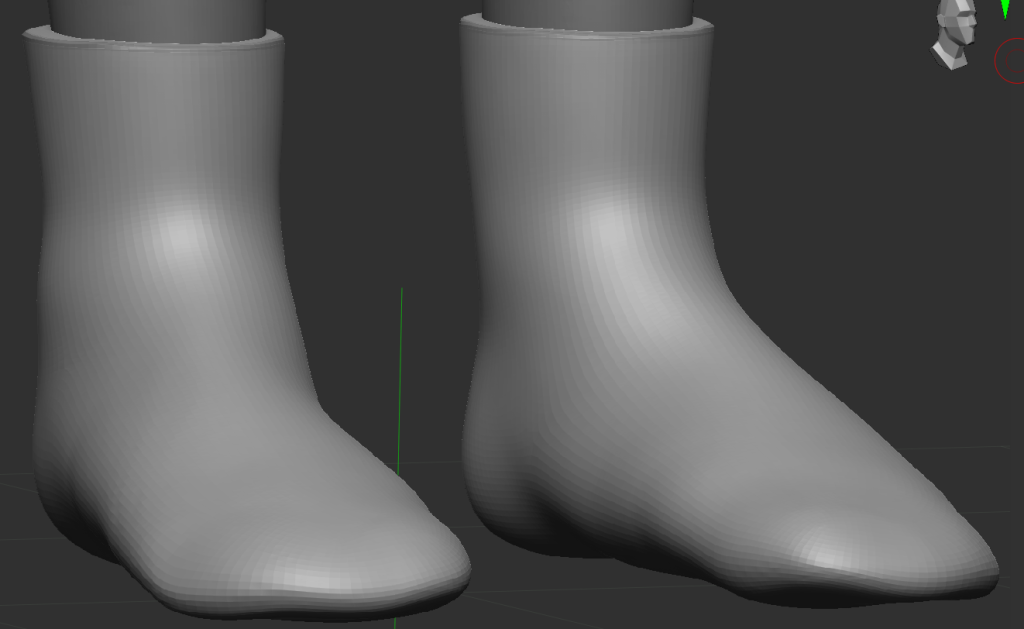
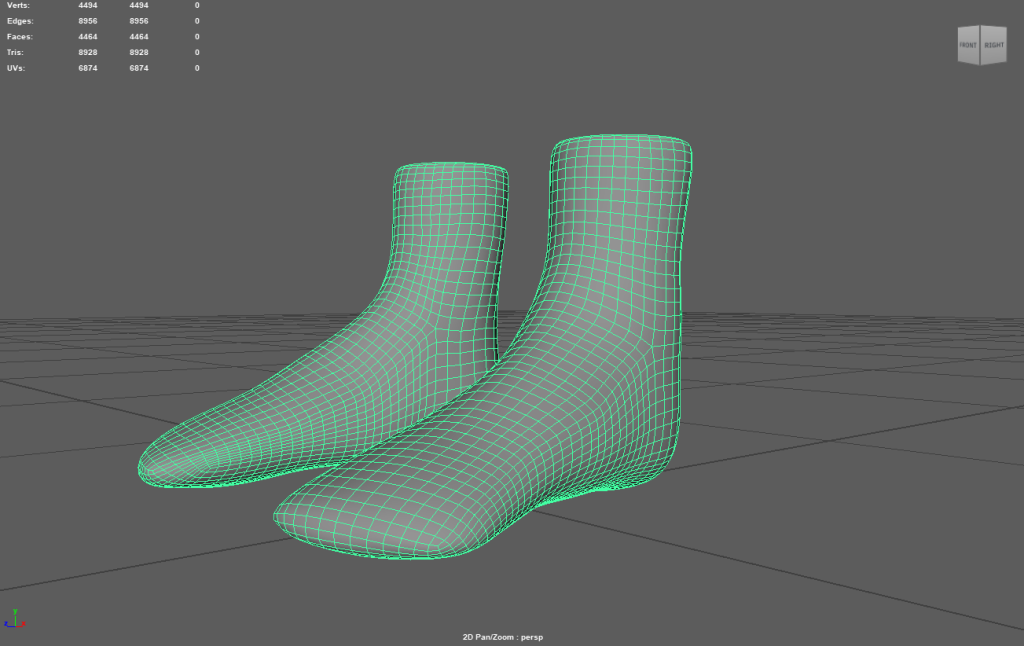
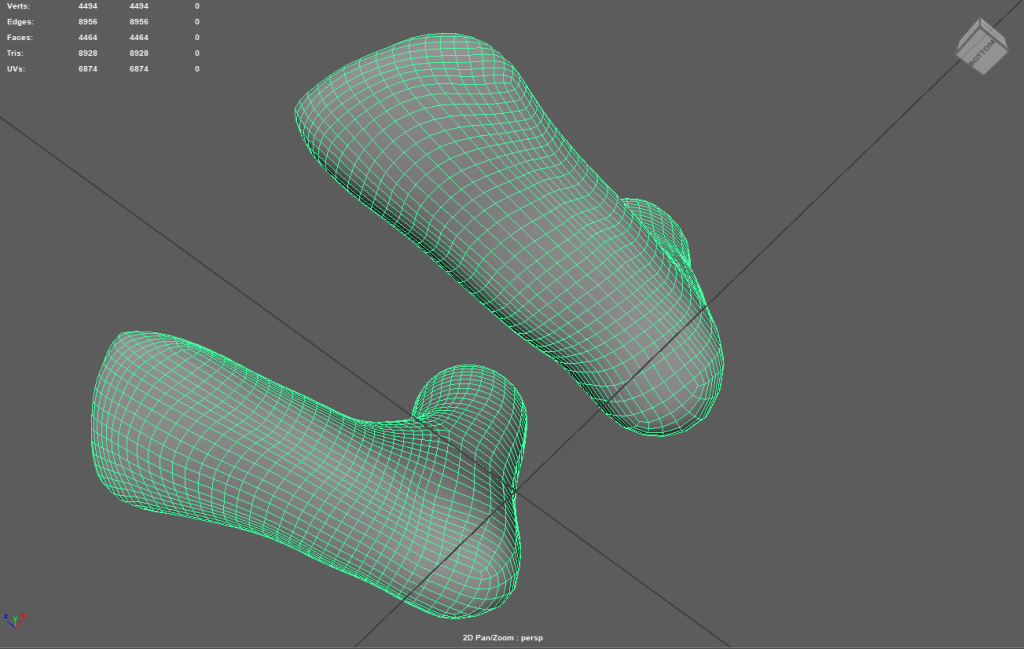
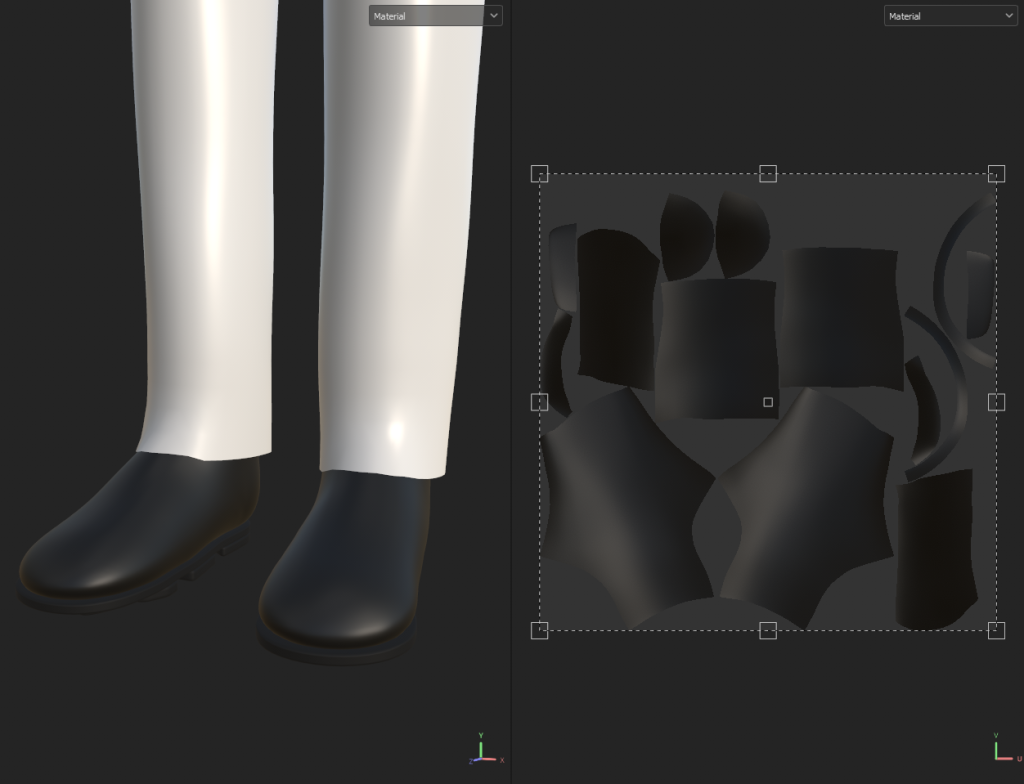
Through Mask Brushing and Extraction I made the Boots Socks that are attached to the boots but will be a separate grouped mesh, which can be edited and textured separately .
Then I added in the Boots Base. I went with a Flat Ankle Boot Design, this allows Aureline to still fight whilst wearing them since they don’t constrict Her when Moving. Even if the Boots are made of Leather.
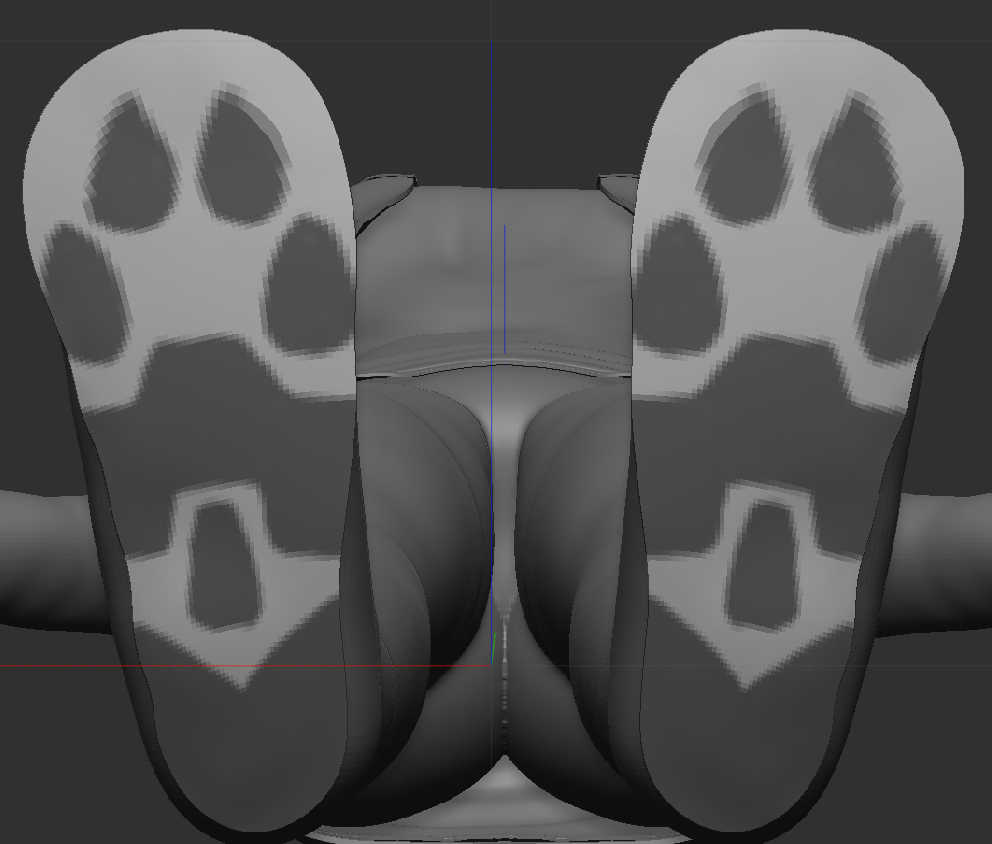
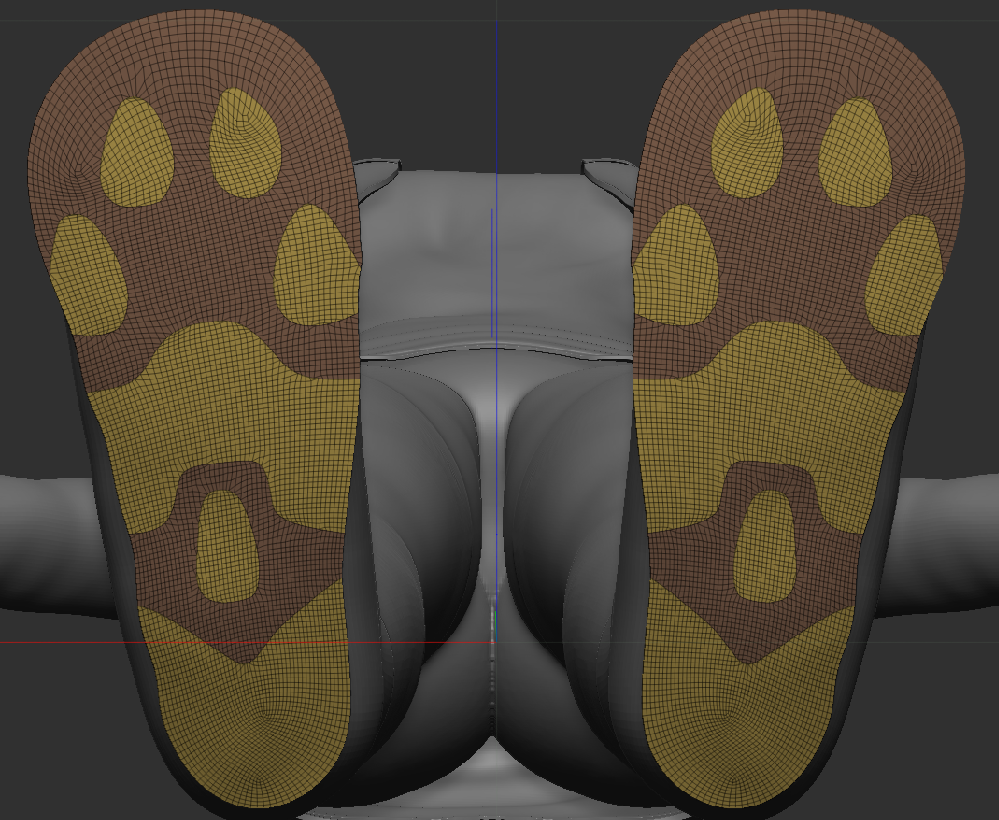
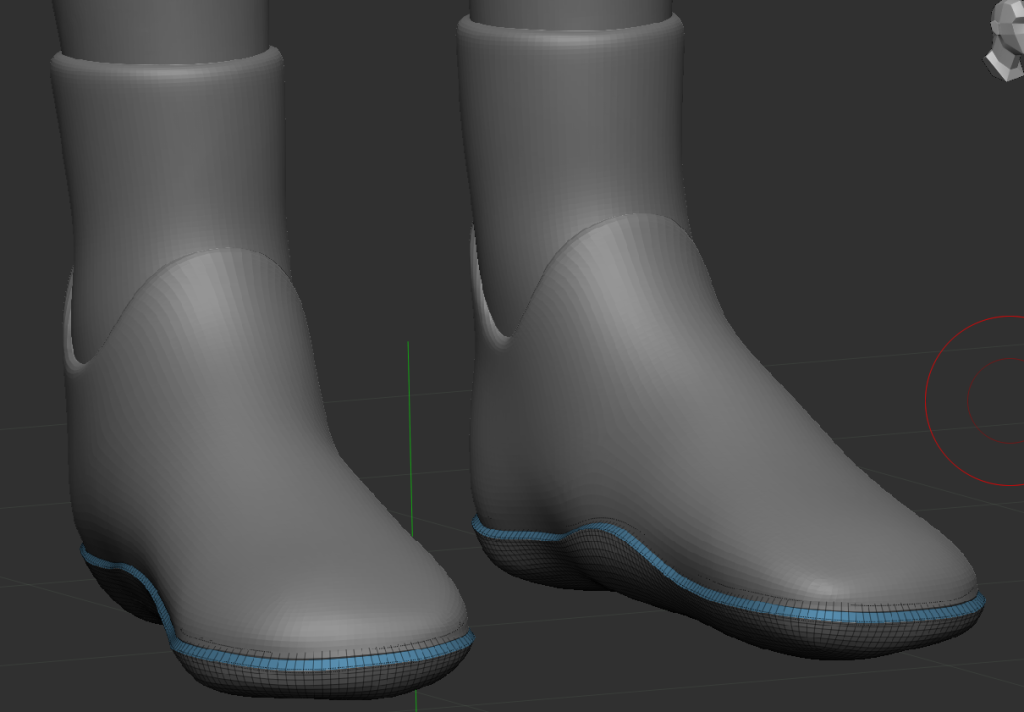
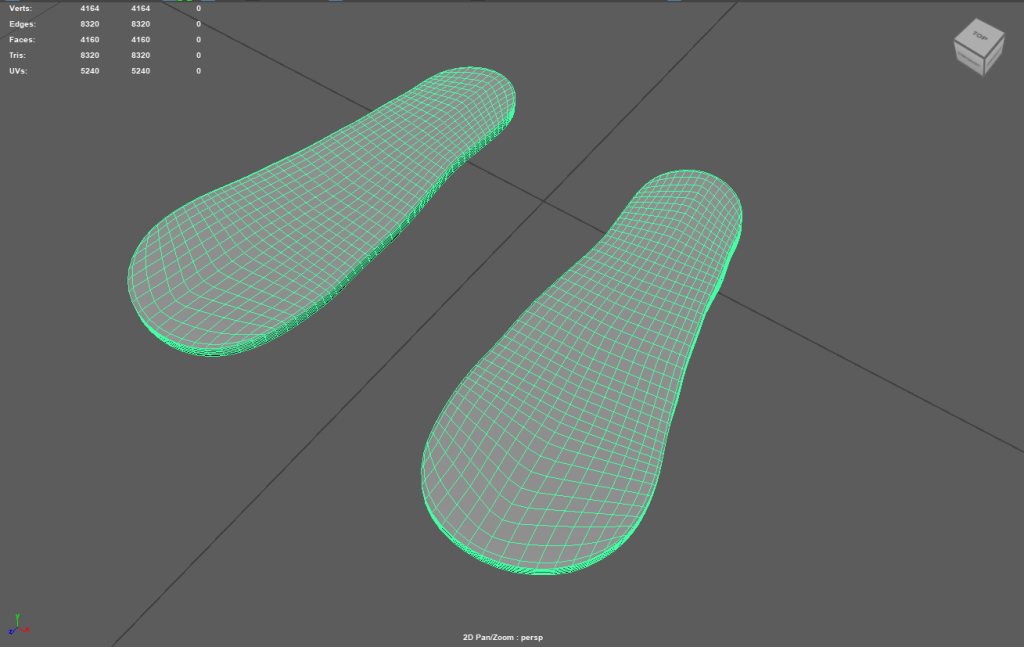
A Friend has sent me a picture of some Shoes with Paw-like Shape Soles. She thought since I’m going with a Demi-Human/Faunus, that this sole pattern would fit well with the theme. The Pic is shown below:
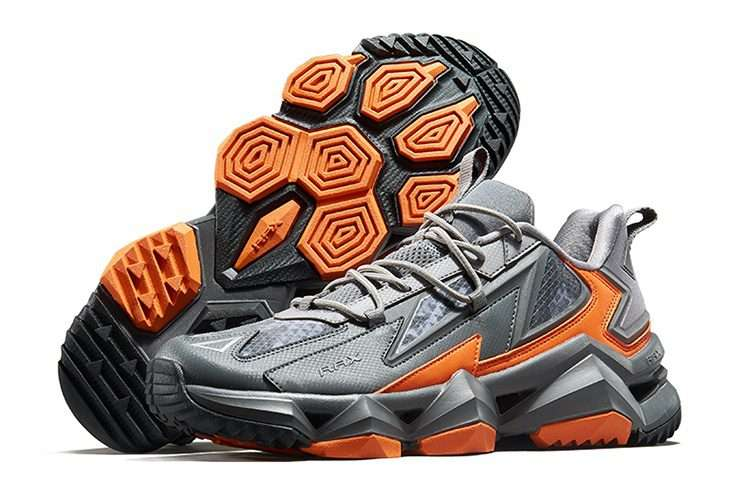
I decided to accept the picture and make these the soles of the boots. This makes these boots a custom-made with this sole instead of a basic flat one. It was a bit of a challenge to get it exactly the same shape, so I made a few modifications and made the sole flat instead of bumpy.
Since there is no need to go over detailed with the Sole because that’s not the main focus of the model. The Focus would rarely get that close to the Boots anyways.
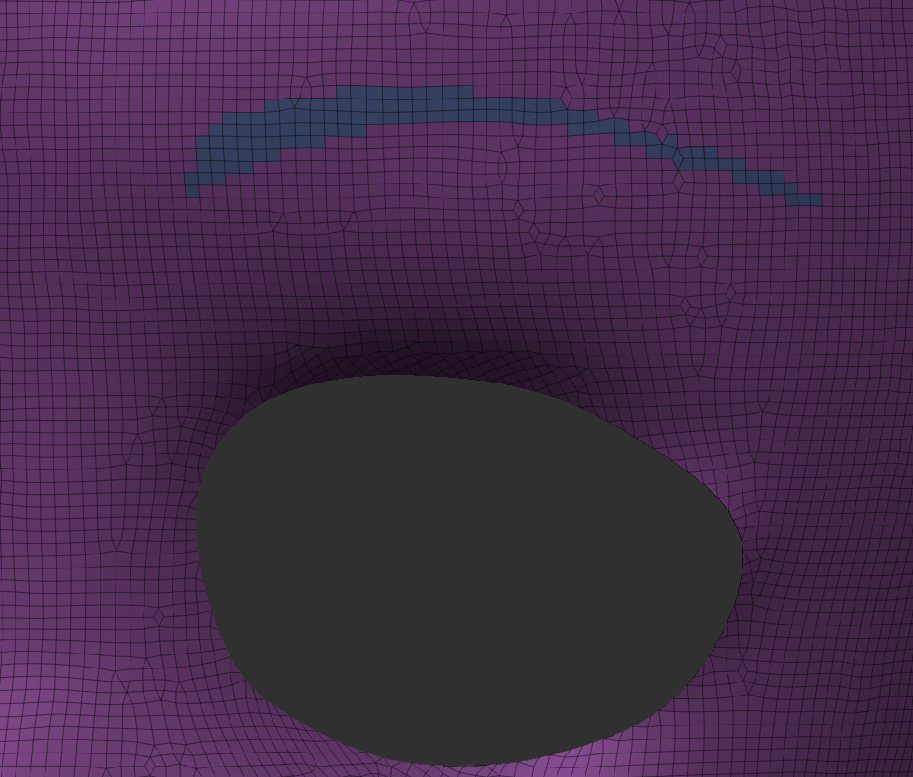
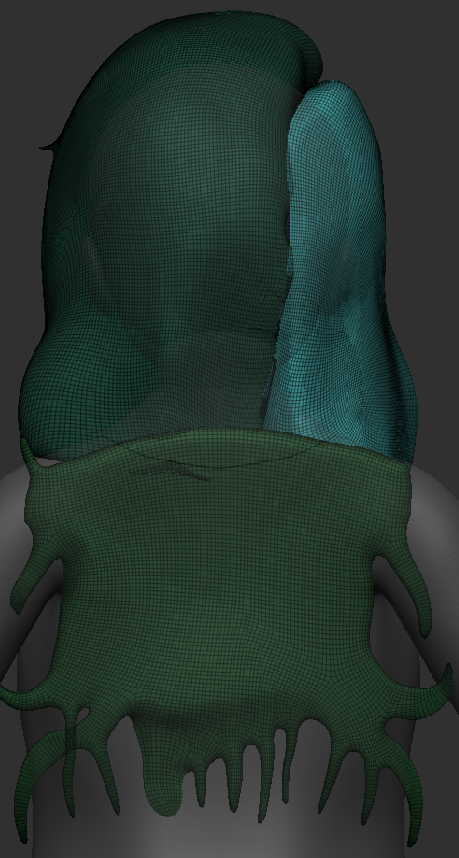
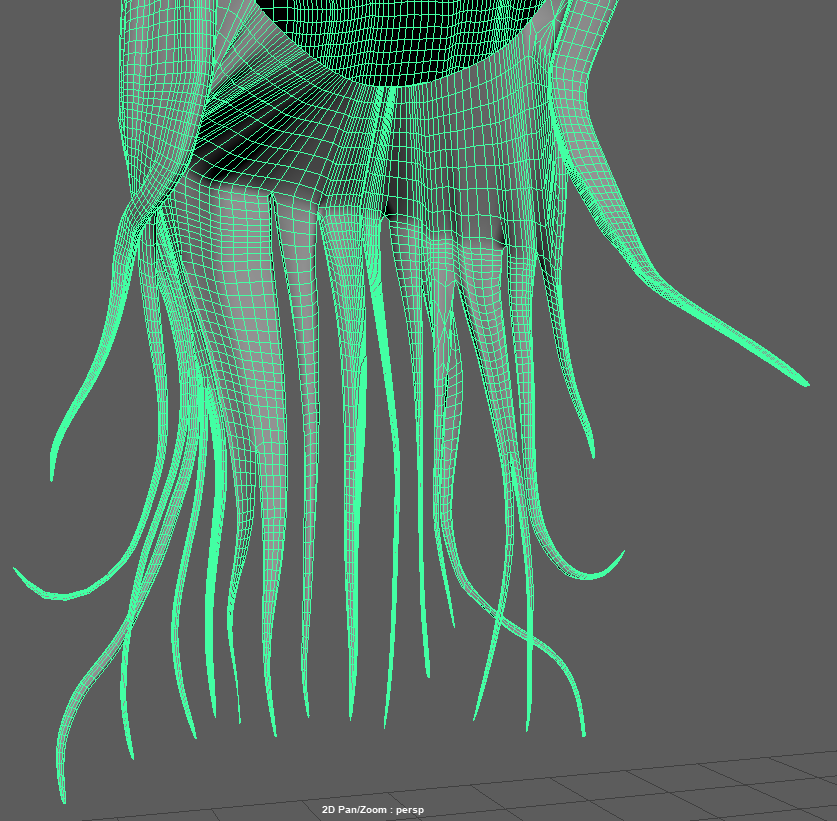
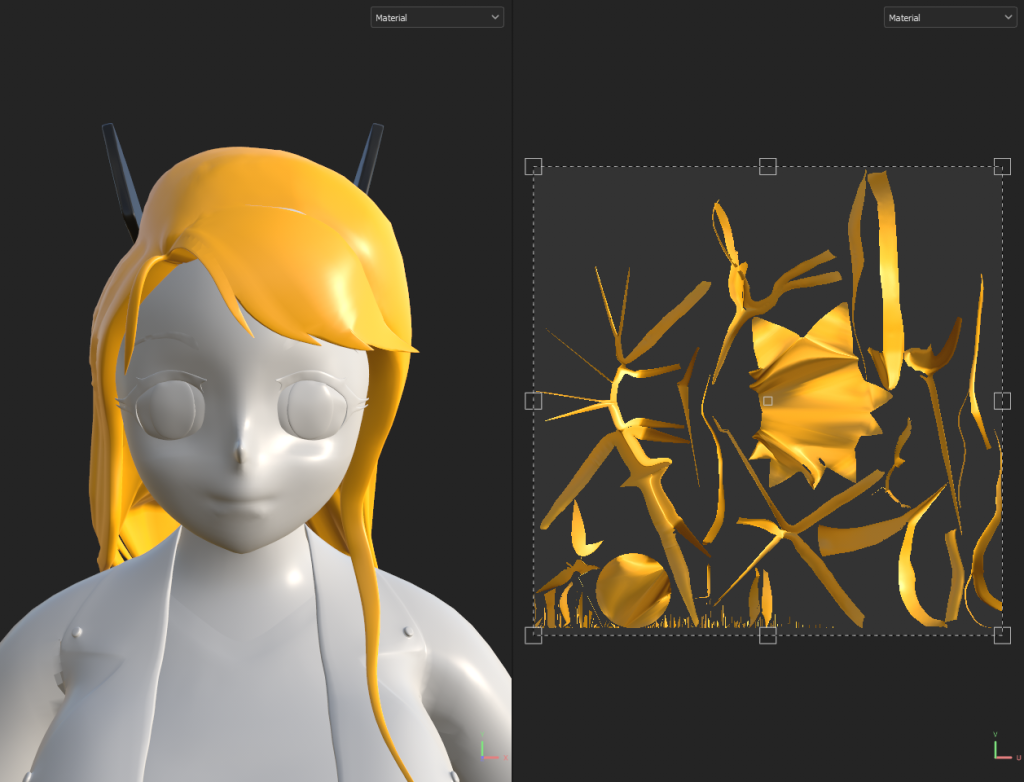
Now with all the clothes in, now its time to add the Hair. To make it easier, I used the Masked Brush to make a hairline and extracted into a grouped Mesh. Now I have a Mesh to branch the Hair Mesh off of, making for cleaner Hair strokes.
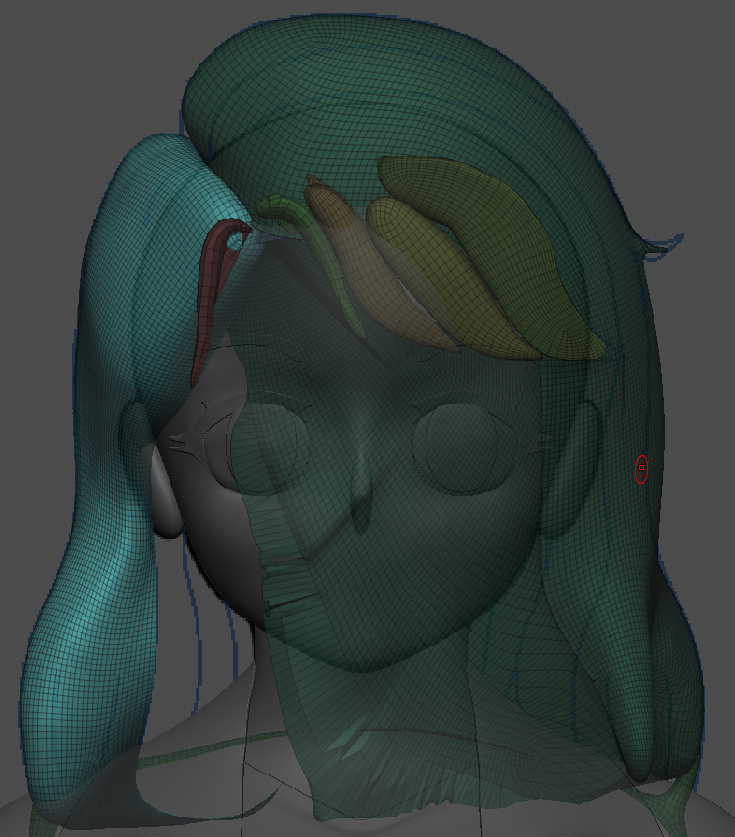
I quickly made a bunch of hair Meshes to get a rough Idea of what the hair will look like when matching my Character Reference Sheet.
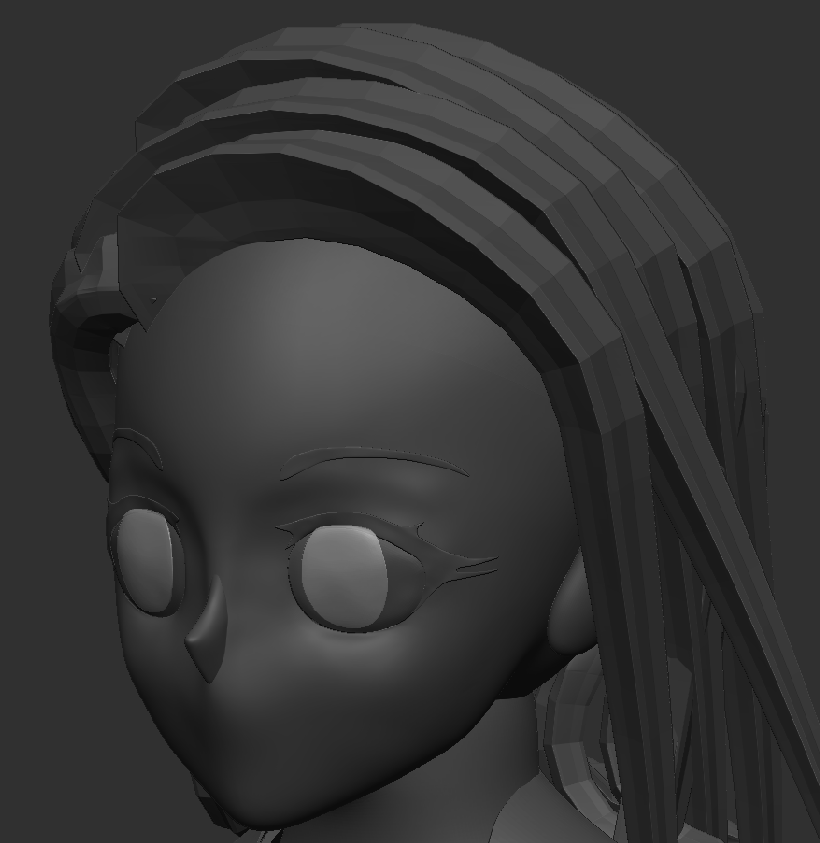
To help with the process, I was given a link to a Custom Hair Brush, that I can download for free. With this brush I am able to quickly make long strands of hair in just a few strokes.
Link to the Custom Hair Bush is in the description or can be found below:
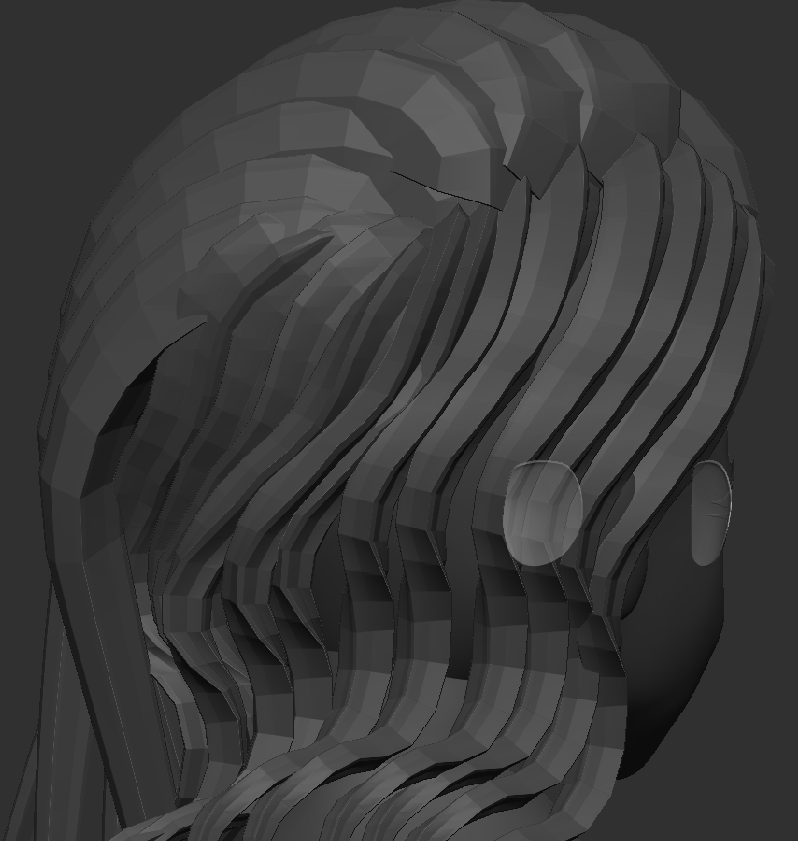
I went with bigger hair strands on the top of the head but on the side, I went with smaller strands to give a big combover style. You are able to see every individual Hair Strand and I like that look, So I kept that in as part of the hairstyle.
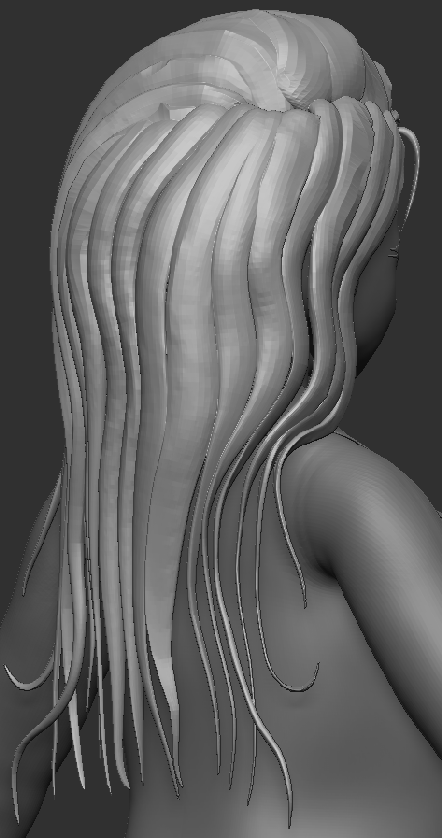
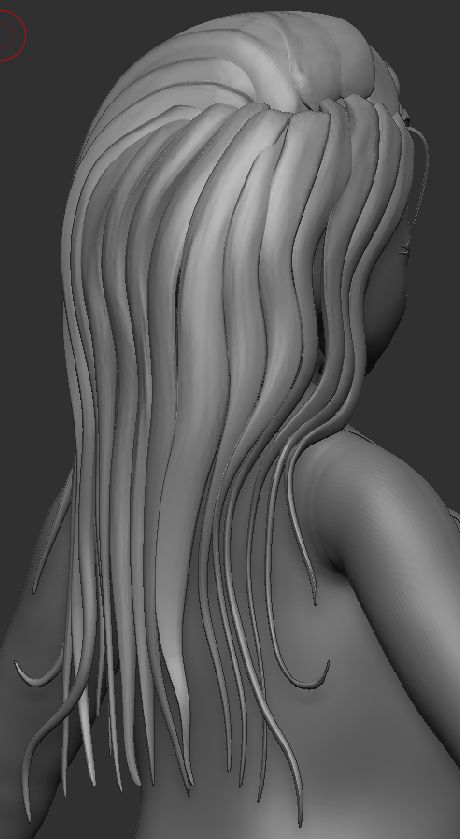
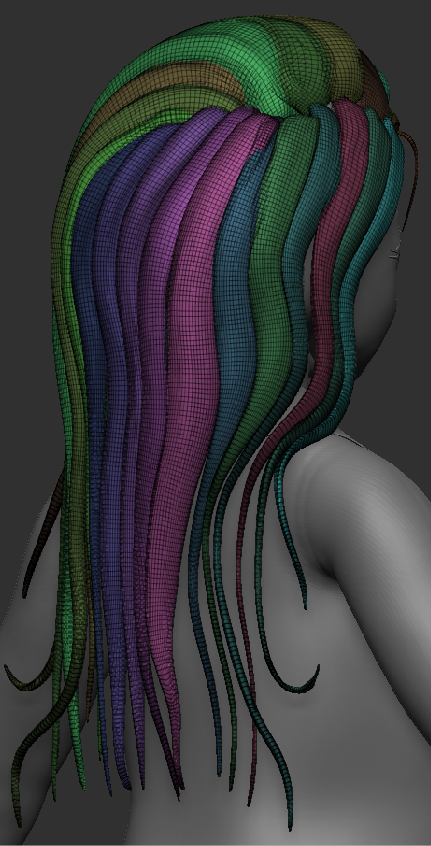
With a quick Dynamesh and ZRemesh, The Hair became more smoother and added in more faces to the Mesh. Plus the Gaps between the hair strands was still visible which I’m glad it did
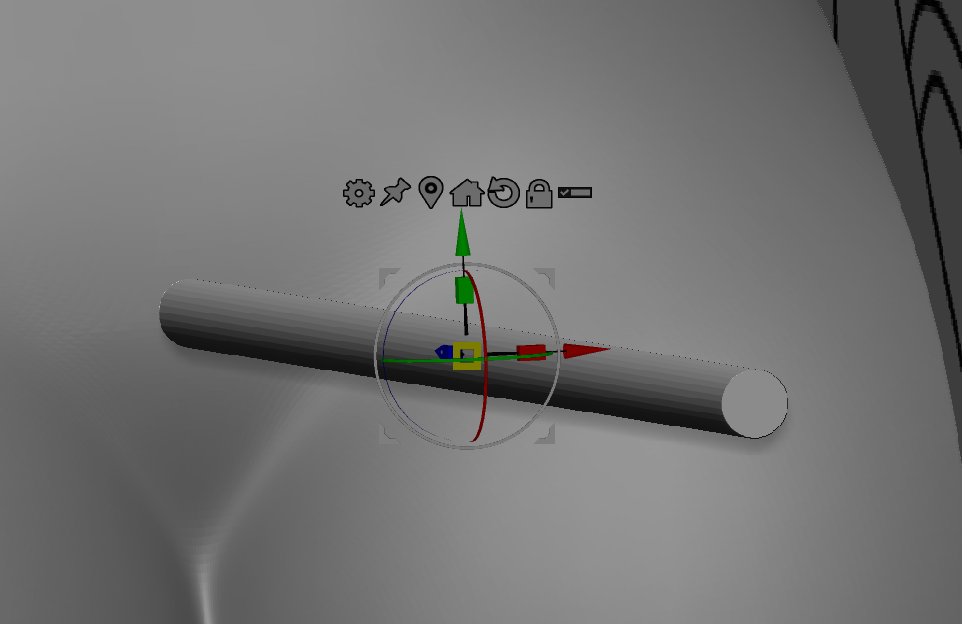
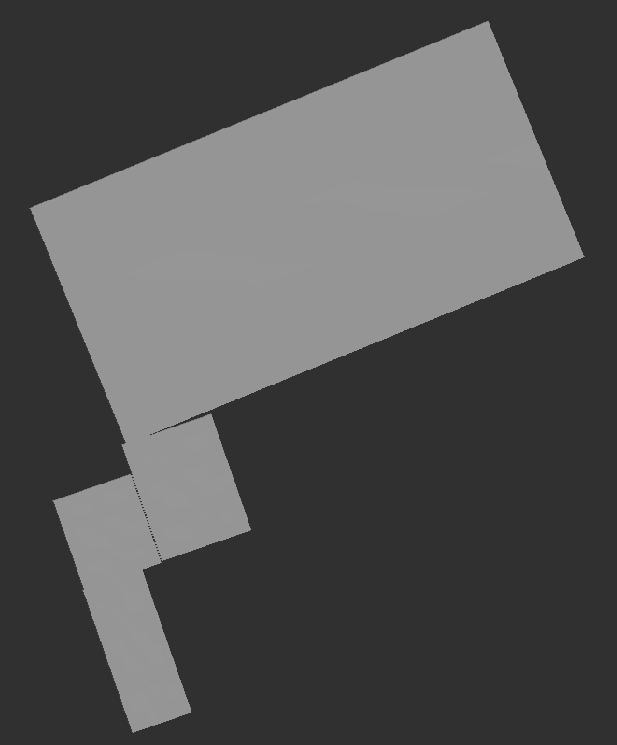
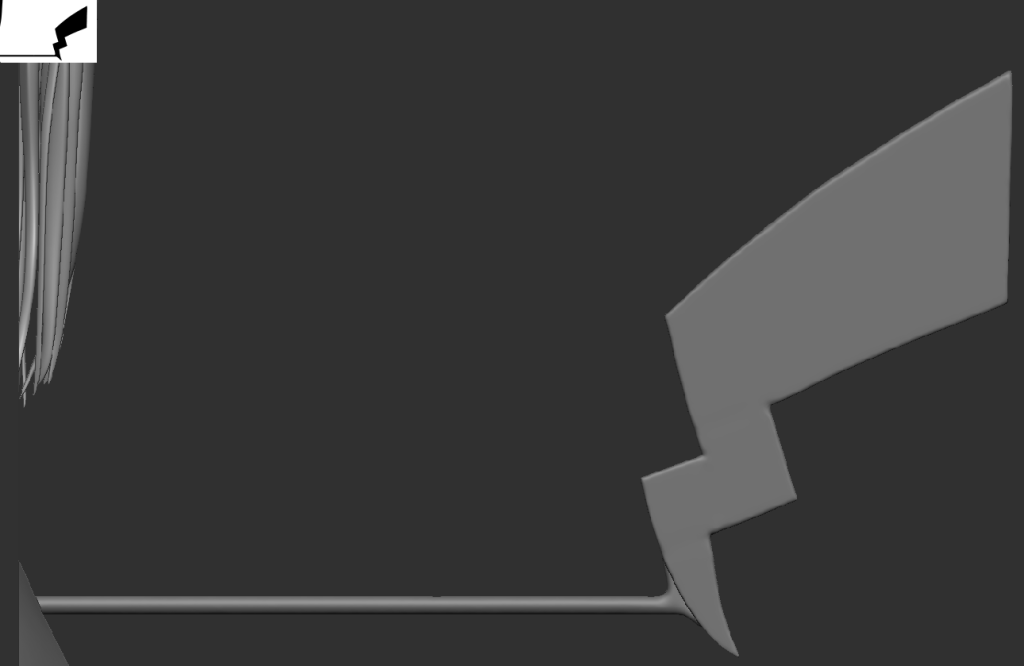
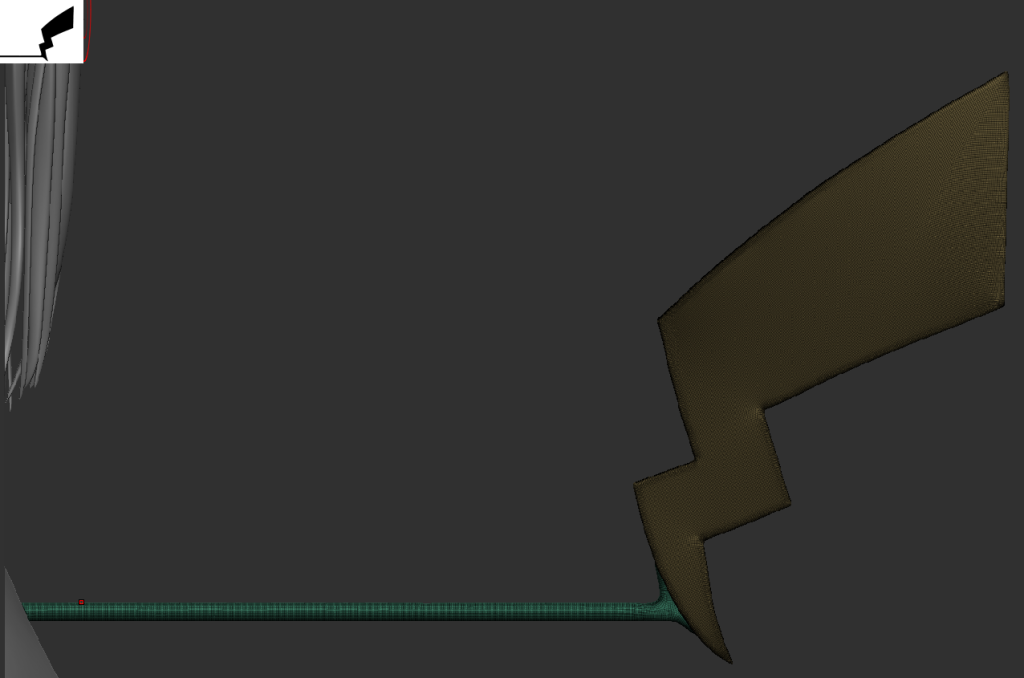
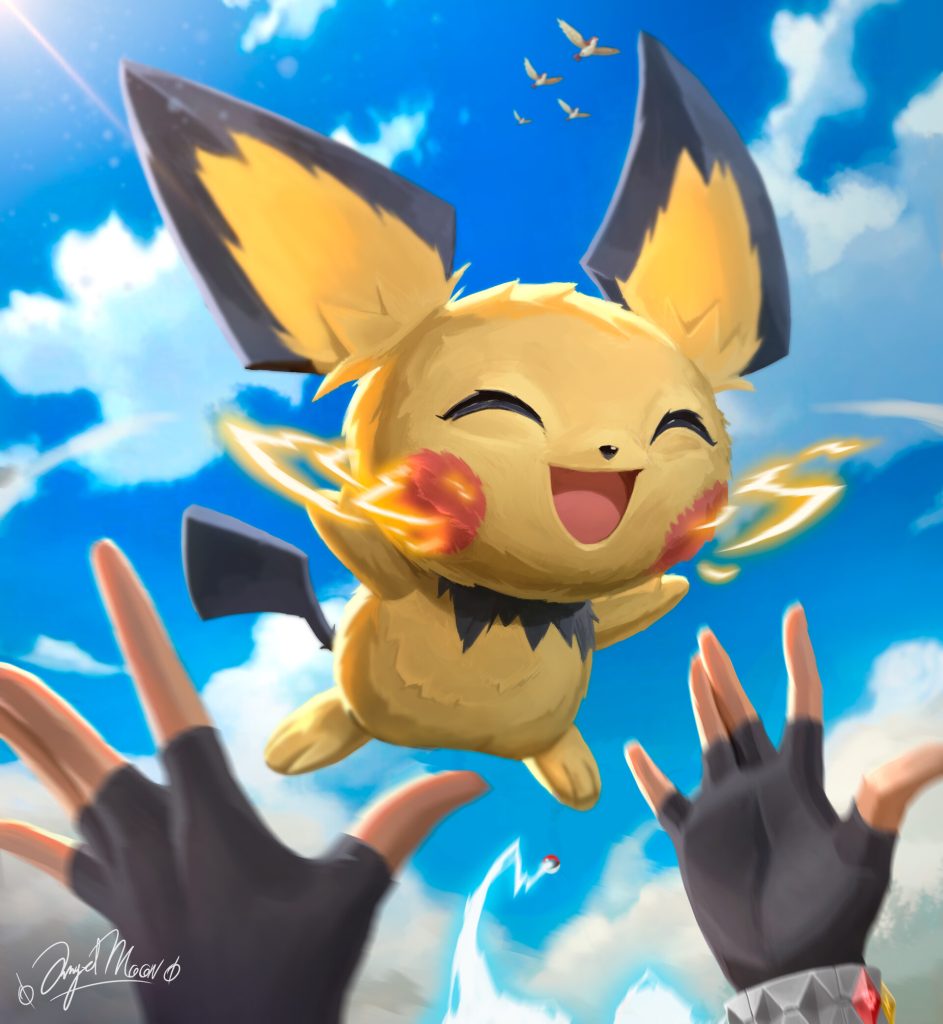
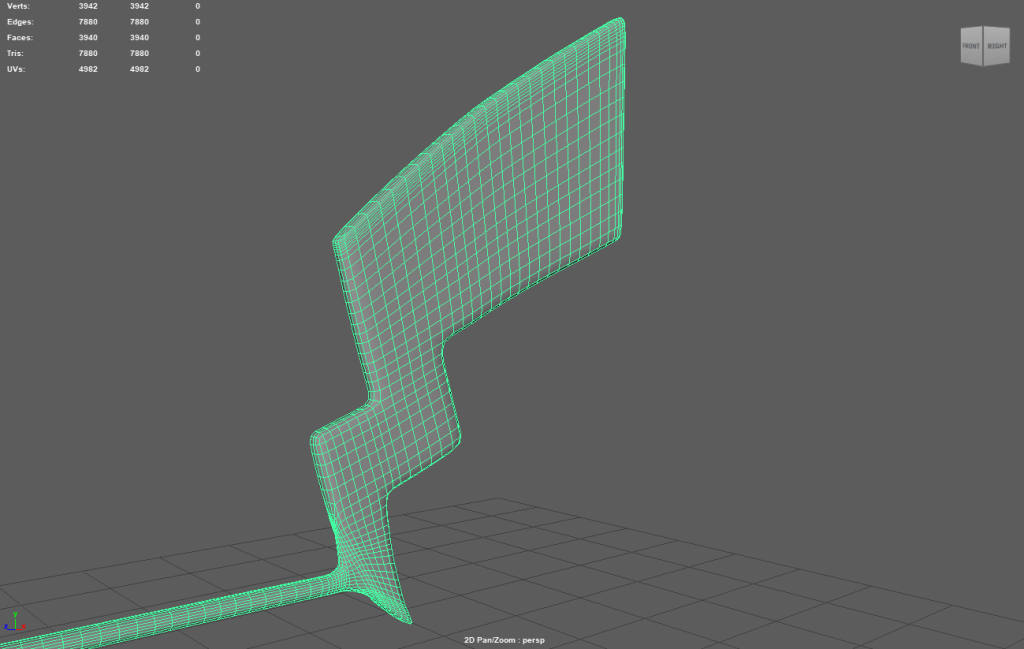
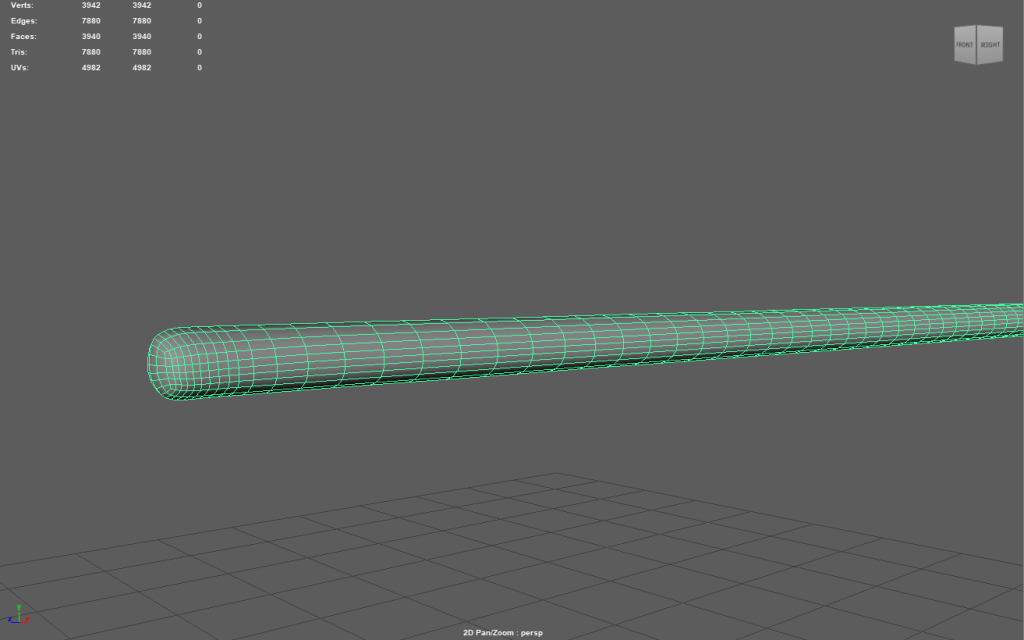
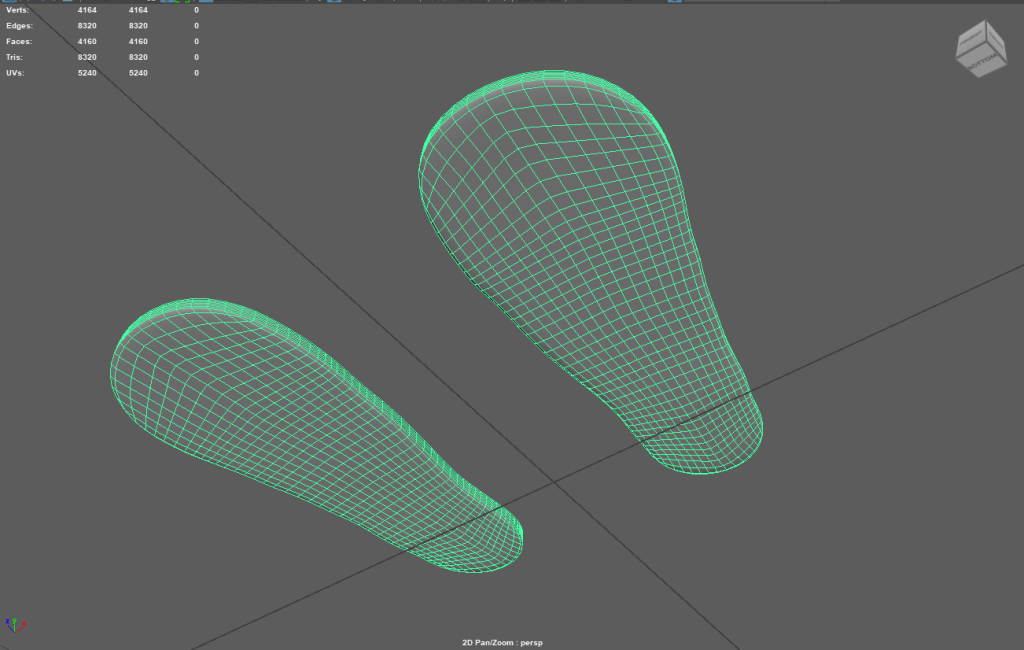
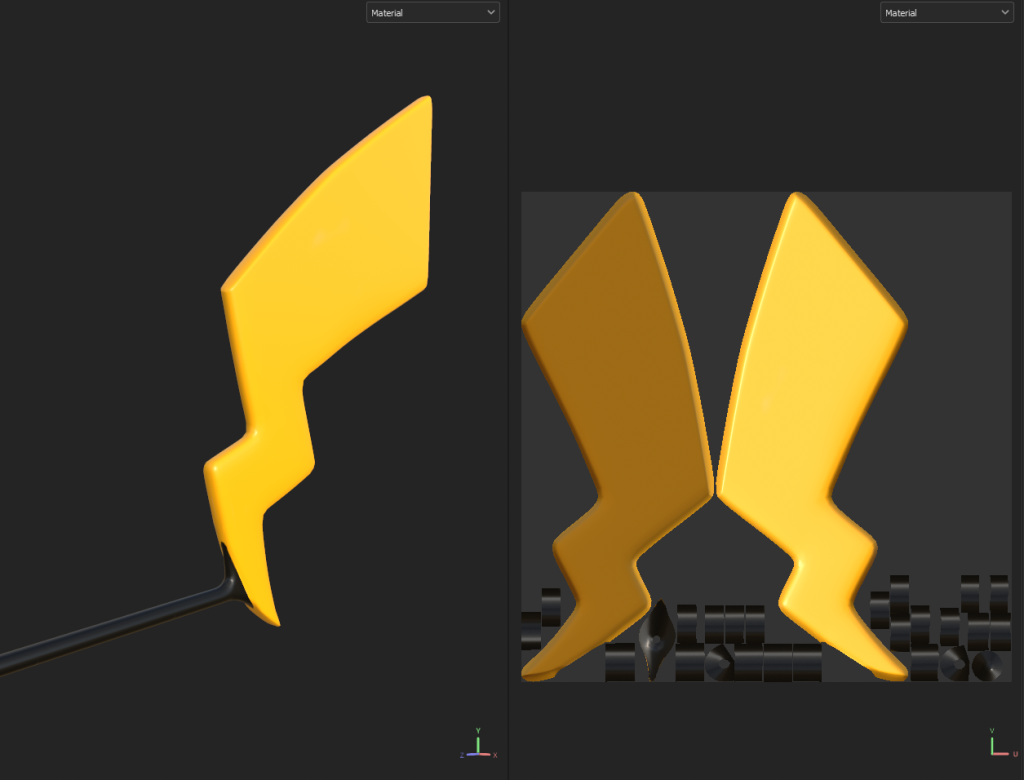
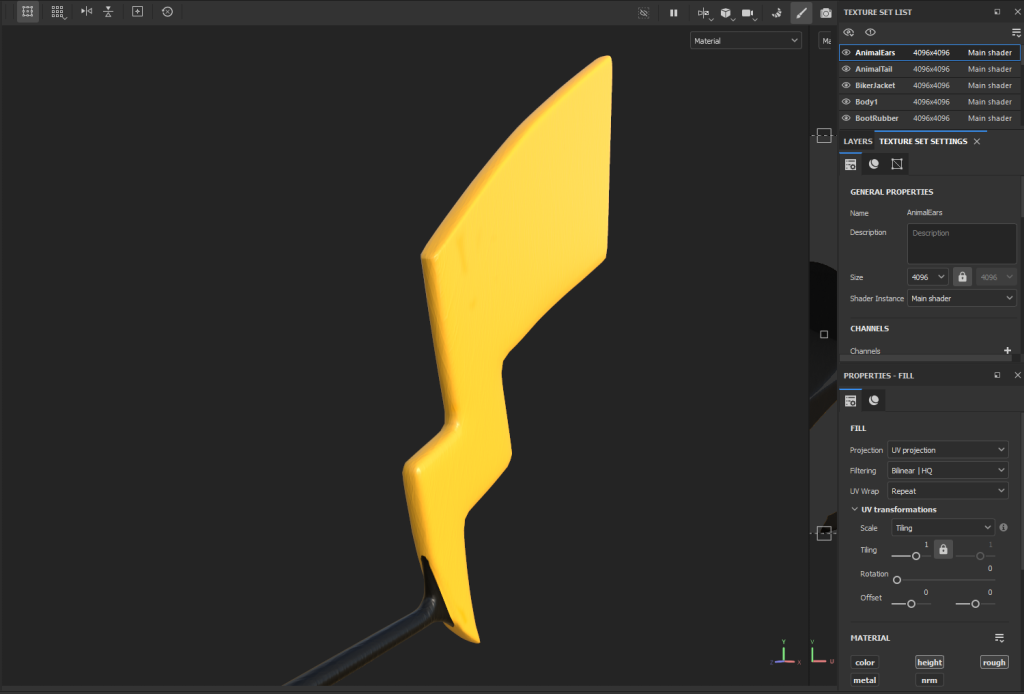
Now time to make and add in the Animal Tail. I used a quick cylinder and extended the Mesh with the Scale Tool. Then Using Four Rectangle Meshes to make the end of the Tail End. Yes its the shape a Pikachu Tail, one of my references I used at the start of the Assignment. (I do like the Pikachu Evolution design).
Pikachu Picture Here
Now having the Base and Tail End finished, Now I needed to connect them together, so I Made a slope on the end of the Base Tail Mesh to ‘Connect’ with the Tail End.
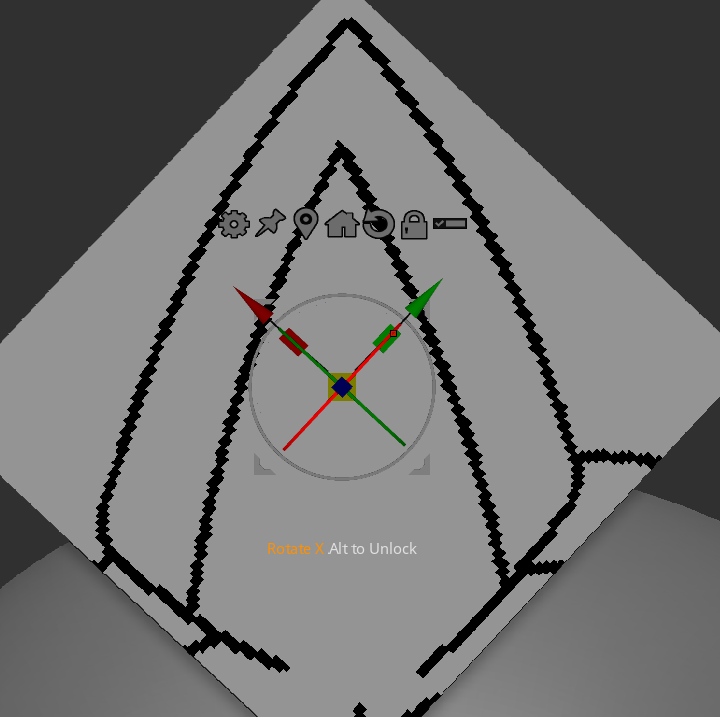
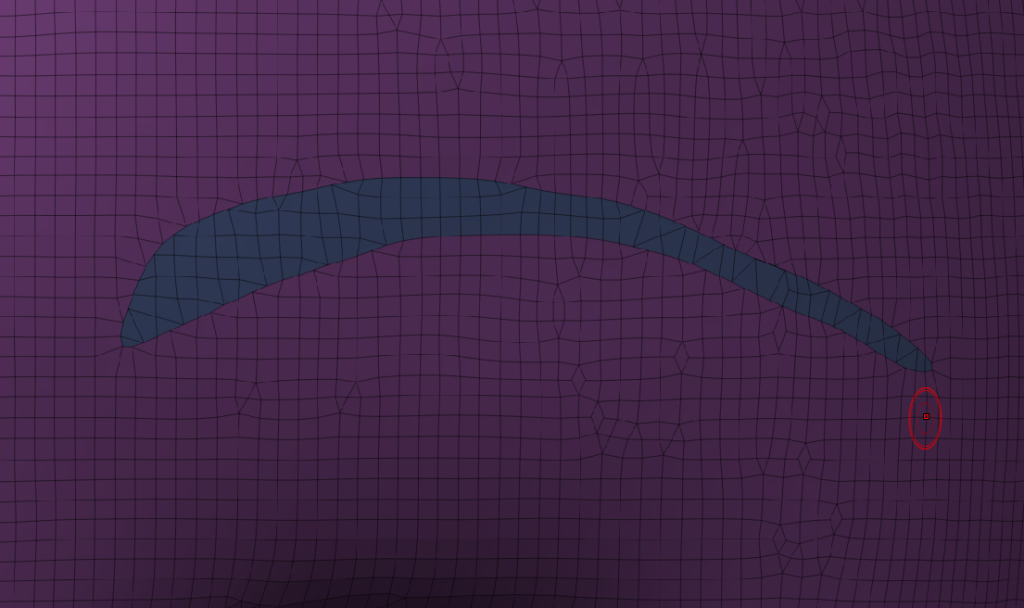
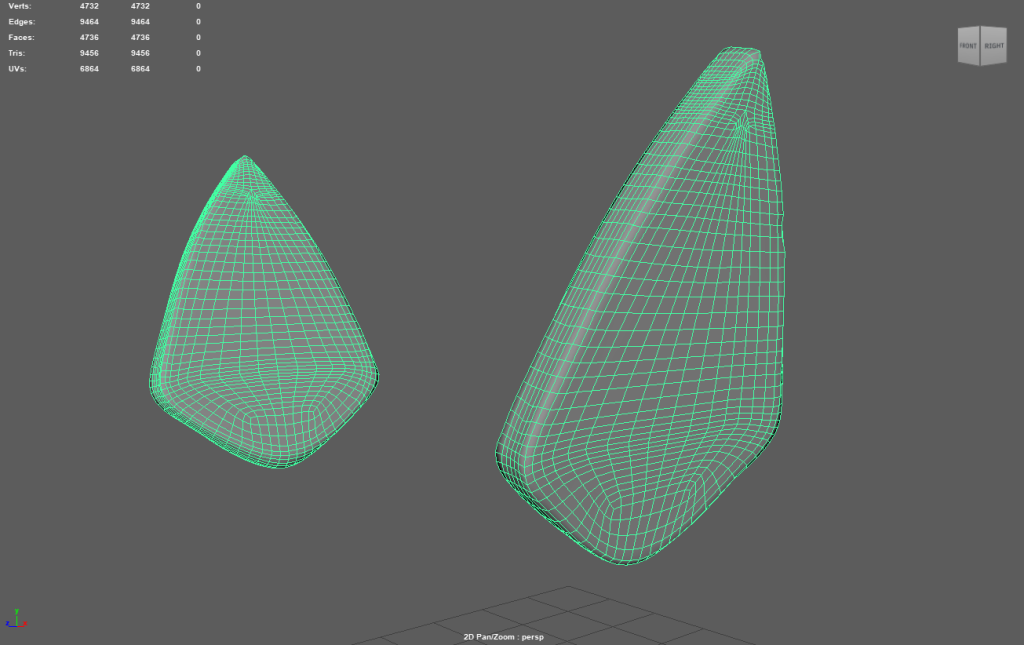
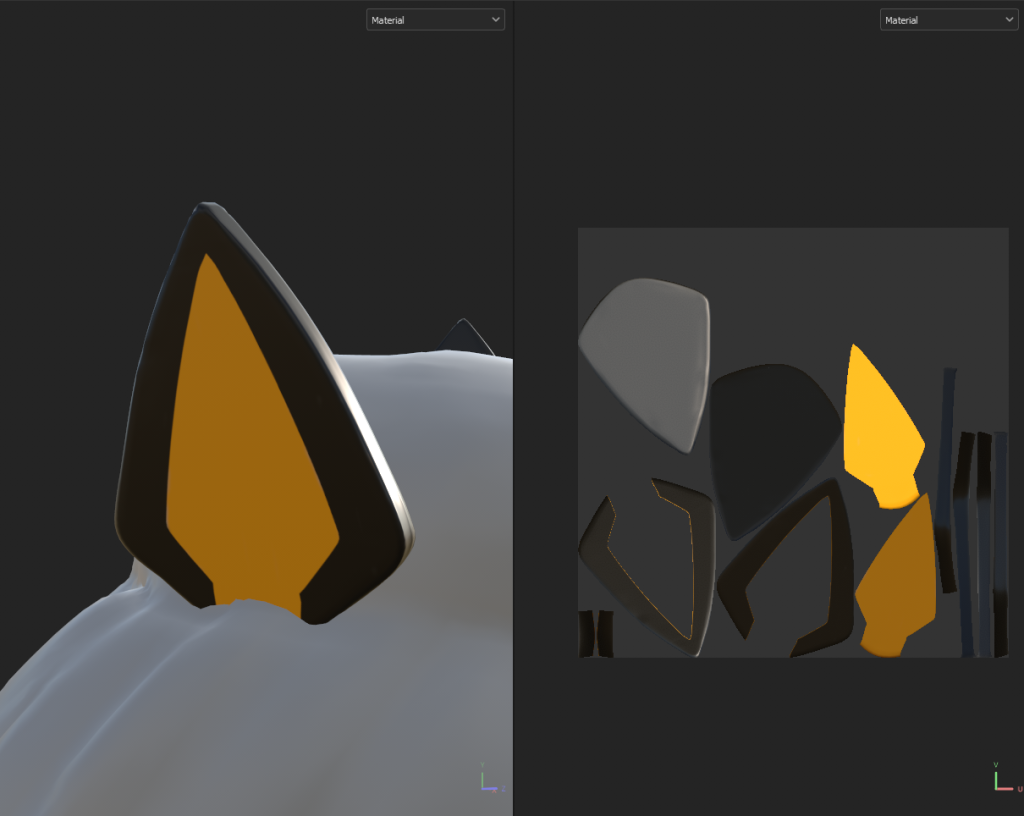
Using one my Aureline Musashi Sketches, I snipped out the Ears she has as a reference to help make the Animal Ears. The current Character Sheet did not have the ears, just the Tail. So the Snip of the Ears can do.
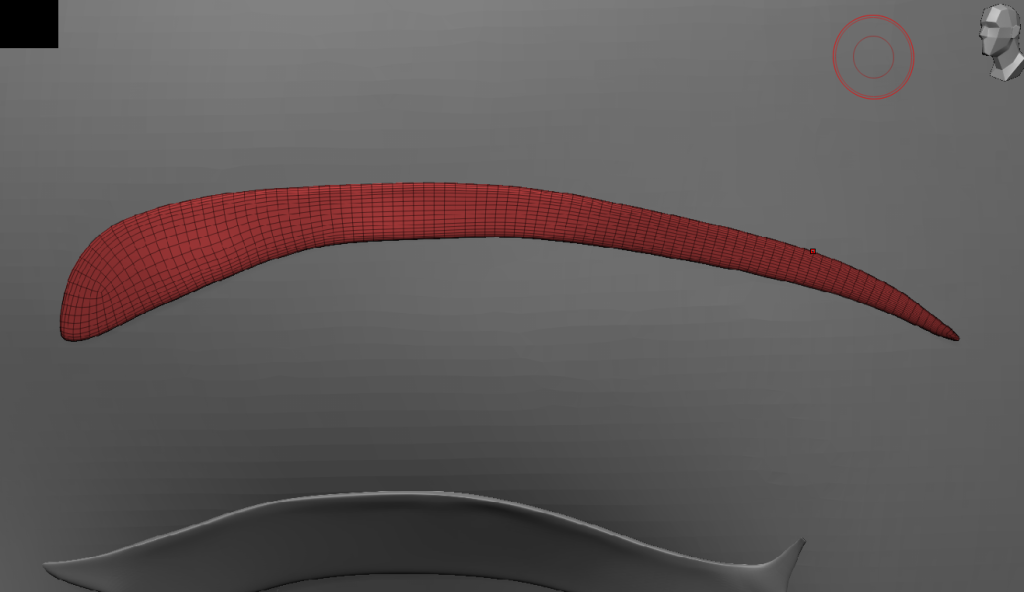
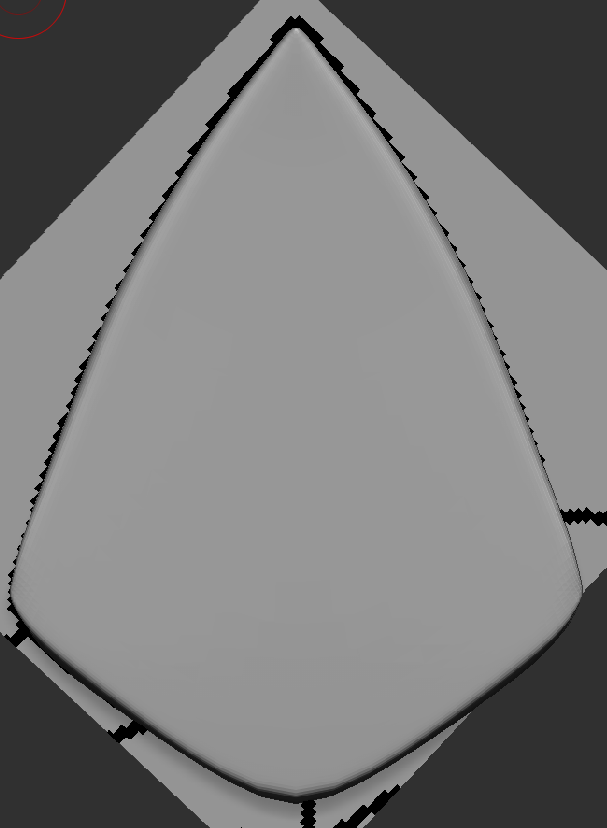
Using a Square Mesh with the Move Topology Tool, I moved the corners to match the Reference. Masked out the area to be separate, extracted and used the Group Smooth Tool to make the Faces near the top more sharper.
Now I have my Custom Pichu Ears ready and set.
Pichu Ears Picture here
Decimation
Here is a video that helped me better understand Decimation and learning step by step on how to Fully Decimate my Model

In order to move my Model into Autodesk Maya, I will need to decimate my model. The Model’s Topology Point count was 9.2 Million, Yikes. First in the Decimation Master, I will need to pre-process all my meshes in order to have them all ready to be decimated.
My Lecturer wanted me to aim for 500,000 Points via Decimation in order for Maya not to explode (Maya can just handle under 1 Million Points). With the power of decimating all of them, then individually that I don’t think needs to be as high quality.
I was able to get around 509,000 points which is more than good enough for Maya to handle. Now with that, I am able to send my Model over to Autodesk Maya for Retopology.
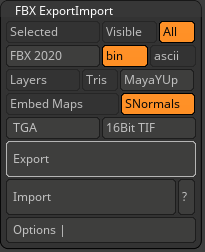
In the FBX Export/Import List, I click on Export to then Turn my Project into a FBX Folder. Maya accepts FBX files to be imported into its software. Now its ready to be launched into Autodesk Maya.
Autodesk Maya
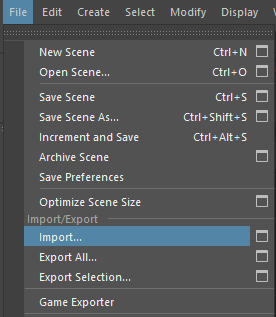
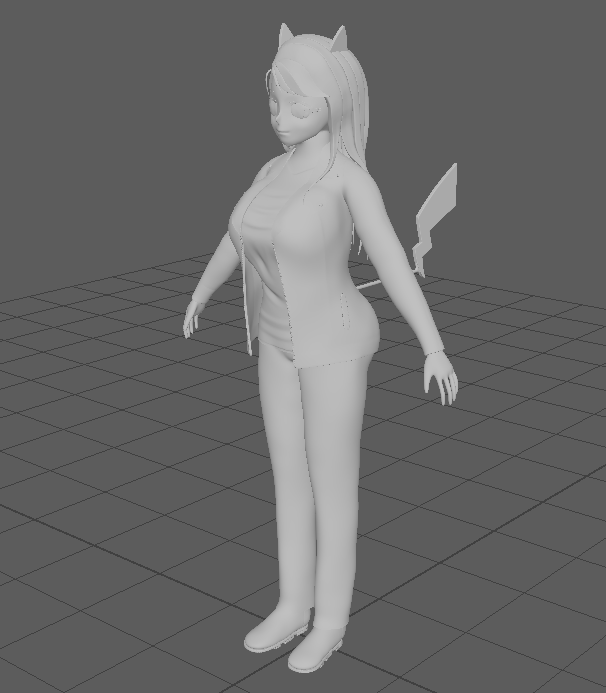
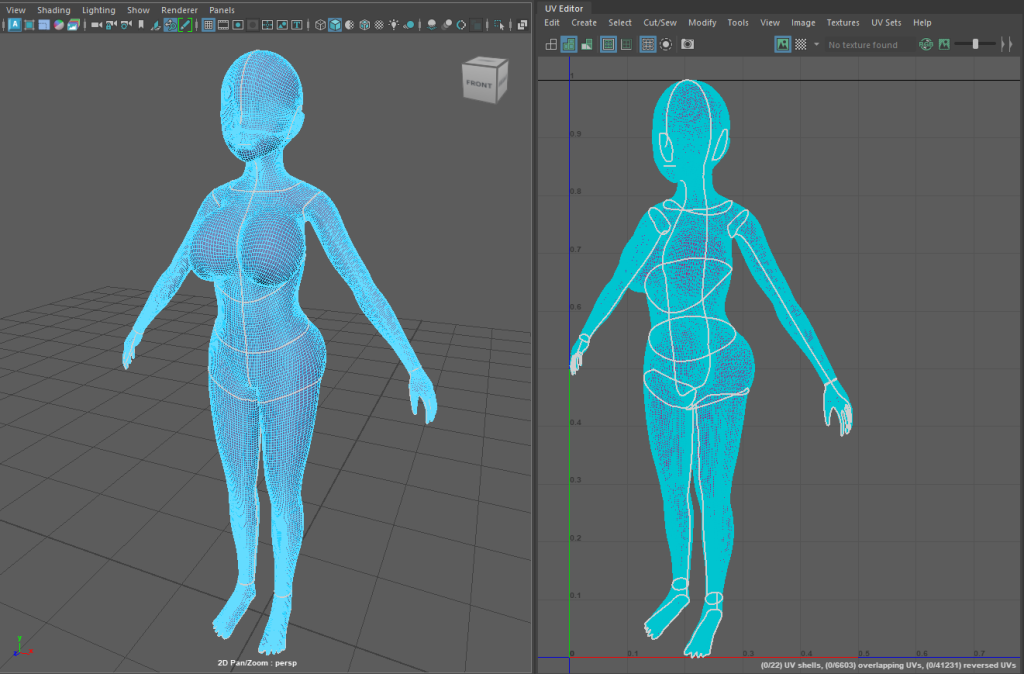
Going into File – Import…, I selected my FBX Project Folder to be uploaded into Maya. Few moments later, My model appeared on the Grid, ready for some Retopology.
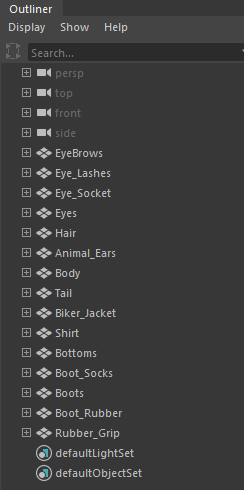
Looking at the Outliner List, Maya was able to point out every Mesh created from ZBrush and the names I gave them. Having them all separate will help with the Retopology process.

In order to start Retopology, I need to make the Mesh that I want to start with first, become live. Making a Live Object helps with creating the Faces because it will auto detect the Mesh surface for you to start drawing on.
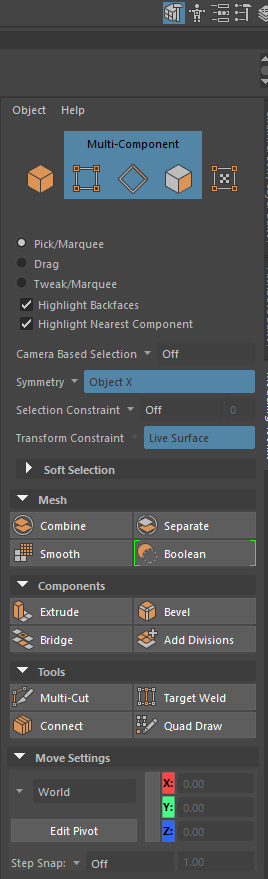
This is the Retopology Toolkit, with this I can start to create the Poly faces. Quad Draw will be the most used in the kit given, along with the Mesh Smooth Tool to help with smoother Retopology.
With Quad Draw, Click on the Surface to make a dot. Make Four dots then hold Shift and Click in the middle of the dots to make a Poly Face. Whilst holding TAB, click on any side of the Poly Face and drag across to make another instant Poly Face.
Always try to draw with Quads, try to avoid Tris as much as possible.
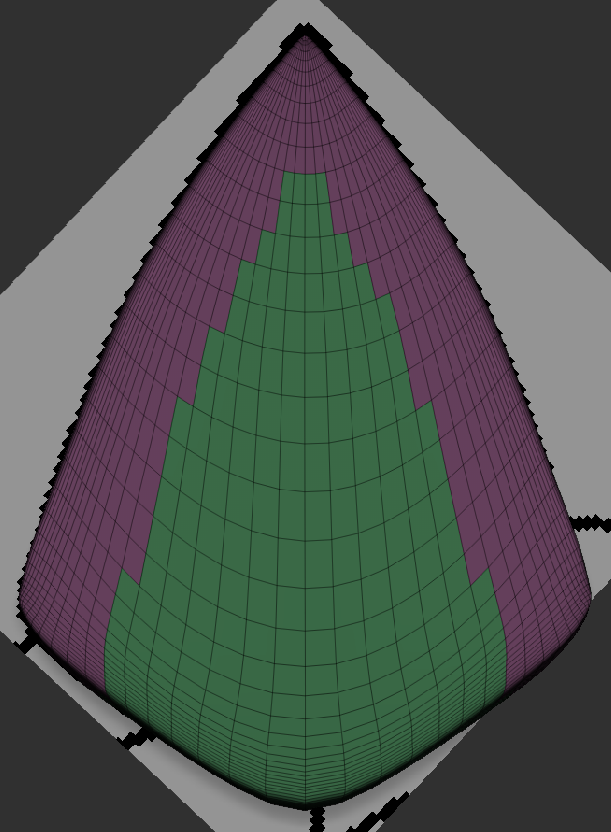
Retopology
Here some videos that gave me help towards my design, learning the tools and using tips and tricks to making Retopology a faster process.
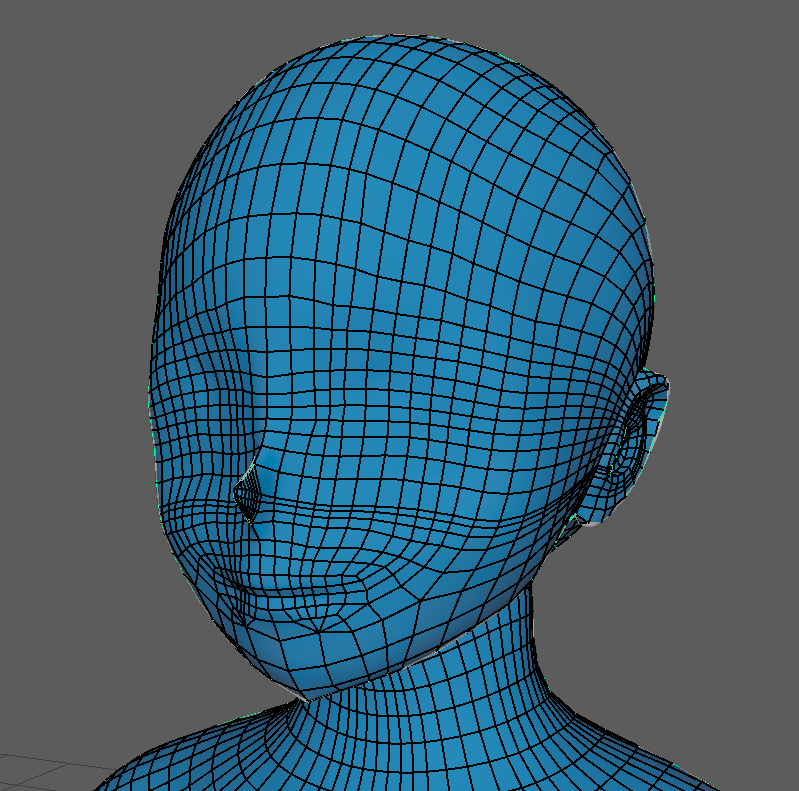
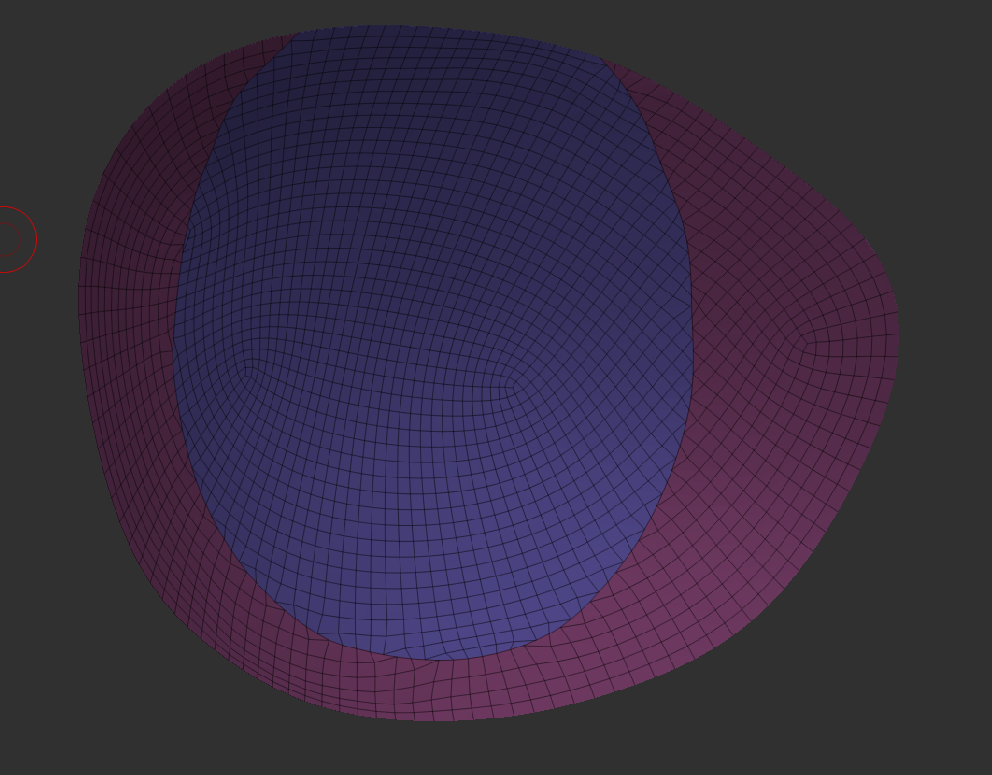
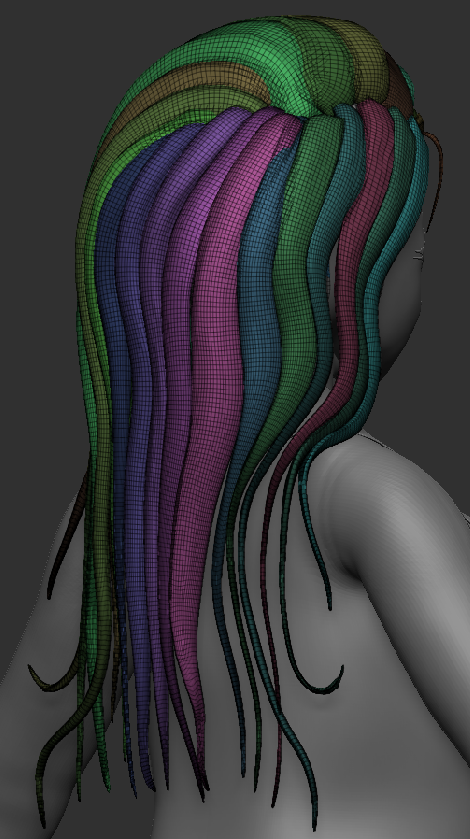
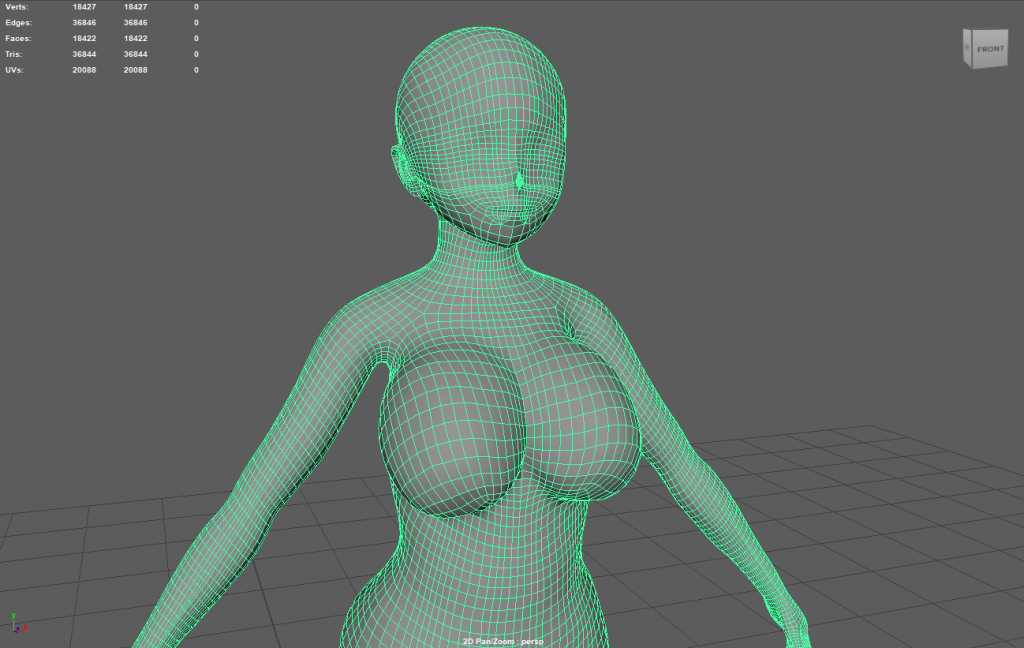
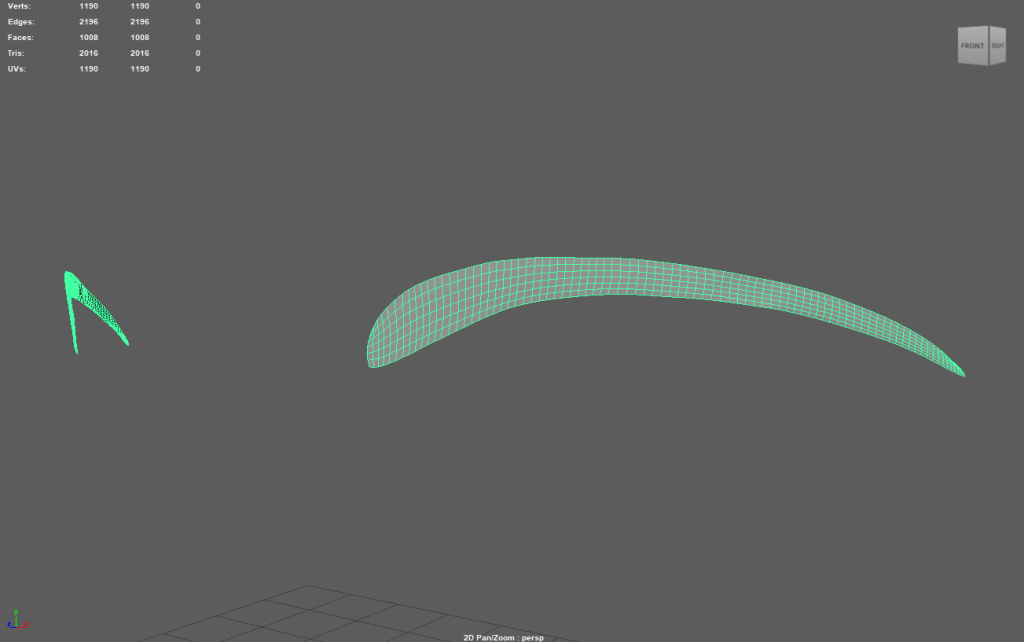
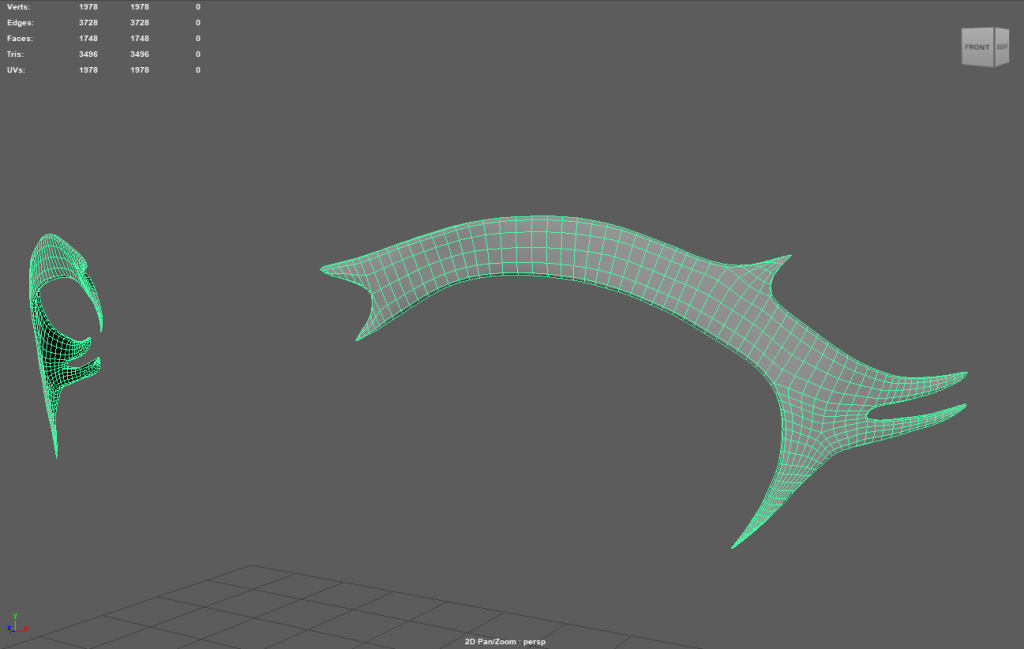
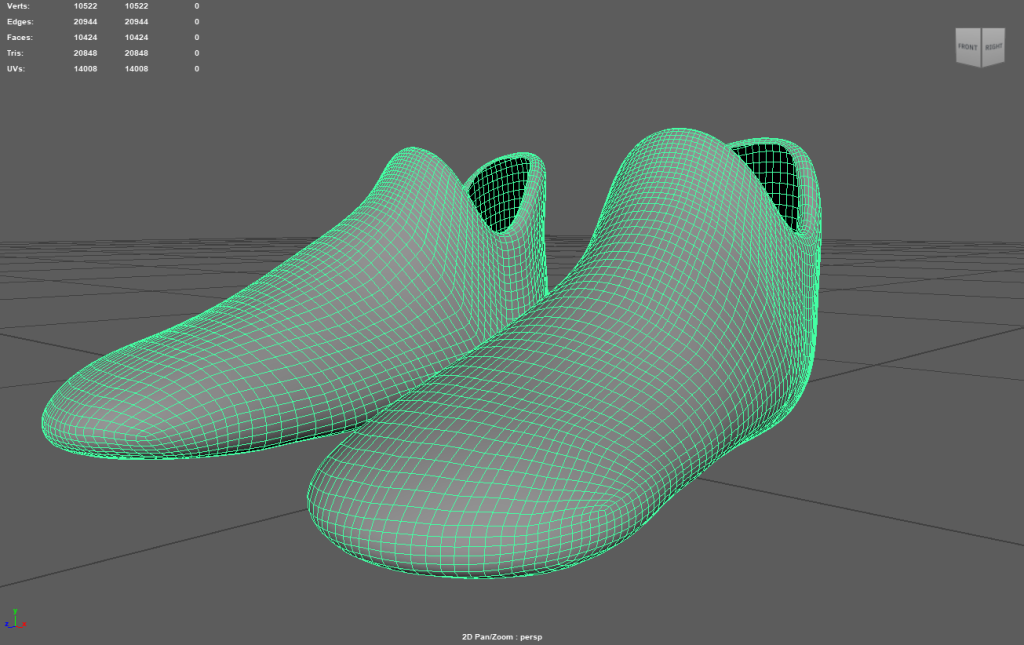
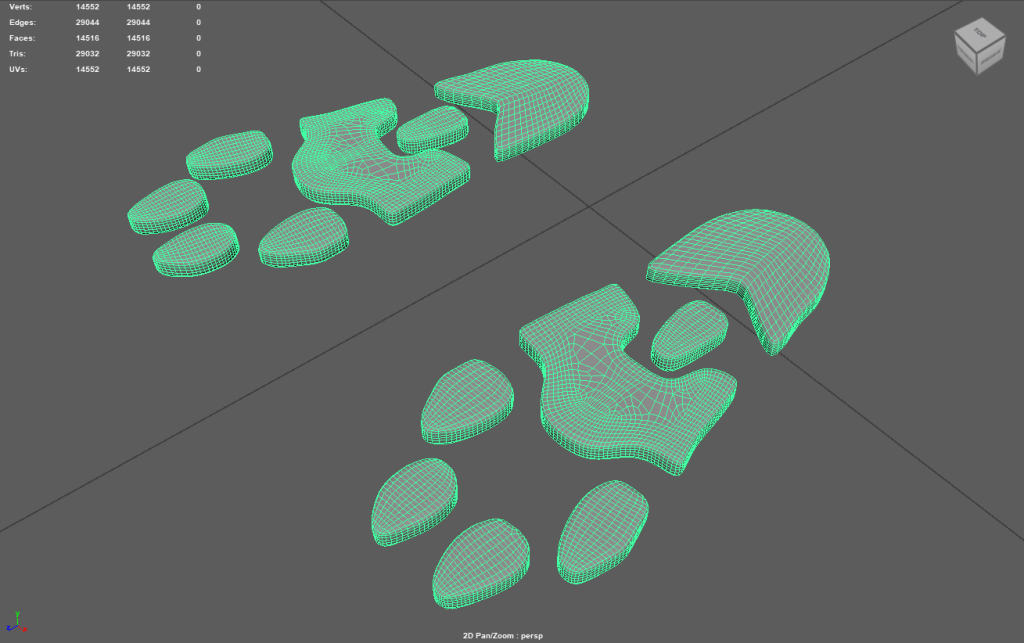
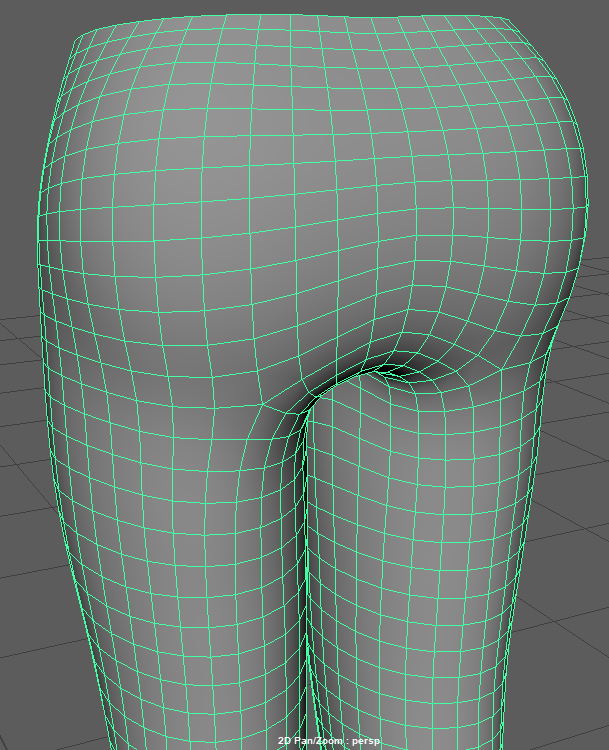
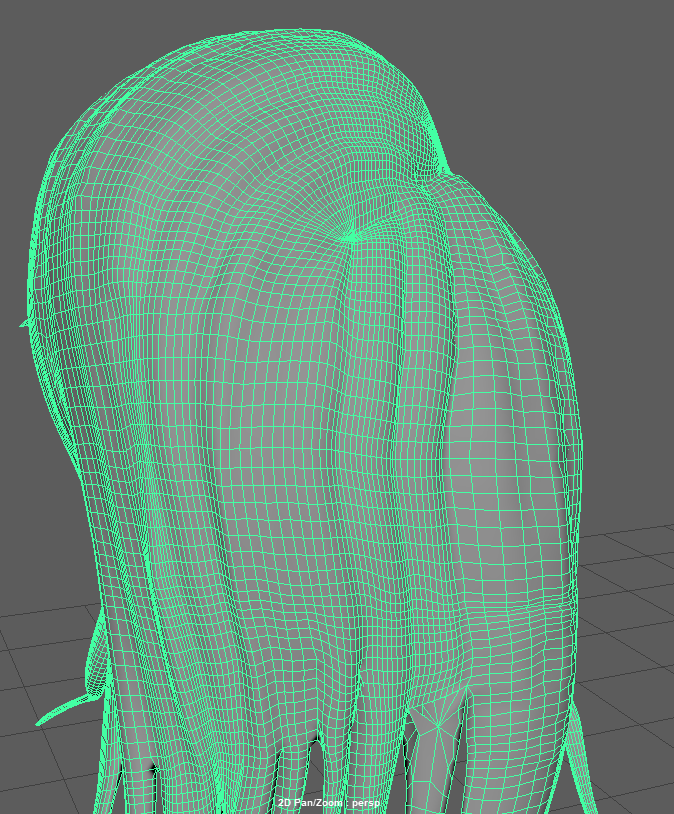
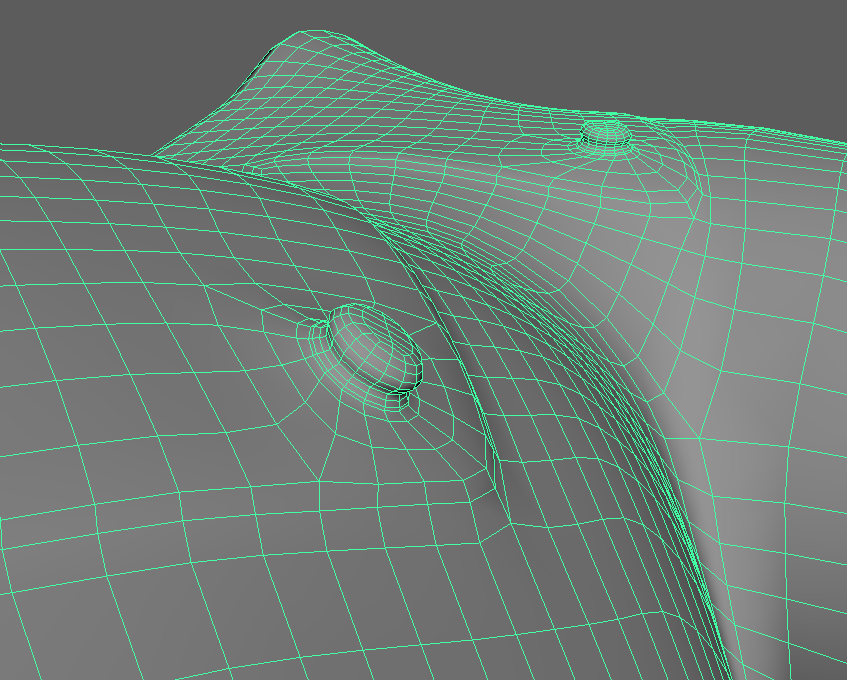
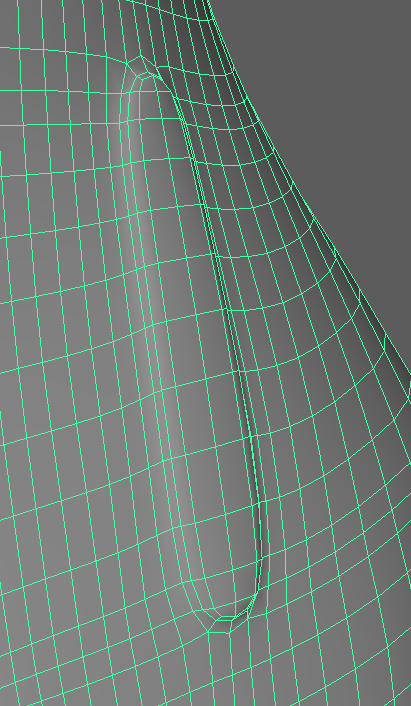
After hours of making a ton of Poly Faces, I was able to cover the entire Body. The Ears and Finger was the most tedious part to Quad Draw, I had to keep messing with the camera and making the Quad Drawing smaller to get the proper details.
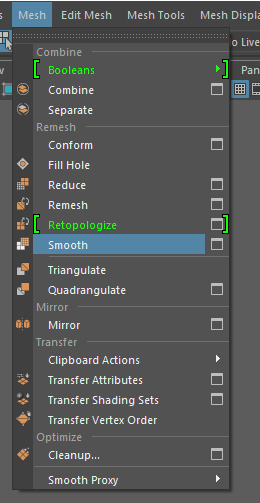
Whilst the Poly Faces Mesh is selected, I go into Mesh – Smooth. Smoothing a Quad Draw by placing Multiple Faces inside of one Face. thus smoothing, curving, sharping areas thanks to the help from the Live Object.
I have made a Before and After with showing the Faces, Sides and Corners count to show the difference or how many each Topology has.
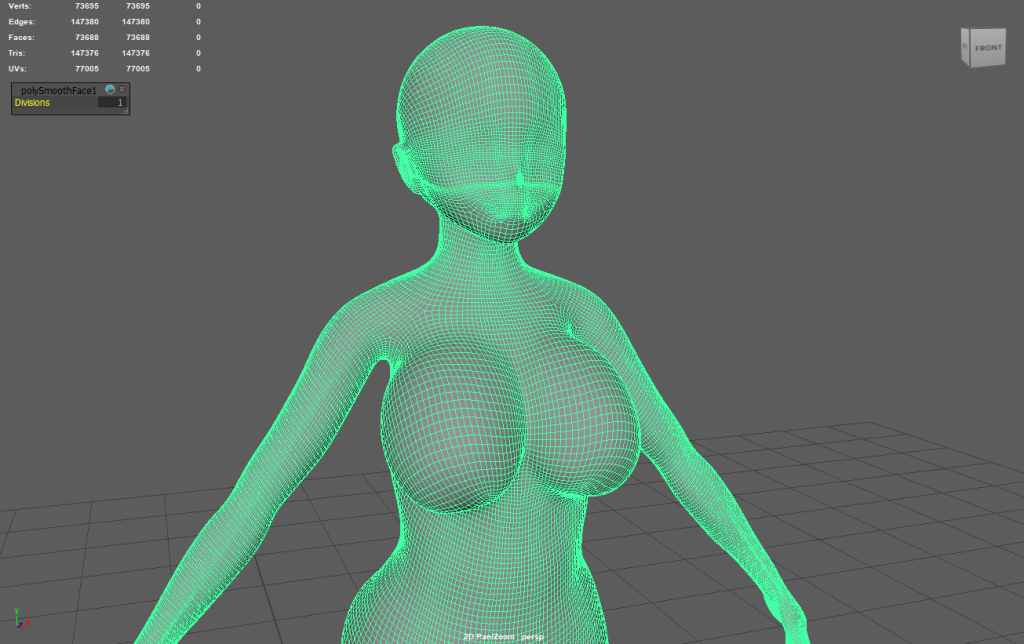
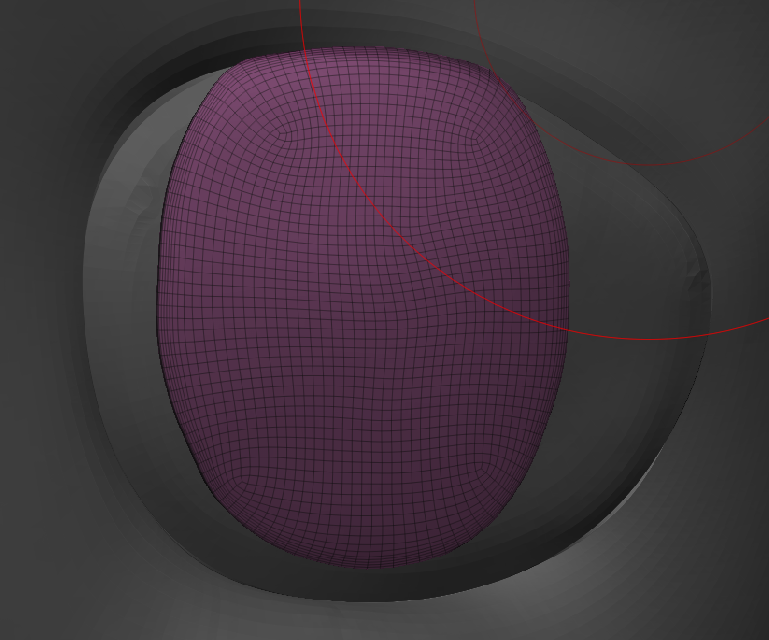
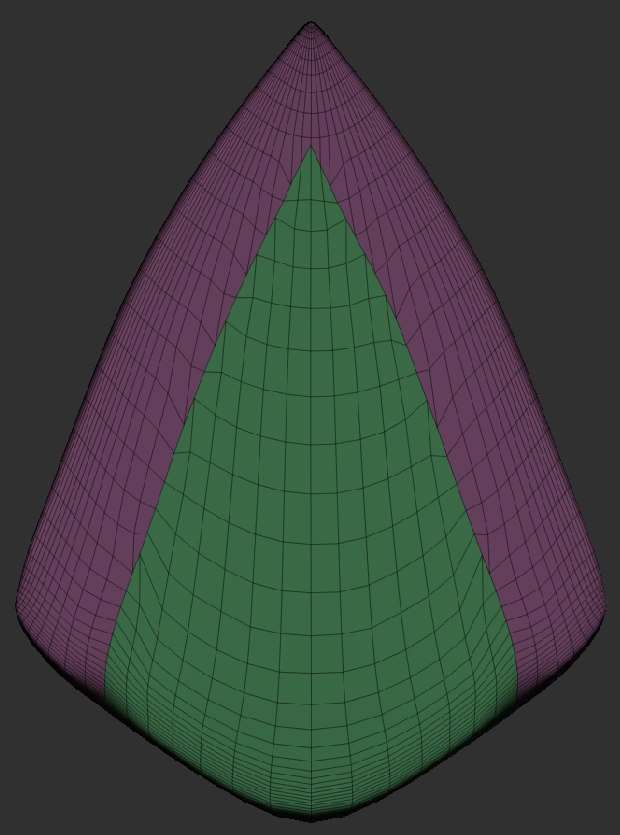
More Smoothed Retopology
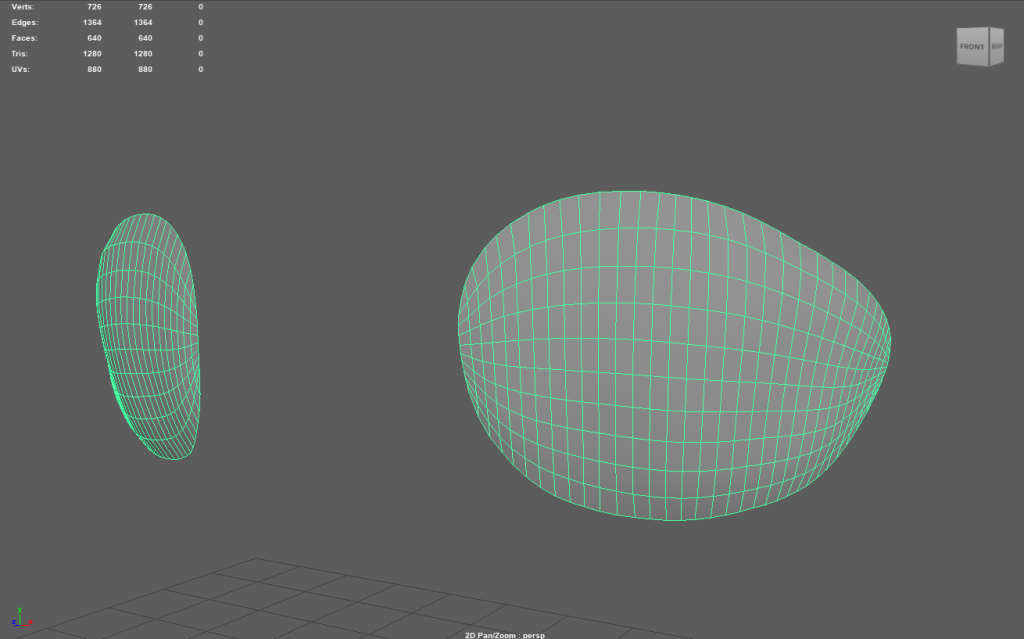
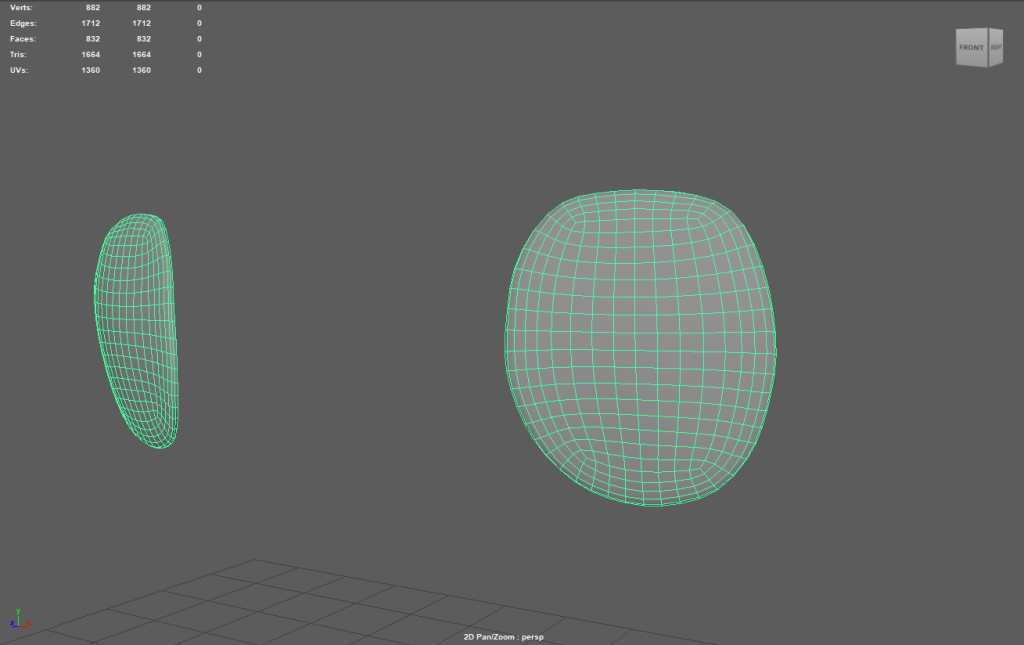
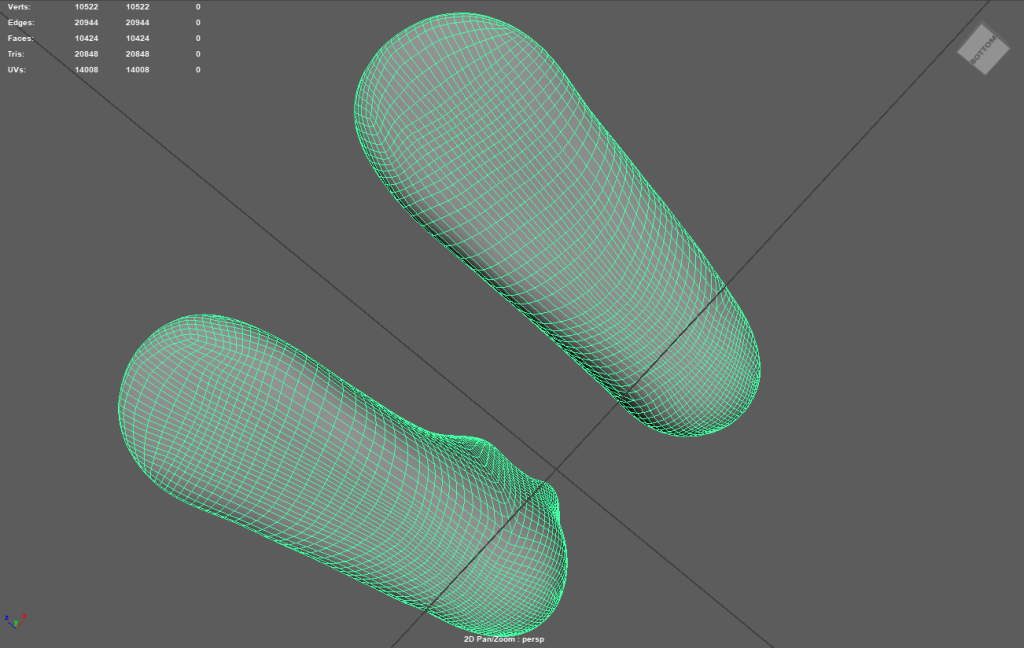
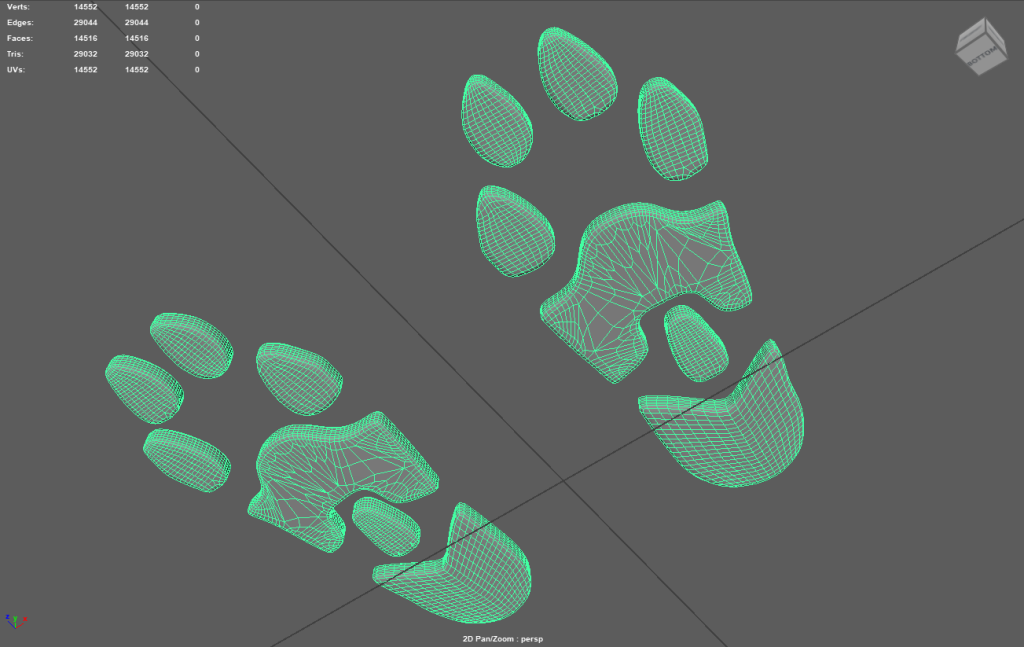
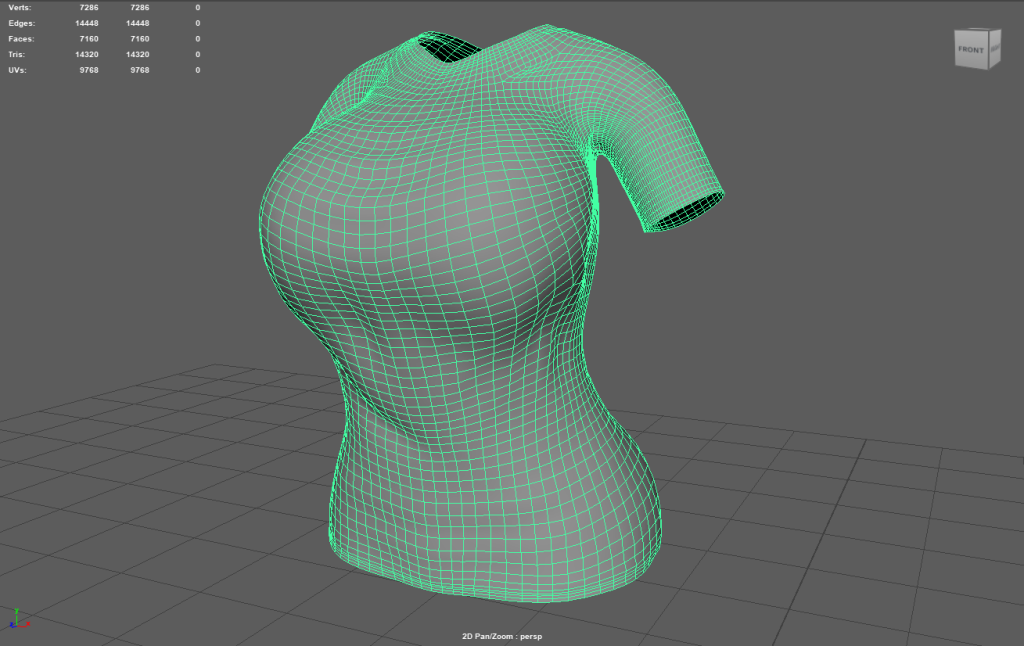

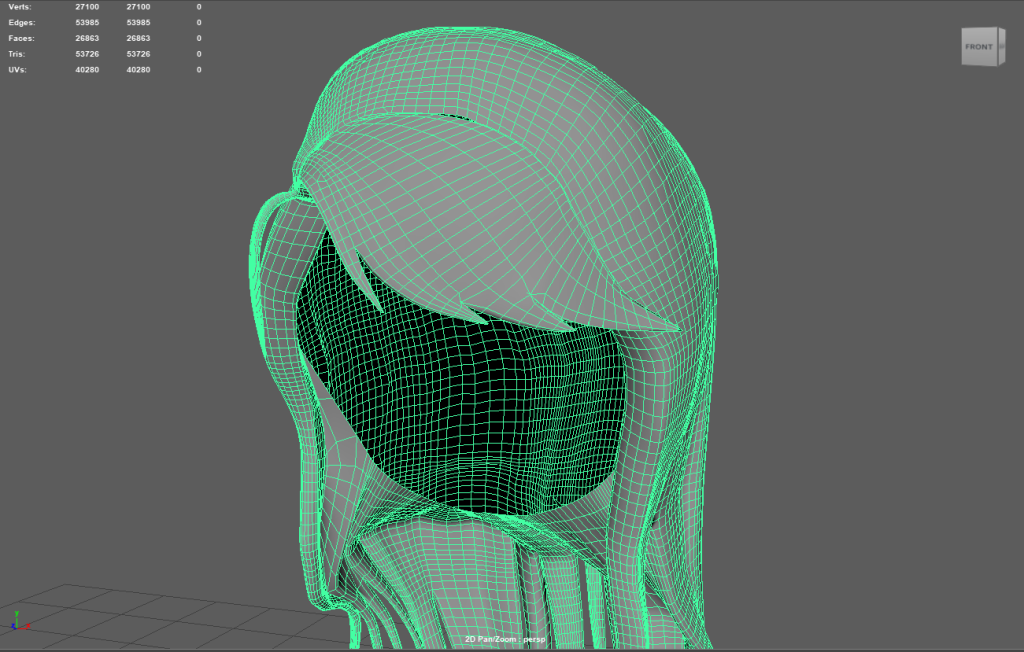
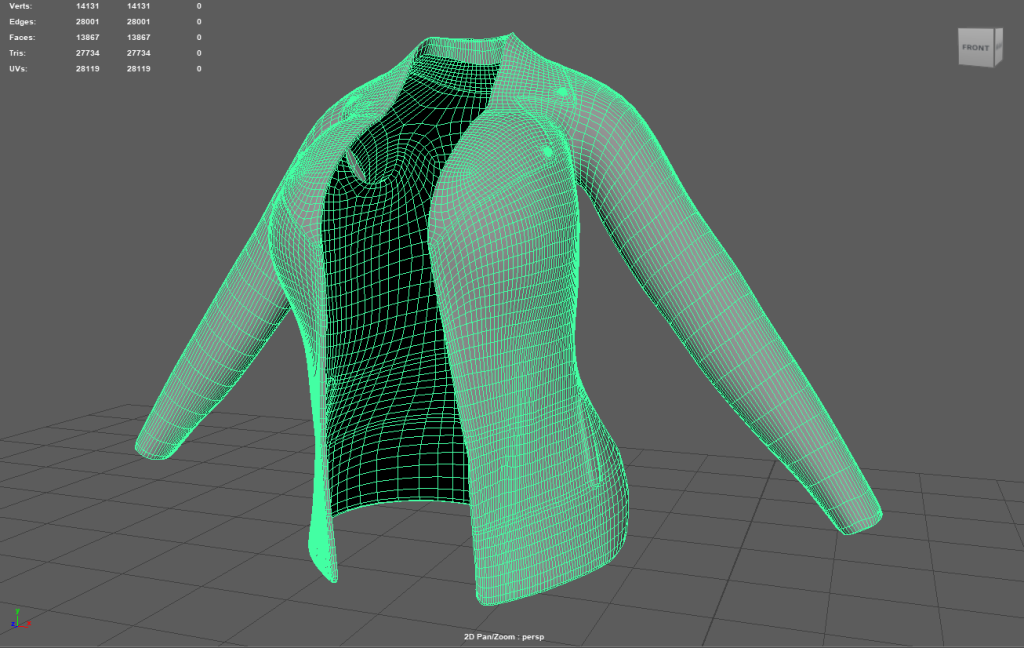
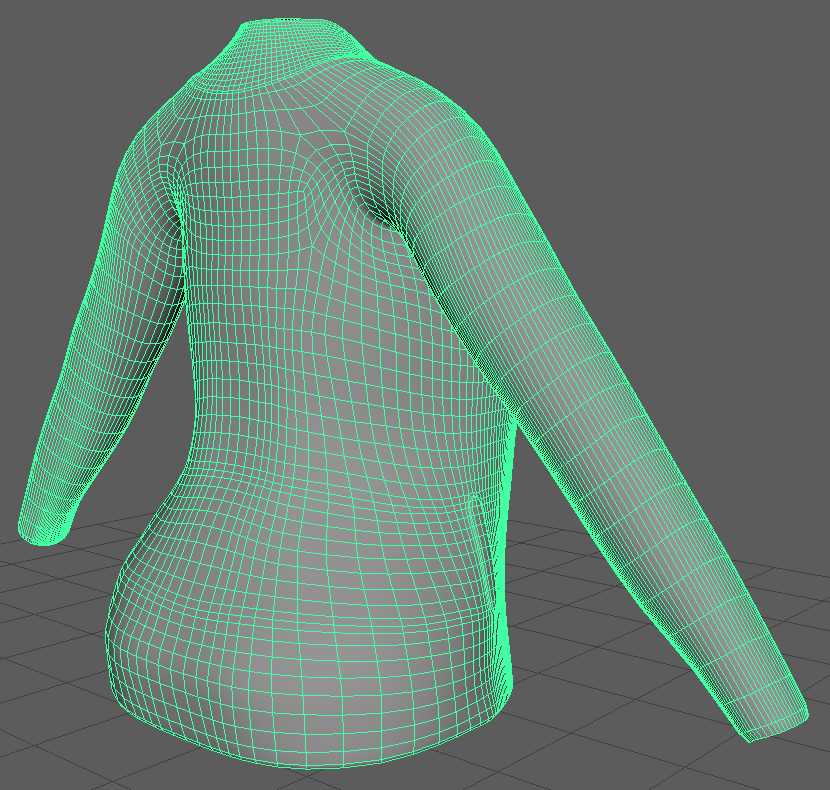
Now with all Retopology at high Quality, It is now ready for it to be further processed with the Cut and Sew Tool. Then, It will be fully prepared for a full UV Unwrapping.
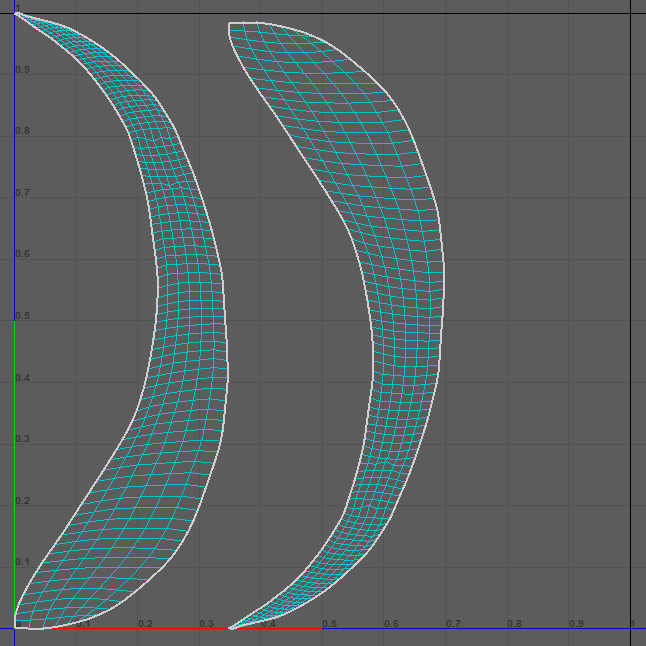
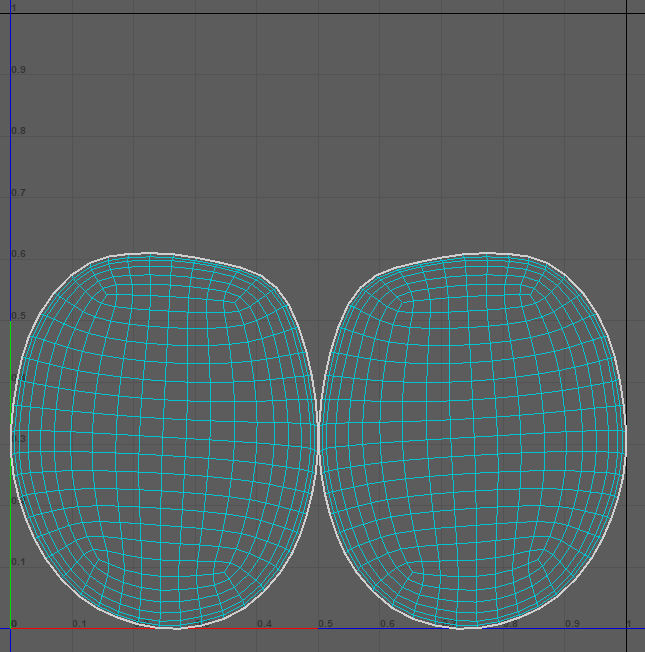
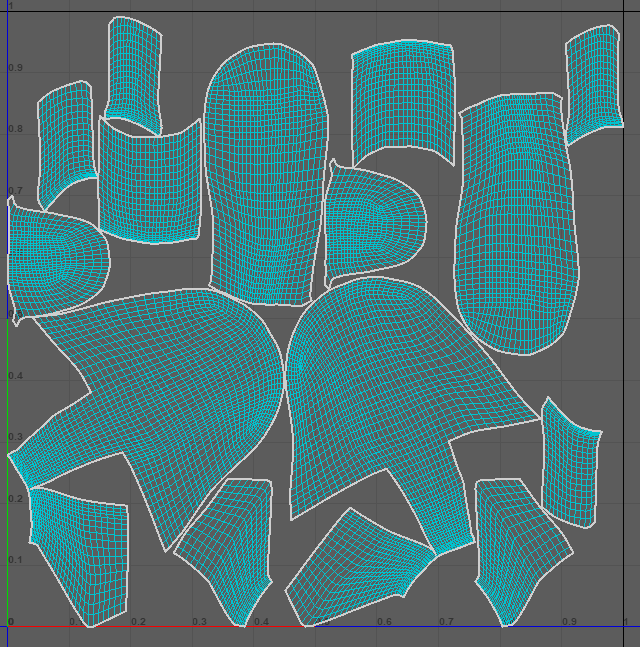
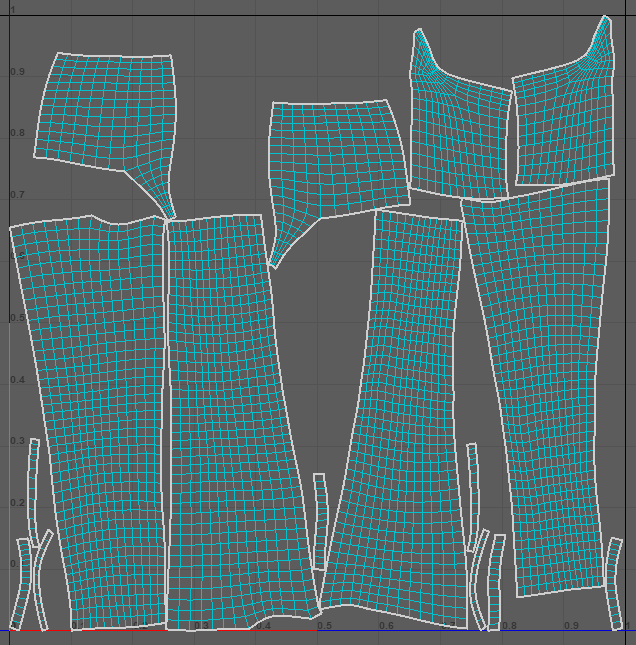
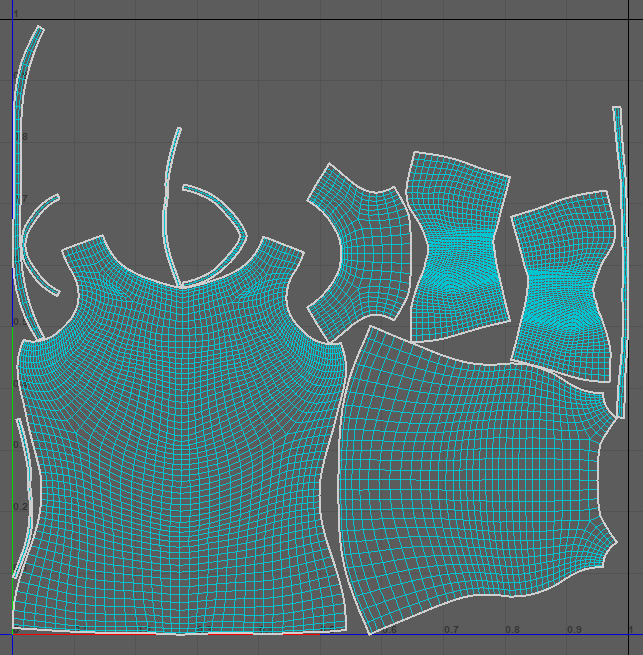
UV Editor – Cut, Sew and UV Unwrapping.
UV Cut and Sew Tool is a handy Tool to make clean UVs for Unwrapping which will make the Substance Painter Colouring and texturing the Model much easier.
Cut and Sew Tool will ‘Cut’ a certain area you have selected that will be ‘Detached’ when Unwrapping and making it a flatter, easier to paint on UV Surface. But, It will still all be UV Map thanks to the ‘Sew’ part of the Tool. It will take that part but will still ‘Reattach’ that Cut UV part back with the other UV Parts. This video below gave me the understanding needed to complete Cut and Sew Tool job:
UV Editor – UV Unwrapping

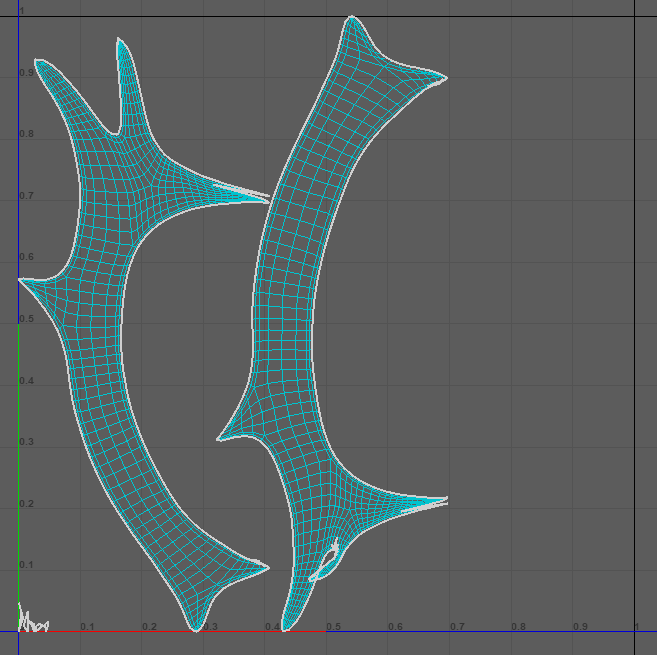

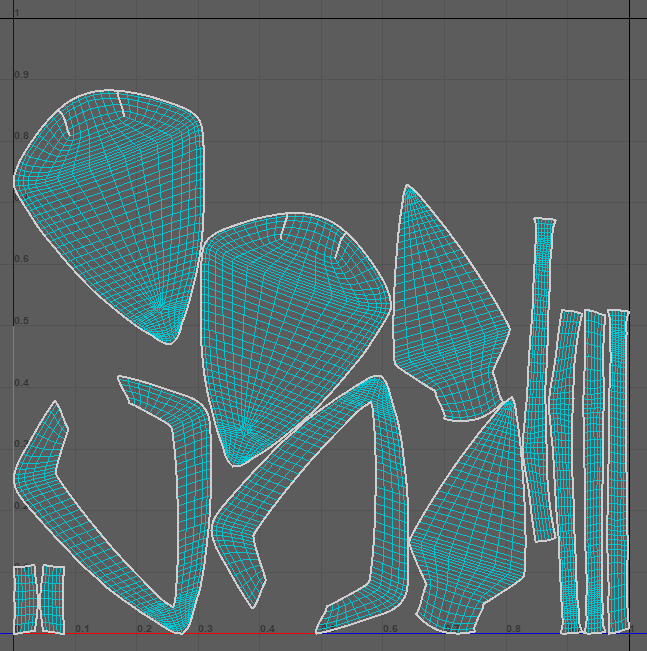
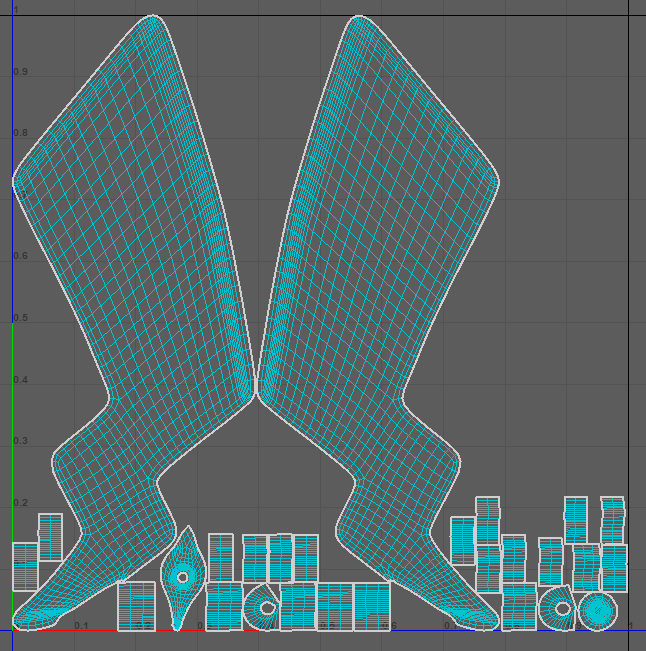
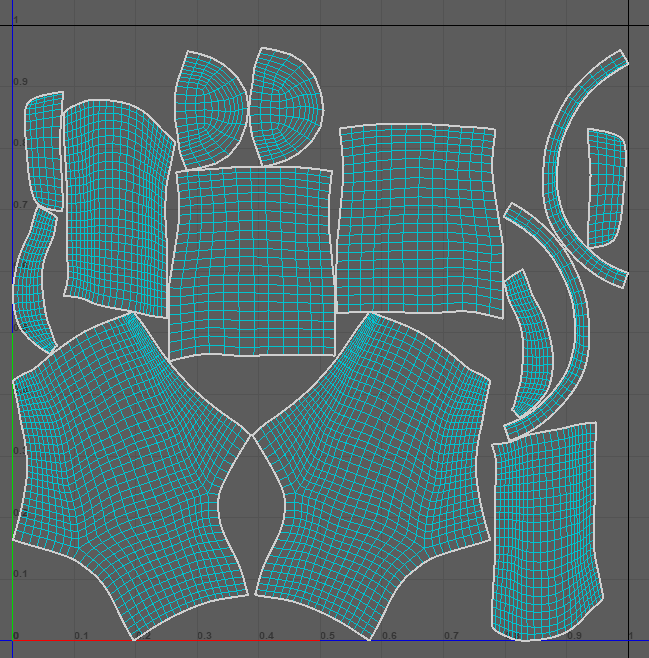
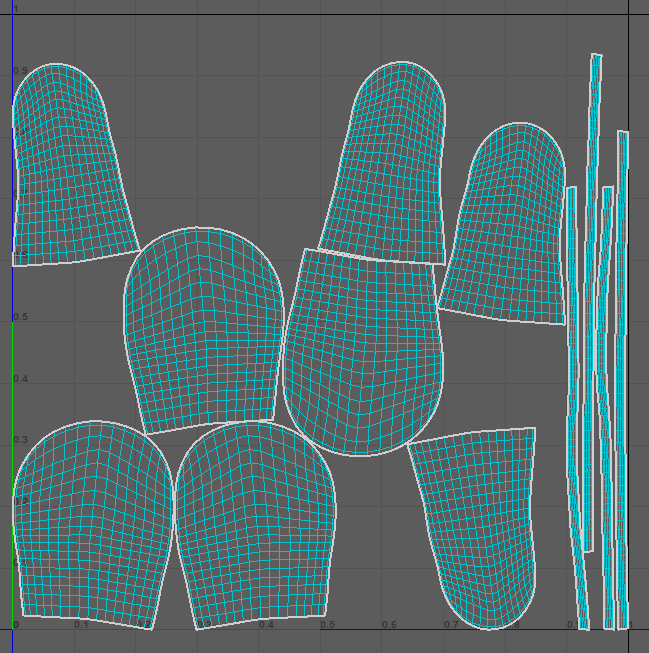
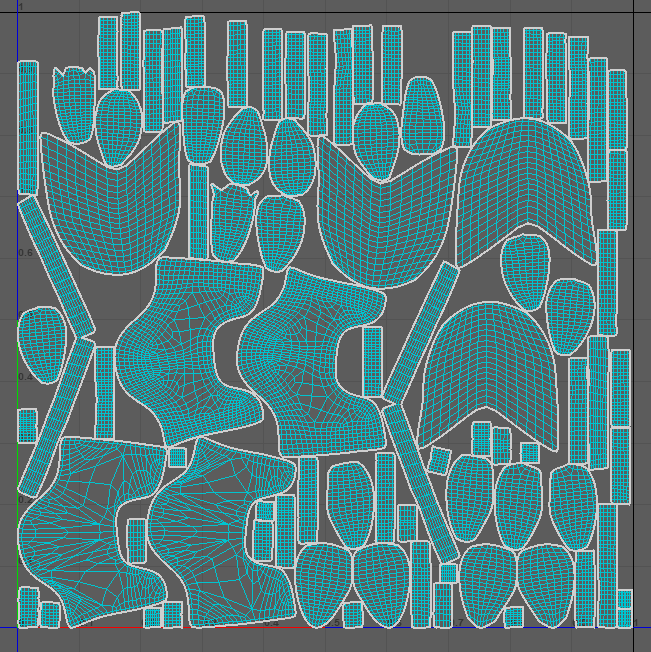
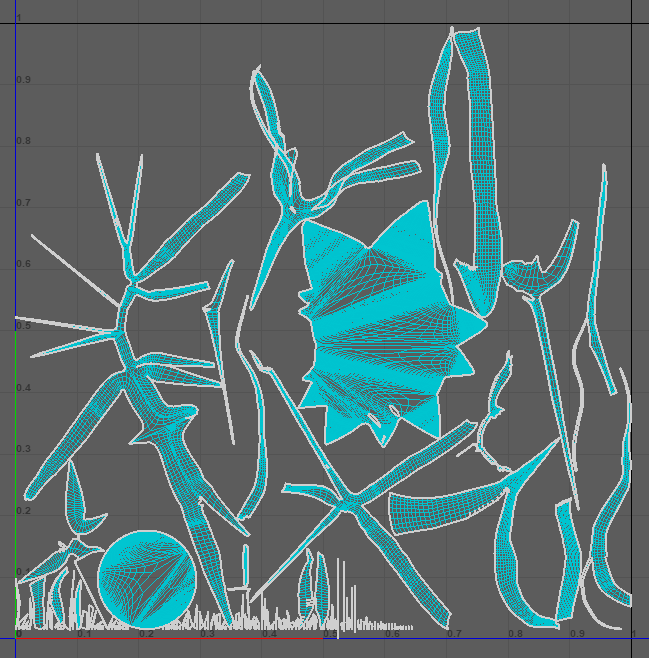
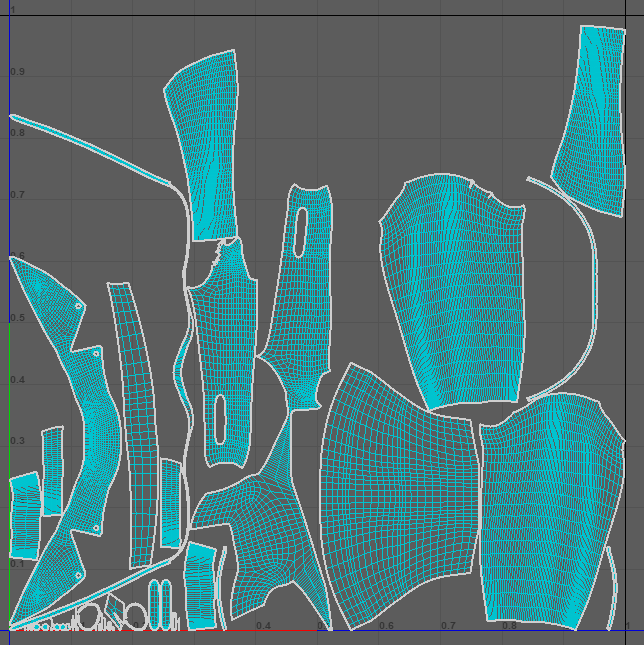
Now with that done, there is still one more step before I can Export into 3D Substance Painter. Substance is not going to recognise that all these UVs are Separate and Individual. So, we need to apply something before Substance will sperate each of the UVs accordingly.
Adding Lambert Material for Grouping UVs
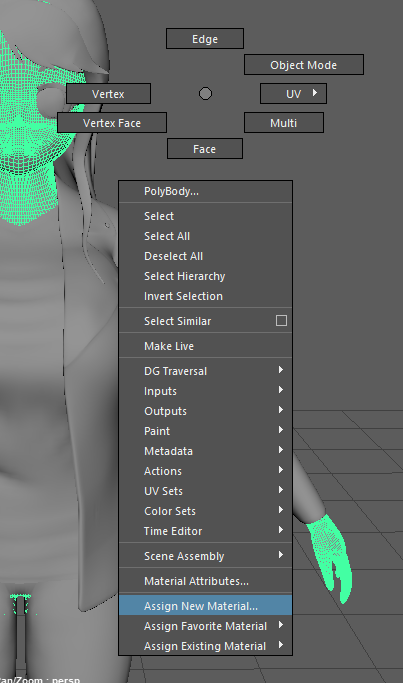
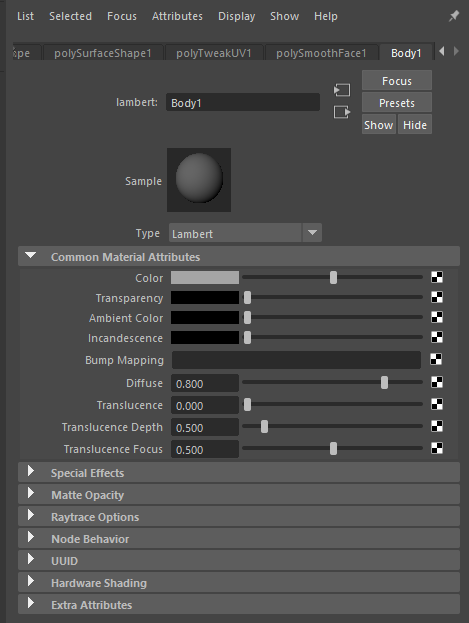
For each Mesh, I needed to add an AiLambertSurface so then, Substance will see that the UVs will need to be Individual instead of sharing the same UV Map. Thus making Colouring and Texturing each UV will so much easier with them being in their own groups.
Exporting to Adobe 3D Substance Painter
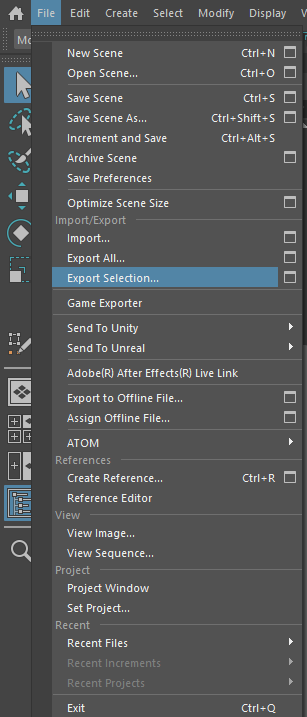
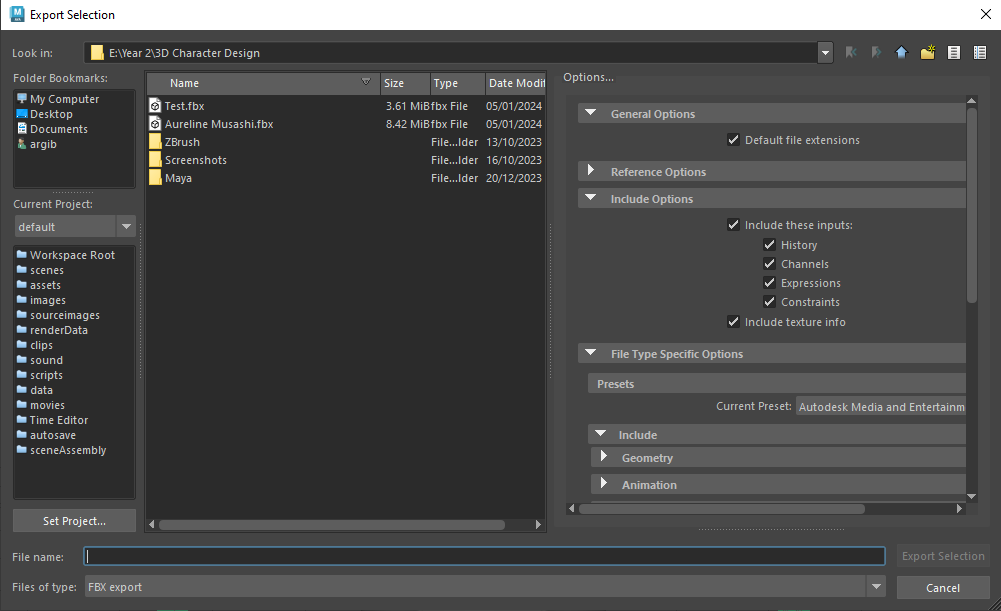
now with the UVs fully wrapped, clean and grouped, now I can grab my selection of the New UV Meshes and Export them into 3D Substance Painter. now Exporting via Selection, I chose where my new file will be located and now I can open 3D Substance Painter.
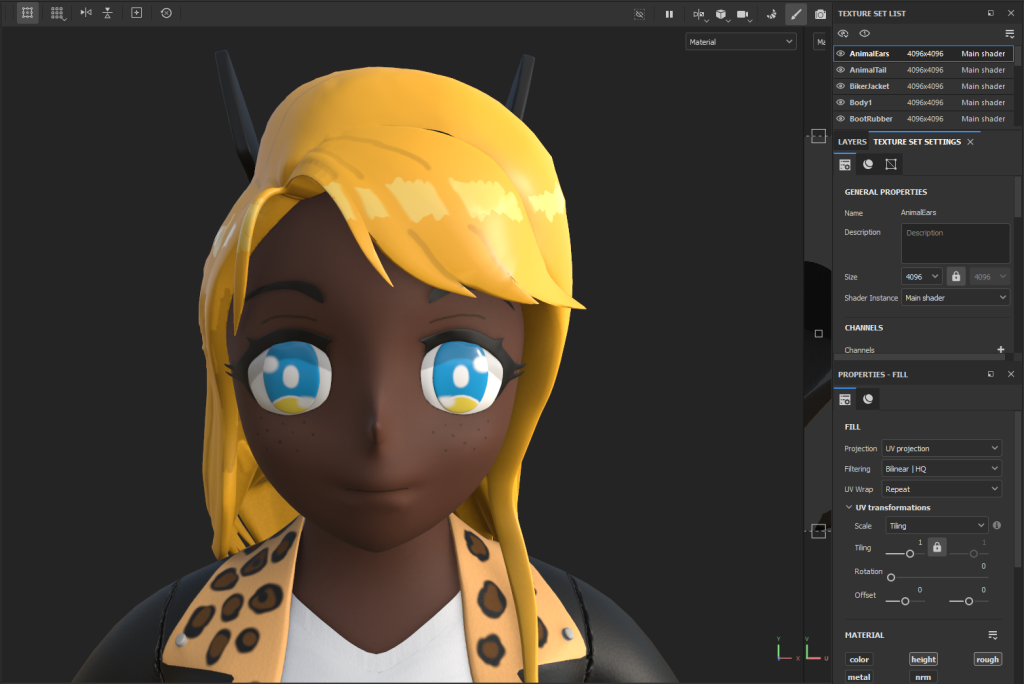
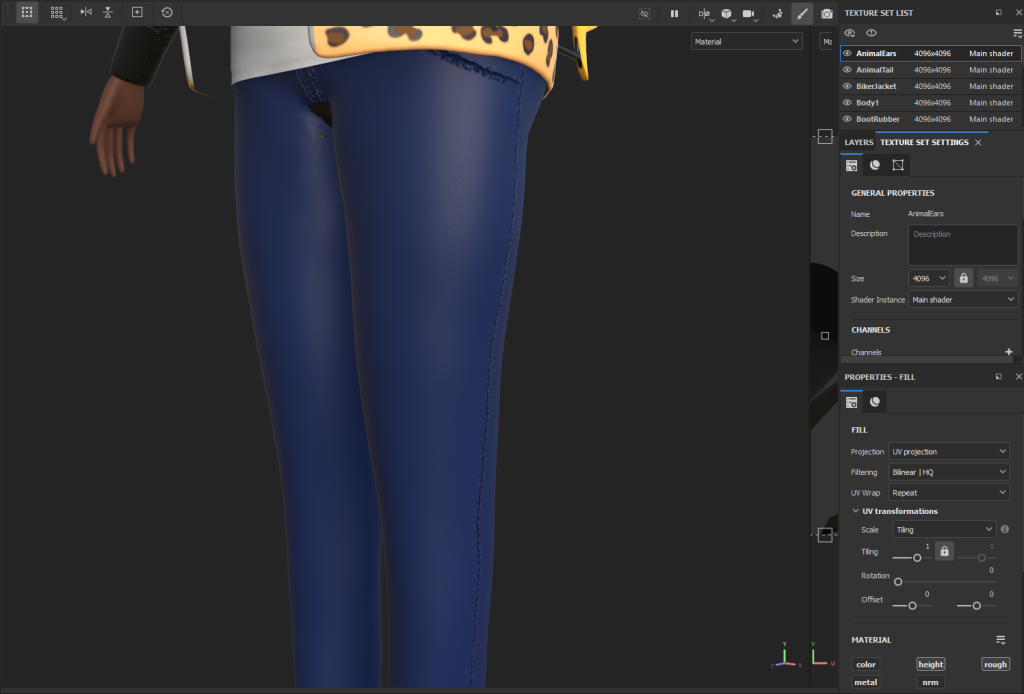
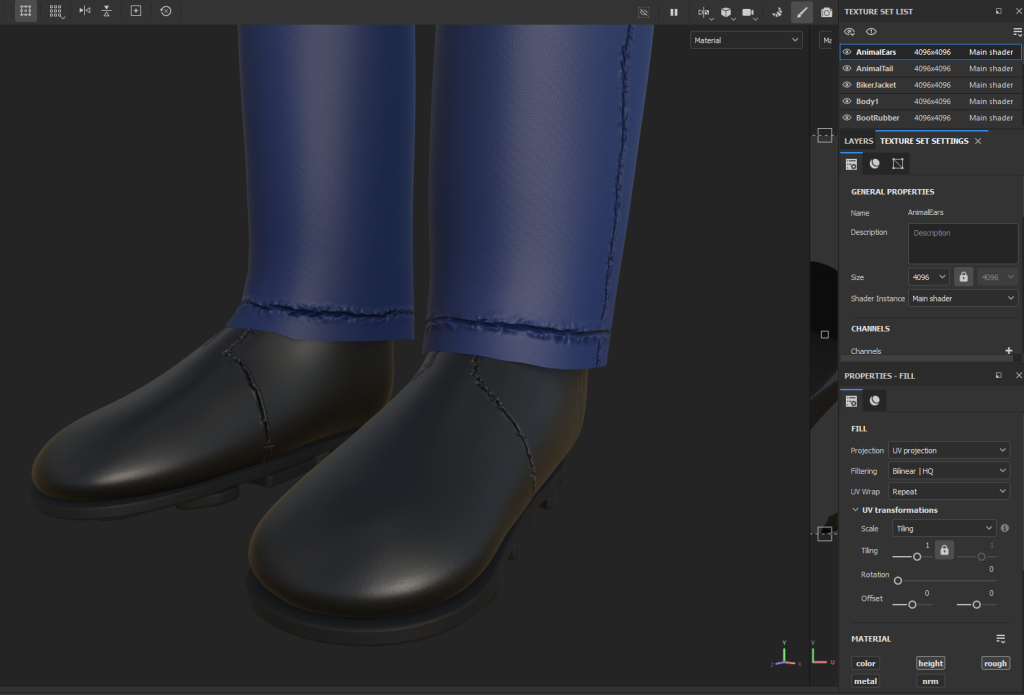
Adobe 3D Substance Painter
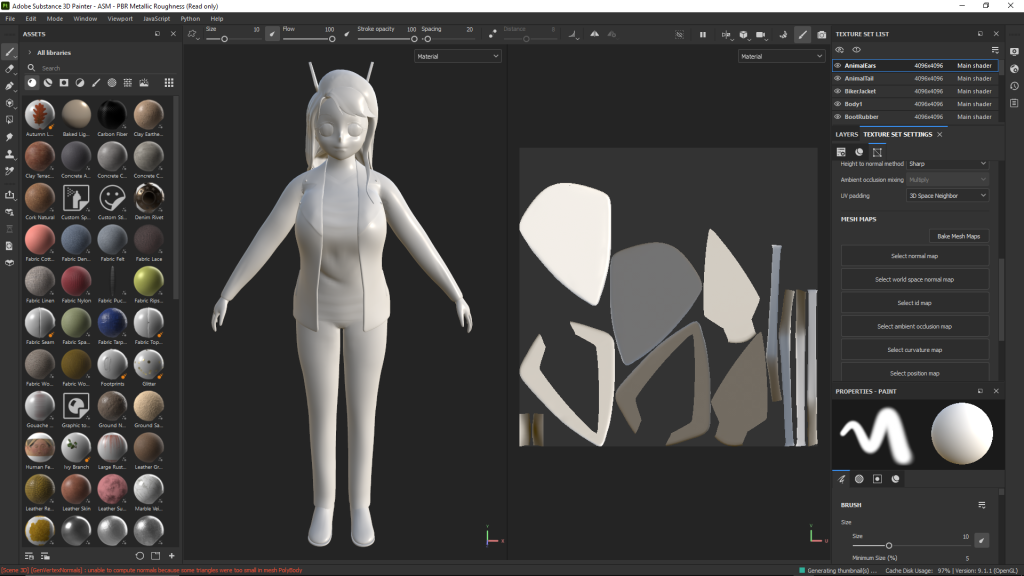
My model has now been Imported into 3D Substance Painter. In the texture Set List shows each Individual Mesh with their own UV Maps for me to Colour and Texture without effecting the other UVs.
Basic Colour

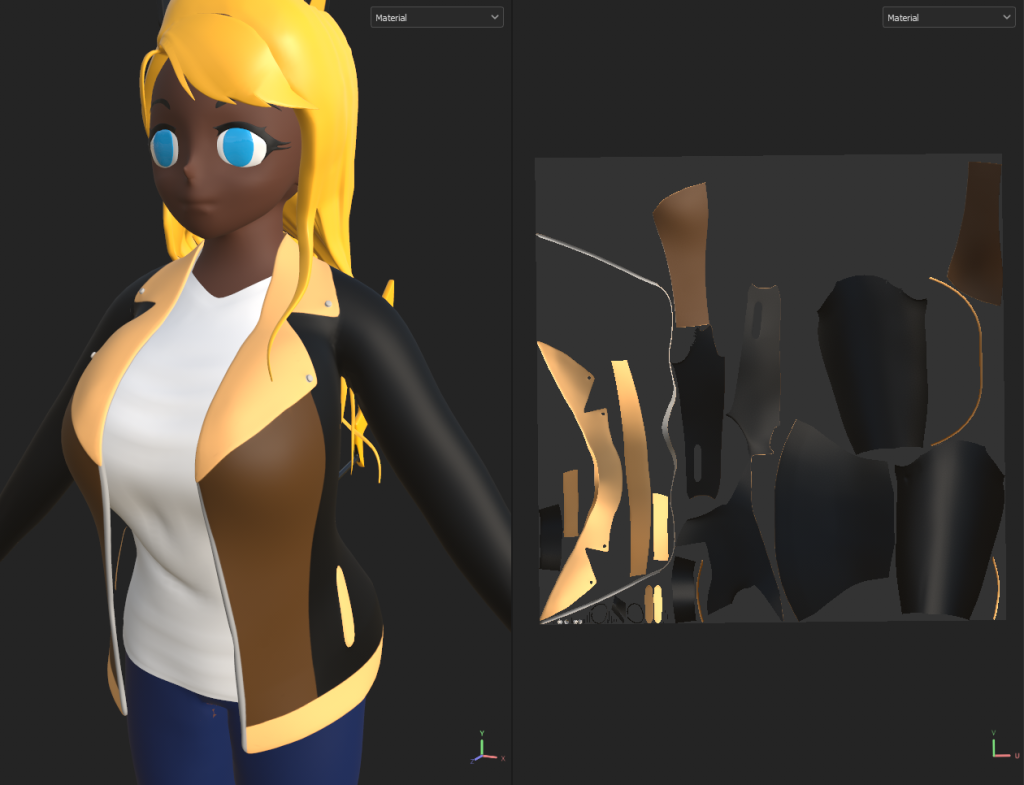
Full Detailed

Now with all the details I want to have on my Model. Its time to get this back Into Maya for a Turntable Full Render.
Lighting
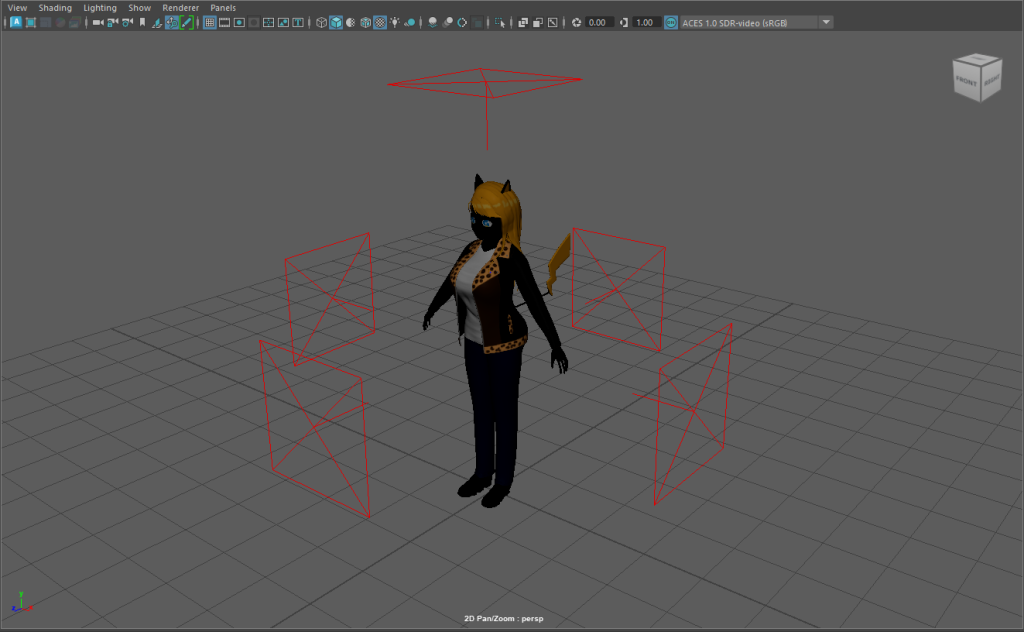
Now back into Autodesk Maya, I quickly setup Five Area Lights, Sky Dome and a Turntable Camera running at 30fps. The timeline is 300 Frames long, so the video will last near 10 seconds once all images have been put into a Image Sequence.
Turntable Product
What have I learned
- How to Quad Draw and Retopology
- Understanding of the Cut and Sew Tool
- How to clean UV Unwrap
- ZRemesh, Dynamic Subdivision and Polishing
- Colouring, Texturing, Painting
- Black Mask and Fill Layers
What changes could I have made?
I could’ve made more changes to the Hair’s Cut and Sew, UV Unwrapping. The Unwrapping came out Messy and was next to impossible to clean-up, I didn’t want to spend too long so I could only clean it up so much of it.
Conclusion
The road from Start to Finish was a fun experience, learning to Blockout, make a detailed Body, Adding clothes, UV Unwrapping, Colour and Texturing. I love that I was given the Opportunity to turn one of my Manga Characters into a 3D Character, this Ups and Downs was worth the Final Result.
Reference List
3D, E. (2019) 3D Cut and Sew Tool Maya 2018 (Fast and Easy UV Method) – TUTORIAL. www.youtube.com. Available online: https://www.youtube.com/watch?v=lwDtOEtO_J4 [Accessed 9 Jan. 2024].
Bittorf, D. (2022) ZBrush Decimation Master tutorial. www.youtube.com. Available online: https://www.youtube.com/watch?v=Vi8KPSP9Aio [Accessed 9 Jan. 2024].
CG, Y. (2021) アニメ調の頭の3Dスカルプト Sculpting a stylized head in Zbrush Timelapse. www.youtube.com. Available online: https://www.youtube.com/watch?v=M8npOpwKe4Y [Accessed 9 Jan. 2024].
CG, Y. (2022) 原神 蛍の3Dスカルプト Sculpting Genshin Impact Lumine – ZBrush, Marvelous Designer. www.youtube.com. Available online: https://www.youtube.com/watch?v=B-yLhGEbbKg [Accessed 9 Jan. 2024].
FlippedNormals (2018) How to Retopologize the Body in Maya. YouTube. Available online: https://www.youtube.com/watch?v=_TYOgI9kJtU.
Heroes, A. (2020) [FREE ZBRUSH TUTORIAL] How To Create Hair with IMM Brush. www.youtube.com. Available online: https://www.youtube.com/watch?v=FNjBKQZKHhc [Accessed 3 Mar. 2023].
J-List (2022) Anime girls who are human-hybrid or otherwise demi-human are among the most popular characters. Facebook. Available online: https://www.facebook.com/photo/?fbid=10160156289224320&set=a.10150122098794320 [Accessed 9 Jan. 2024].
Moonlight, A. (n.d.) Pichu’s first battle. ARTSTATION. Available online: https://angelmoonlight.artstation.com/projects/BmzJl9 [Accessed 9 Jan. 2024].
Mutiny, 3D (2020) 🦜ZBrush – Dynamesh Merging. www.youtube.com. Available online: https://www.youtube.com/watch?v=_GrbAWsrZAk [Accessed 9 Jan. 2024].
Normals, F. (2018) How to Speed up Retopo In Maya – GPU Trick! www.youtube.com. Available online: https://www.youtube.com/watch?v=MapL3OQQn_g [Accessed 9 Jan. 2024].
Pattison, G. (2023) 20 Facts about Pikachu. FACTS.NET. Available online: https://facts.net/characters/pokemon/20-facts-about-pikachu/ [Accessed 9 Jan. 2024].
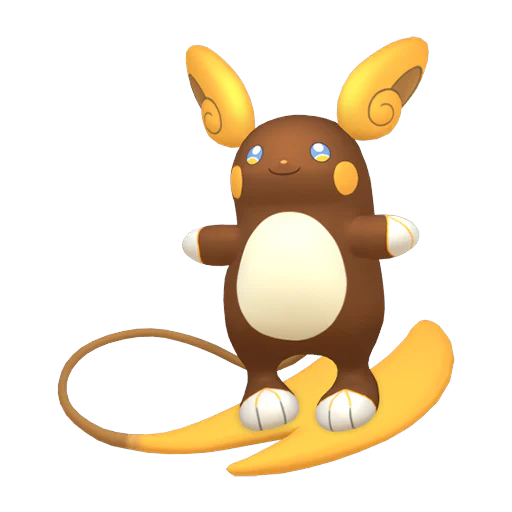
Pokemon4Ever (n.d.) Pokemon Scarlet and Violet Shiny Alolan Raichu 6IV-EV Trained. Pokemon4Ever. Available online: https://pokemon4ever.org/en-gb/products/pokemon-scarlet-and-violet-shiny-alolan-raichu-6iv-ev-trained [Accessed 9 Jan. 2024].