Introduction – Assignment Brief
In the Environment Design module you will have been given a main theme and a subtheme. Once you have decided on your themes, they will be used to influence your 3D asset creation to create a Centre piece for your environment.
Main Themes:
- Horror
- Science Fiction
- Fantasy
- Historical
Sub-themes:
- Alien
- Corruption
- Utopia
- Dystopia
- Celebration
- Decay
- Family
- Beauty
Production piece expectations
You will be rewarded for a more detailed designed asset i.e. textured asset using substance painter, baked high to low poly, normal maps. You will also be rewarded if you are able to maintain sensible poly counts without sacrificing the design of the asset. Simple/basic assets will attract lower marks.
These guidelines are what we expect to see as a minimum within your 3D asset submissions:
- 4K Texture maps
- A unique design, heavily inspired by location and sub-theme
- Fully lit, textured beauty shots of your asset
- Unlit screenshots of your assets in wireframe, orthographic view
- A 20 second video render showcasing your asset
Additional content
For those who seek higher marks:
- Tri count less than 10k / Poly count less than 5k
- Low poly model with textures baked from a high poly model in substance painter
- Studio quality lighting setup
My Asset And Theme Choice
I decided to go with Fantasy as my Main-Theme since I love anything outside of Realism like Magic (Mana) and Magical Creatures and Realms beyond our Imagination.
Sub-Theme I picked is Beauty, most ideas that fall under Fantasy will also go under Beauty like, Forest Environments, Magical Realms, Swords and Potions.. So I wanted my Asset to be under Fantasy, my favorite Theme and Beauty because I can go anywhere with this Sub-Theme like Flowers, Petals and Glowing Effects.
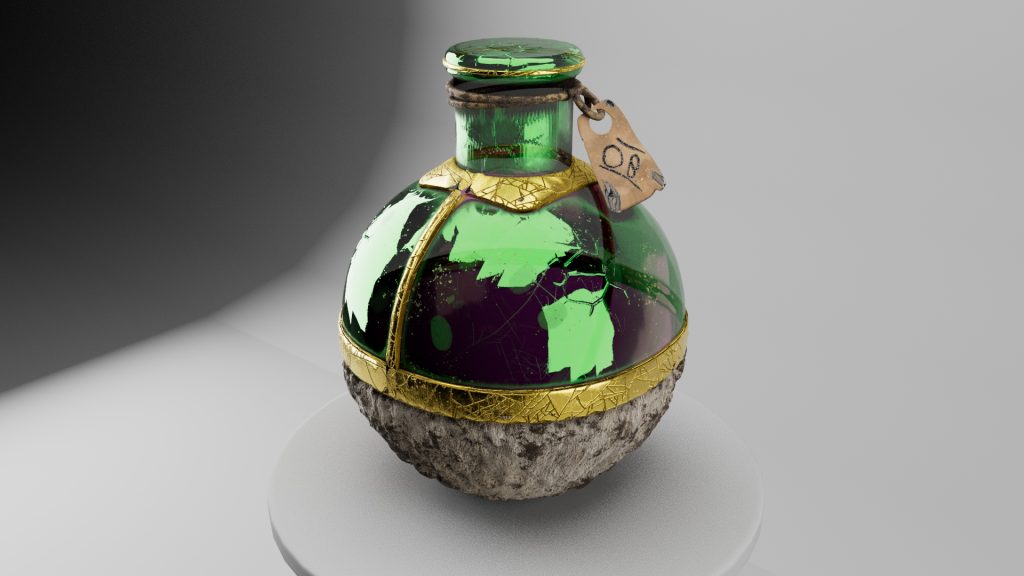
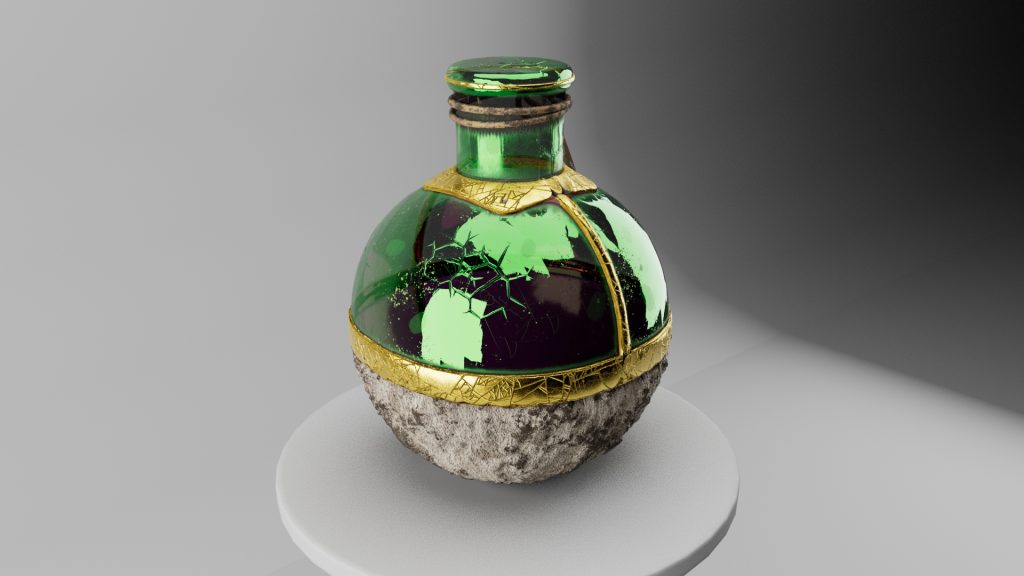
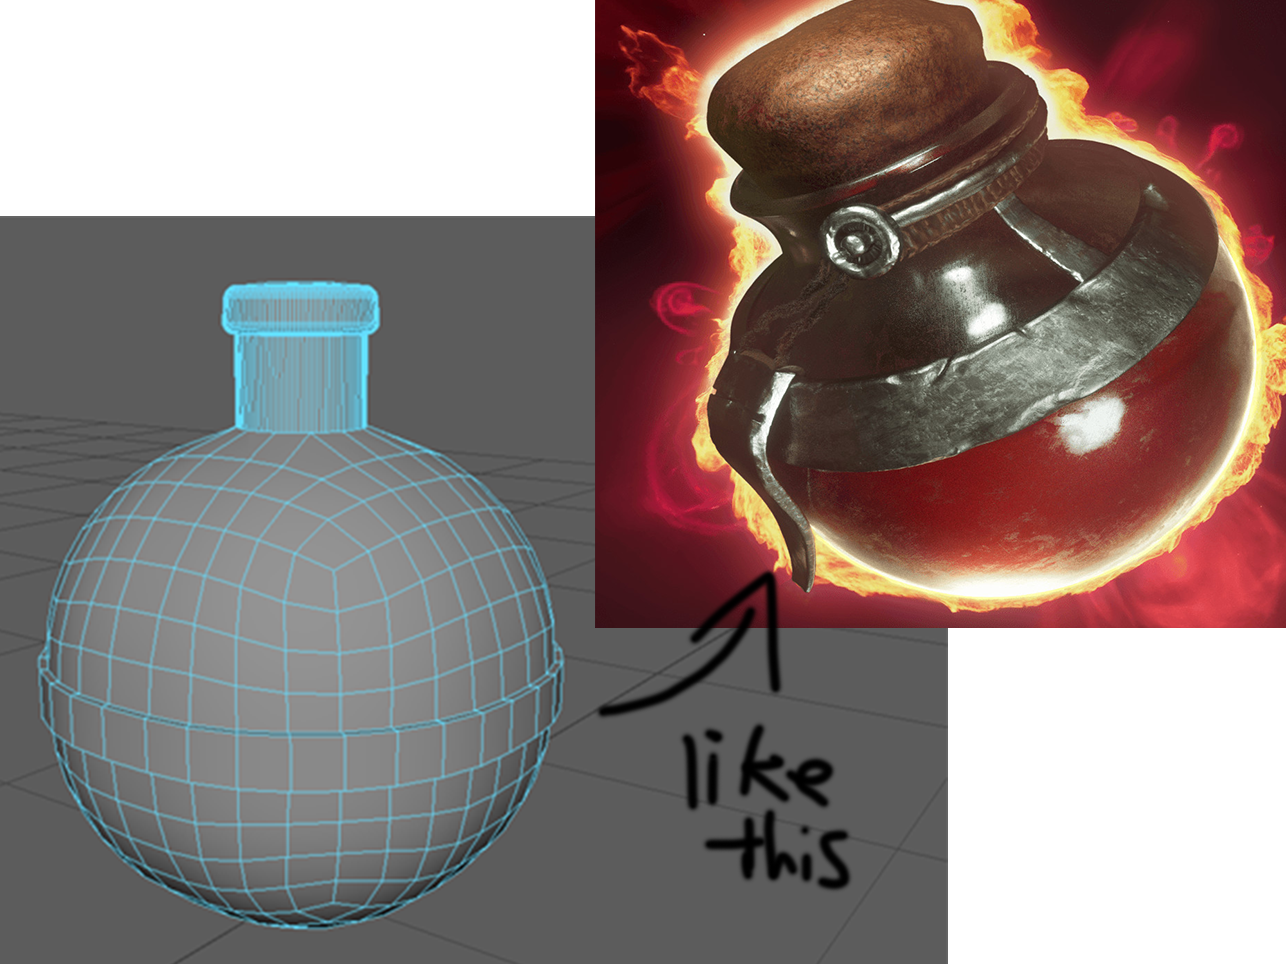
I have chosen to go with a Potion with a tag. Since my Project is going based of Fantasy and Beauty, I wanted to create a good-looking Potion. This will be placed within my environment as the Center piece of the project. The Centre piece will be placed in the middle of a Glowing Mushroom Cave.
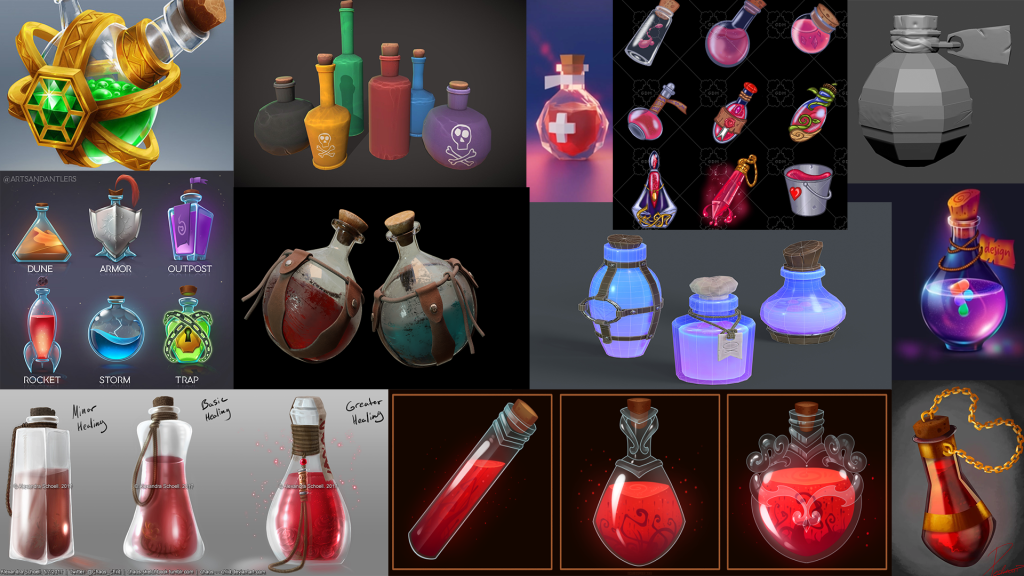
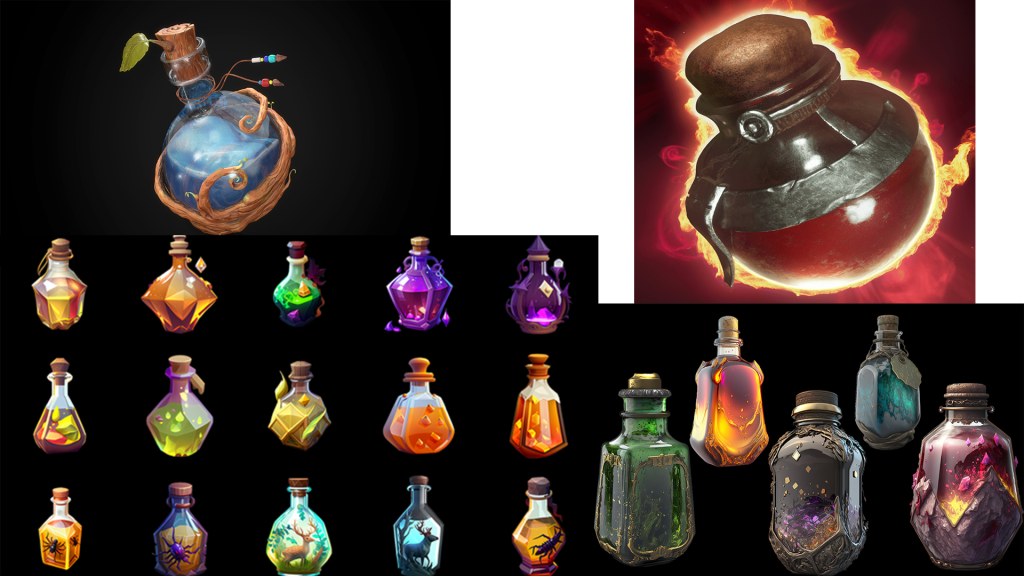
References
Maya Autodesk – Creating My Asset
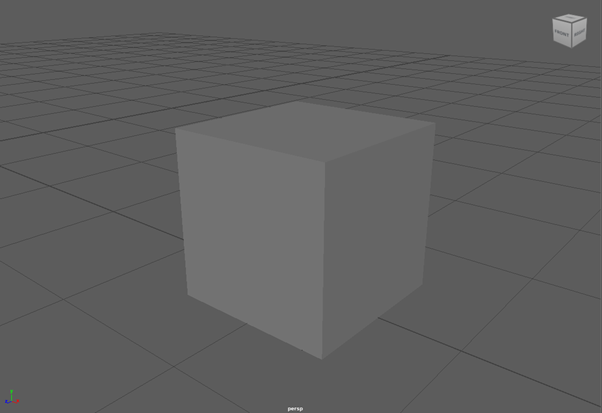
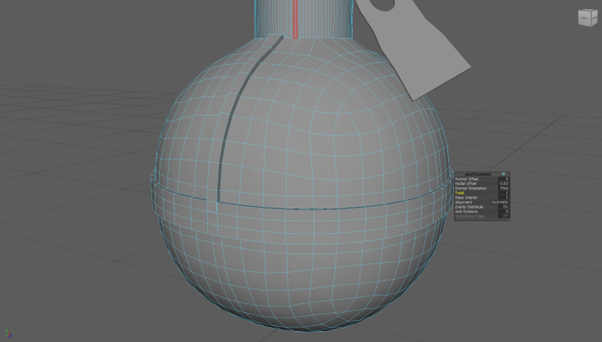
I started with a square because I don’t want to Potion bottle to be perfectly round when rounding with the Bevel Tool. This will help give the Potion Bottle an old ancient look, not perfectly shaped and will be chipped or broken down in a few places.
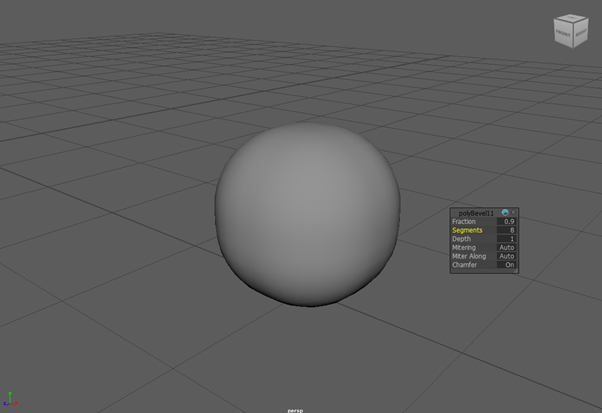
With the Bevel Tool Twice and adding a lot of segments, I made a roughly curved sphere with a bit of bumps to it. Making sure to remember not to be ‘Perfect’ with the shaping to help add detail to the base of the bottle Potion.
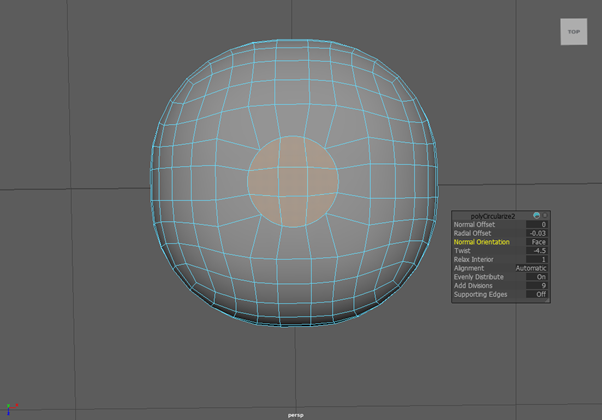
At the top of the Bottle Base, I take a few of the squares selected and use the Circular Tool to make a circle for the handle/tube. Increase the segments to add more curve to the section and make it look higher poly.
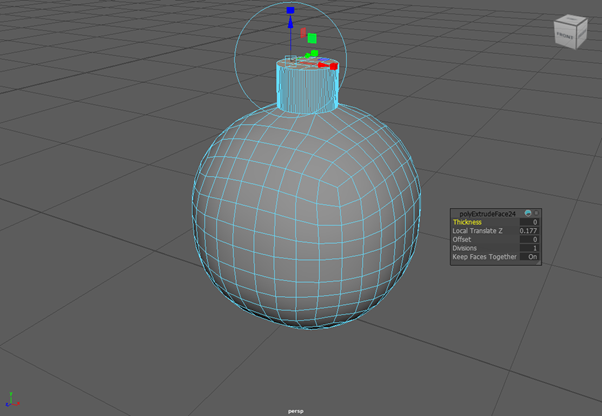
Using the Bevel Tool to raise the circular shape to make the Handle/Tube of the Potion. With another Bevel, we make to make the ‘Plug’ of the bottle for where the Bottle cap or Cork will go to seal the Potion. This will add more shape to the bottle top and I can be more creative with how I want to shape it and would it be damaged. Then, add in the curve on the bottle top with the Bevel tool to give more a realistic bottle shape. I can add more detail to the middle of the Bottle top later.
I don’t want my bottle to be ‘normal’ bottle. So I decided with the References I wanted to make a Frame around the base of the Potion. This way I can be creative to what I want the frame to look like, material, colour, etc. But also, can have the top and the bottom of the Potion’s base to be different (Materials and Colour) If I so wish.
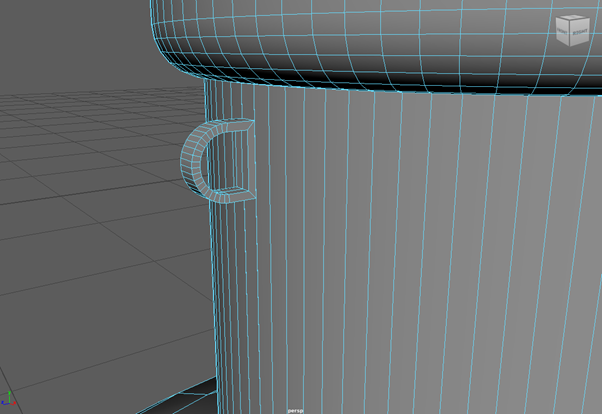
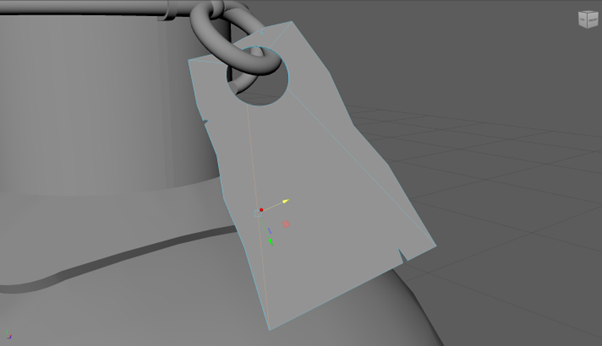
I added in a little piece/hole with Beveling and Stretching on the side of the Bottle top. This is where the String Piece will go for where ill be making the few wraps around the bottle with string, with a tag that will either explain the content of the potion, the potion is cursed, or It will be too damaged to read it.
The String was made under a special shape that could add more loops or change it to look like a spring. But with the other strings, I used a different shape to make them which I will call the Donut Shape.
Using the Sphere shape to create a knot on the string to make another loop of string for where the tag will be created and hanging on to. Later, I add another piece of string to make it look like it was tied into a knot, leaving a bit of string sticking for where it was pulled out to make the knot.
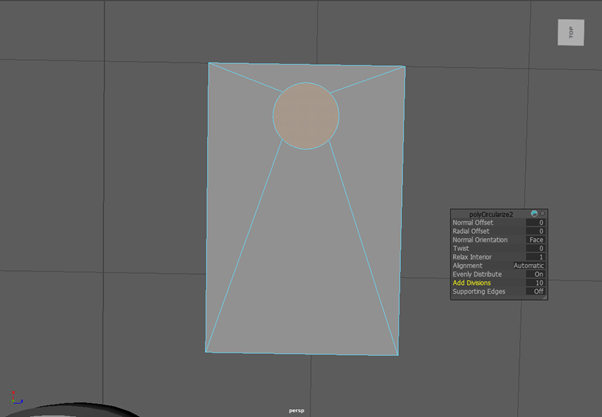
With the square shape to make the Tag, I make into a rectangle shape and nearly completely flatten it to make it resemble paper. I used the bevel tool to make a square at the middle top of the shape and using the rounded tool to turn the square into a circle, added in the more segments for better quality of the circle.
I delete both circle faces to make the hole in the tag. Then with the weld/stitching tool, I fix up the segments in the circle and make sure they are lined up and are attached together. This will help with UV editing later and when It gets processed into Substance Painter.
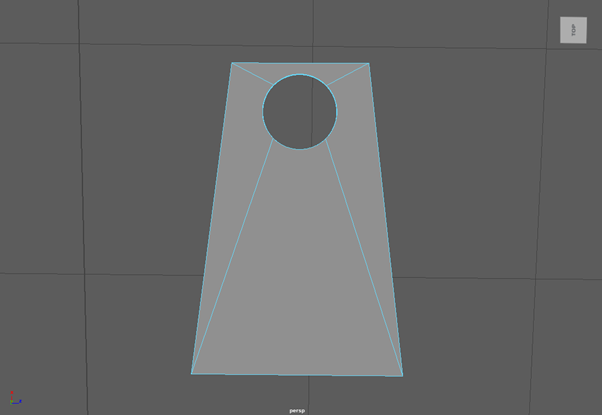
I grab both of the top corners of the tag and bring them slightly in so then the shape look more like a fancy potion tag.
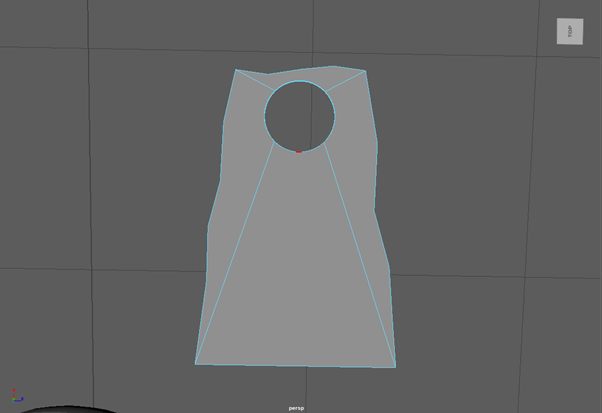
Using the cutting tool, I make corner segments on random parts of the tag, so it doesn’t have a clean corner shape to it, since it will be a old looking tag. I make some the parts bend in and out to help with the old and rough look made to the tag, this will ad much better detail to the tag and won’t stick out when placed with the potion.
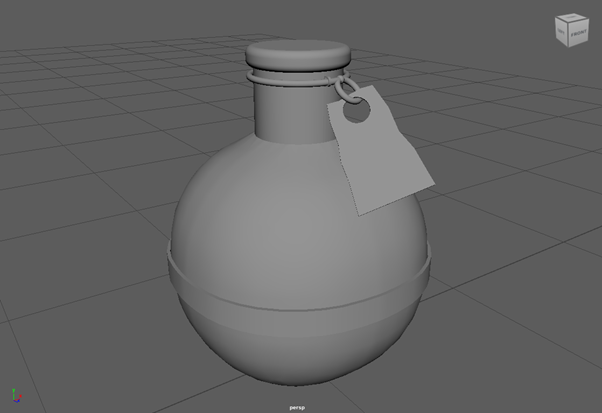
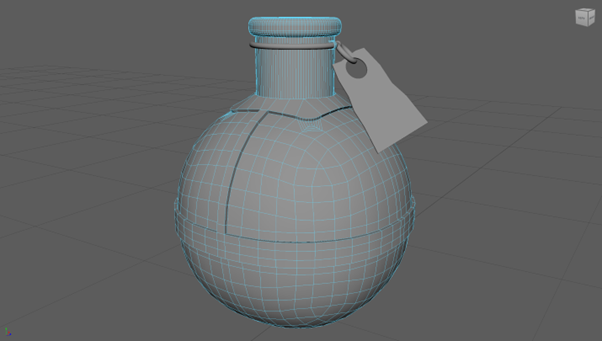
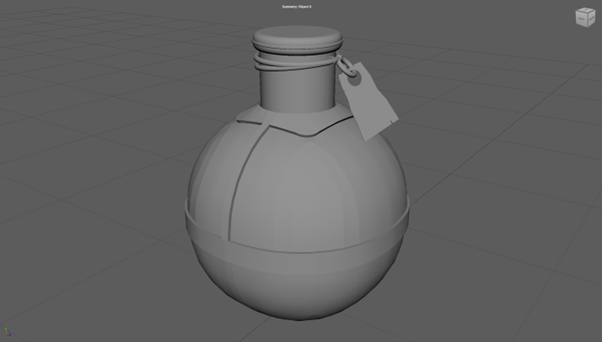
This is what the Potion, String and Tag look like when paired together. So far, I think it looks like a decent basic Potion that can be very customizable, based on the imagination of the person.
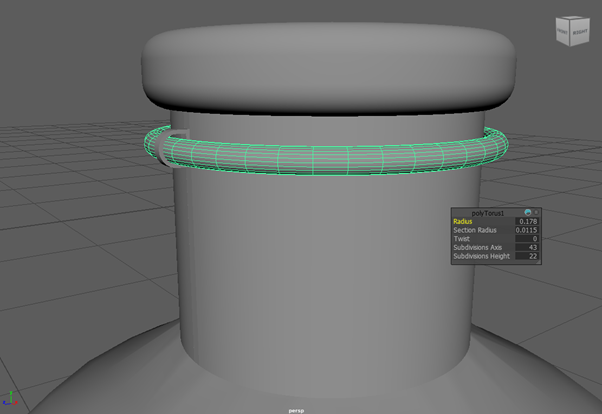
I Updated more of the Frame by adding in two smaller frames (Mirror style) to go towards and connect with the Bottle top. Now the potion looks more reinforced and make it look like it can’t be broken as easily.
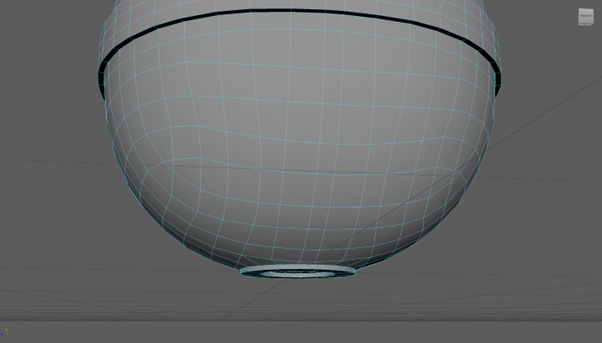
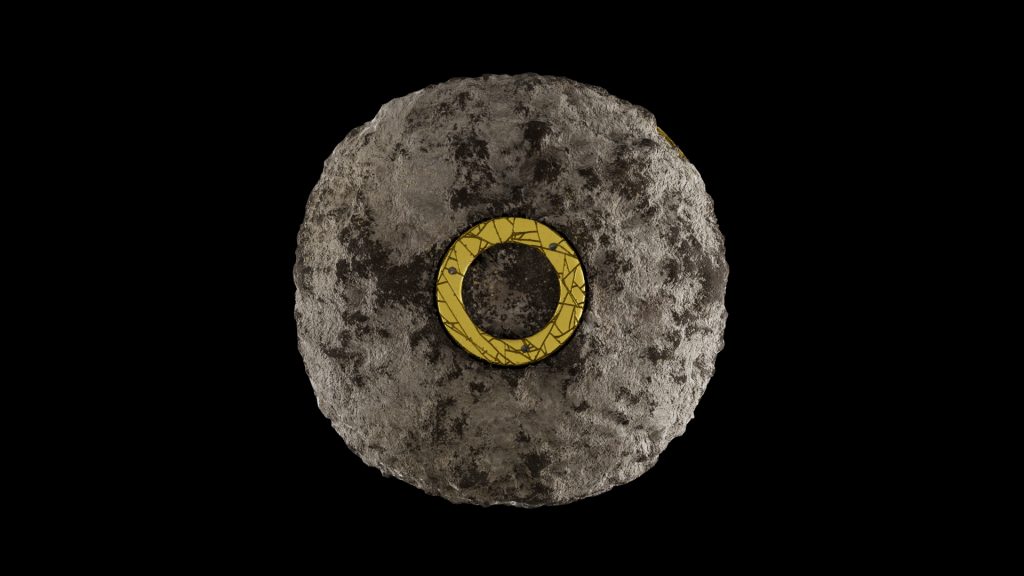
Next Addition, I added in a flat ‘disk’ at the bottom of the Potion. Using the circle tool with multiple bevelling tools, I made the circular shape This allows the potion to sit anywhere with a flat surface and not roll of, possibly breaking it. I also want to make the disk be the same material and colour as the frame around the Potion base.
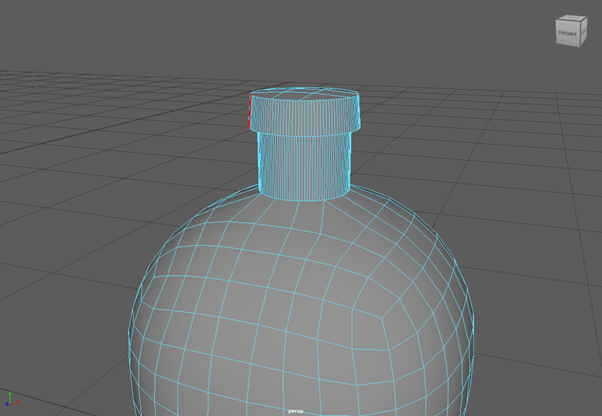
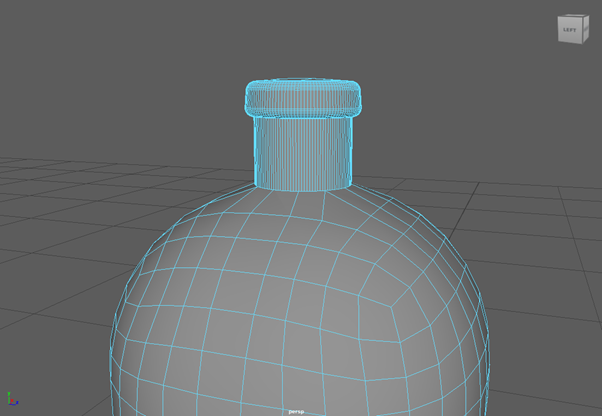
Now I add a frame around the base of the Bottle top to connect around the bottle top and to the rest of the frame for complete detail. The corners around the base of the Bottle top were bevelled and segmented to have curved corner instead to help with detail and look better when going around the bottle.
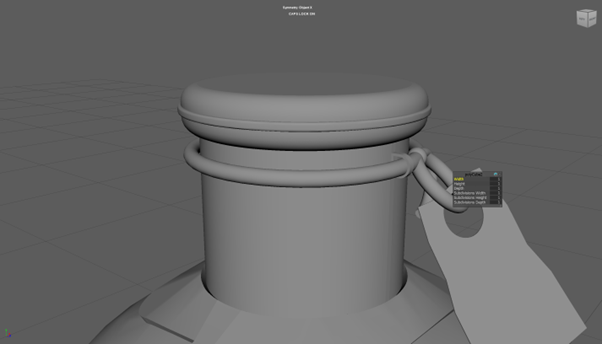
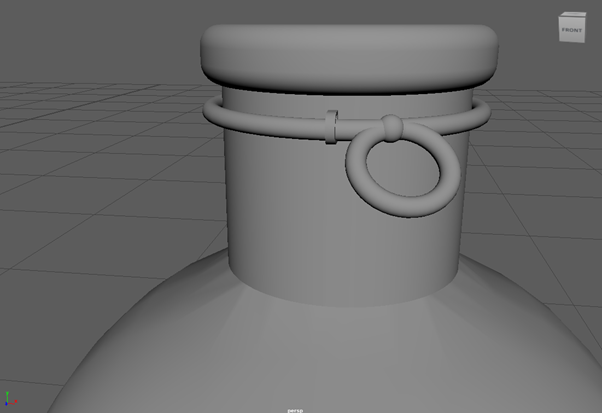
Now back to the lid of the Bottle, I added in a small framework in the middle of the lid going all the way around. This framework will have the same material and colour as the rest of the framework on the bottle’s base.
With the tag, I added in cuts or little rips into the tag to make it more worn down and old looking. This will help with further detail to the tag and make it look ‘busier’, like it hasn’t been touched or having no reason to be with the Potion.
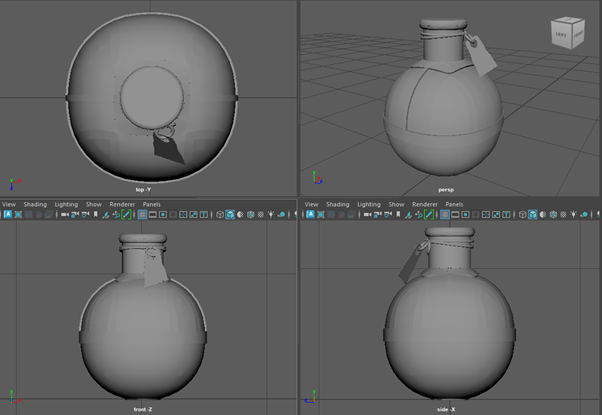
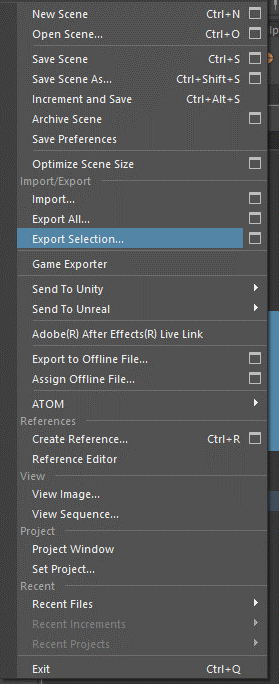
This is the Potion look currently, I have Frozen all Transformation and shapes that made the potion, string, and tag. This is needed for when importing to Substance Painter and for when placing into my Environment because the engine won’t see Potion’s shape as it is and will still think it is a sphere or square for the tag.
So, the shapes were frozen, and this resets their scaled value back to One or Zero for the engine to know the shape of the potion. Then it will be onto the UV Editor to help with splitting each part of the potion into their own separate parts to make it easier to paint onto via Substance Painter.
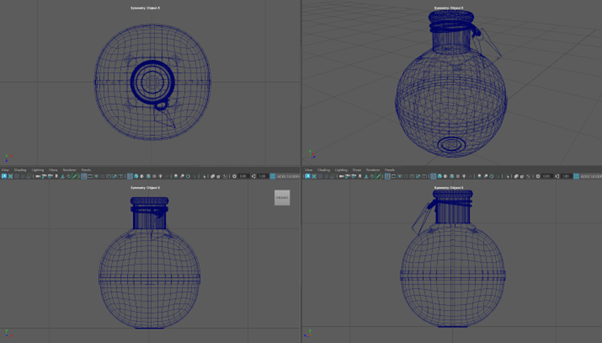
Here is the Wireframe of my Potion Asset. Now I can see a better understanding of how I structured my Potion Asset, see if everything connects and if everything is in place. It also shows how many Squares Rectangles and Triangles I have used to make my shape to be a Potion with a Tag.
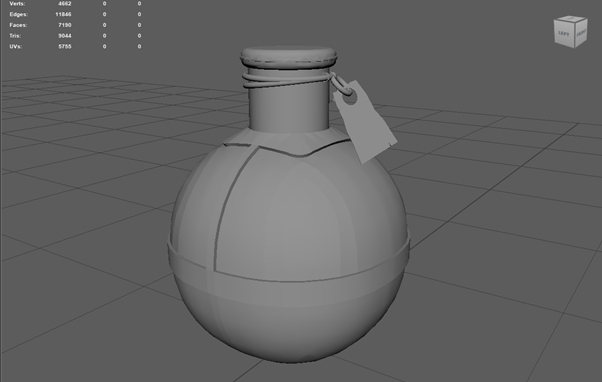
I Activated Poly Count to see how many Verts, Edges, Faces, Tris and UVs I have made to create my Potion Asset. My Aim is to have a Tri count below 10k, and I have managed to make it possible.
UV Editor
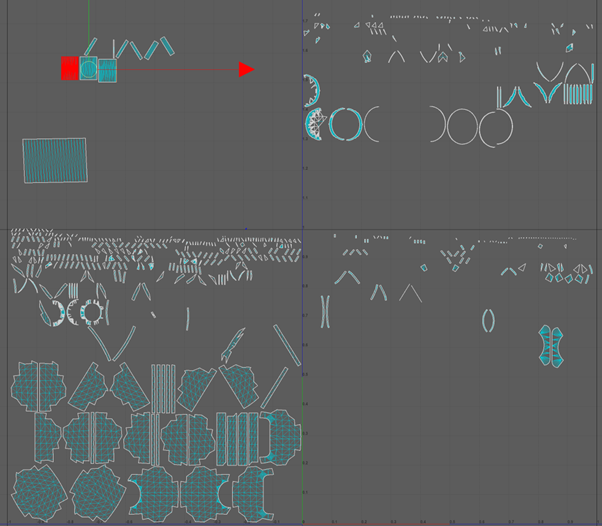
Making sure that my 3D Asset was all connected properly and reinforced, then It was time to send into the UV editor. This took a few tries to work and auto generate the asset and split them into different parts, you will end with big and small UV parts.
UV Editor will be available and you can access it near the top-right of the application. Now my Asset is shown as many different UV parts.
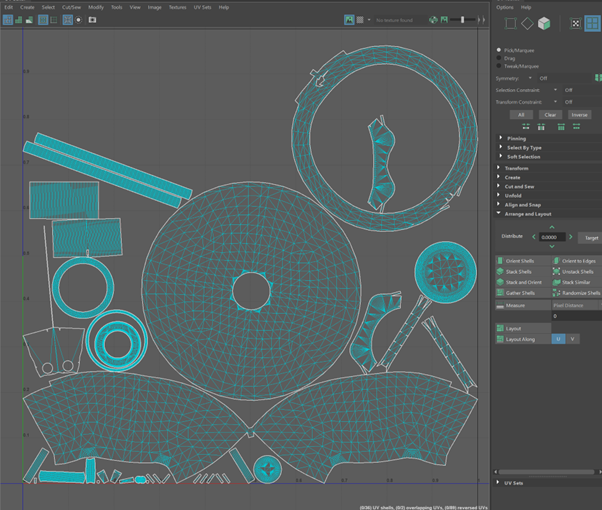
Thanks to the Stitch and Sew tool, now my UV Maps are cleaned up, now I have recognizable parts of the Potion, with a few small parts and Moved them all into One grid to make finding the parts easier.
Importing to Asset into Substance Painter
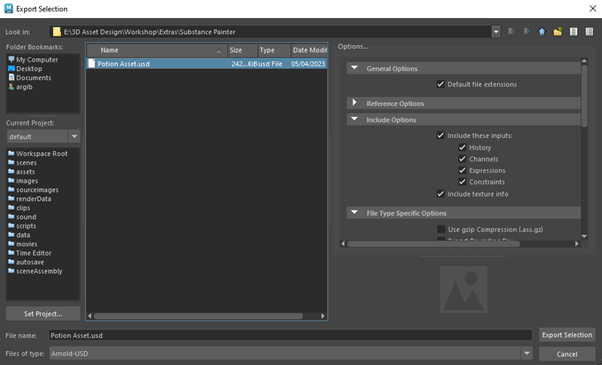
Substance Painter
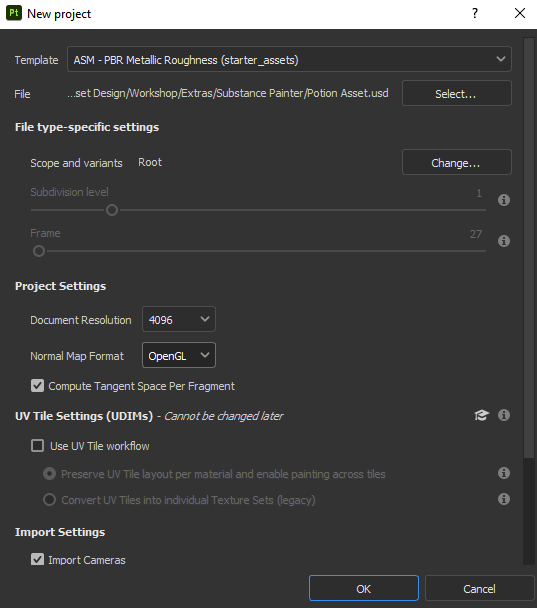
Added in the settings needed to meet the Assignment’s Brief. OpenGL will be useful for getting my Potion Asset into Unreal Engine 5, since DirectX is not compatible to transfer over.
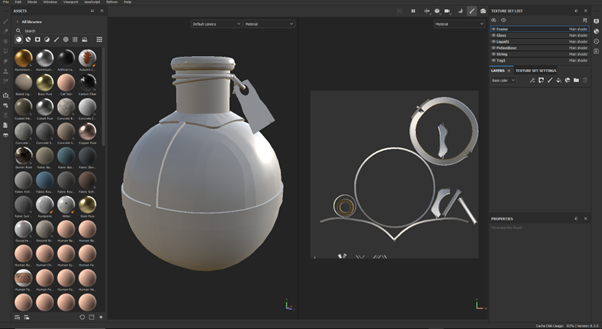
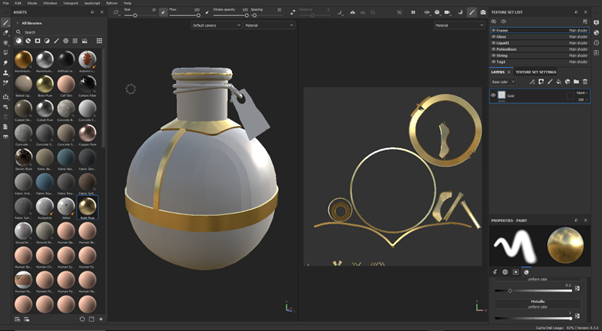
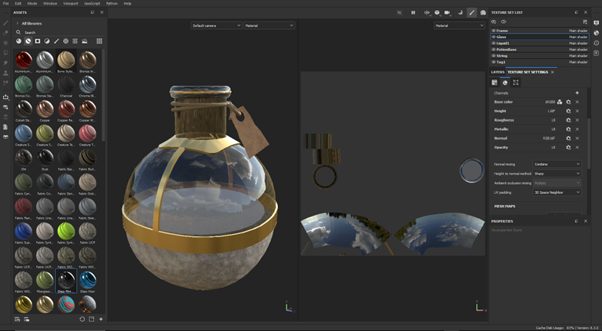
Now that my Asset is in Substance Painter, I can now Paint the Asset to my liking and fit with Fantasy and Beauty. I went with a Gold Frame because I think it looks nice and It will help with my Asset standing out more in the Environment.
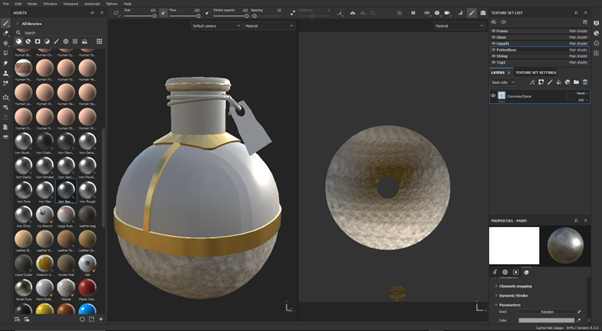
The Stone texture will make it like it was crafted from the Cave walls itself or by stone deeper down in the caves. This will fit with the stone ruins within the environment to show how old the Asset could be.
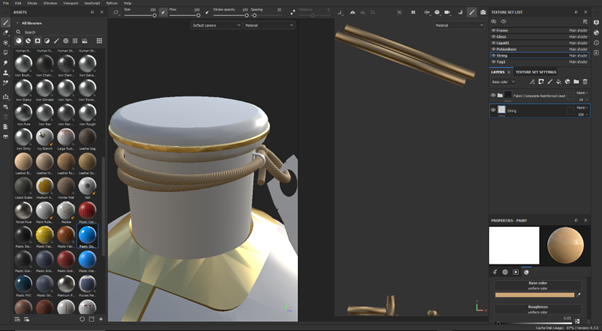
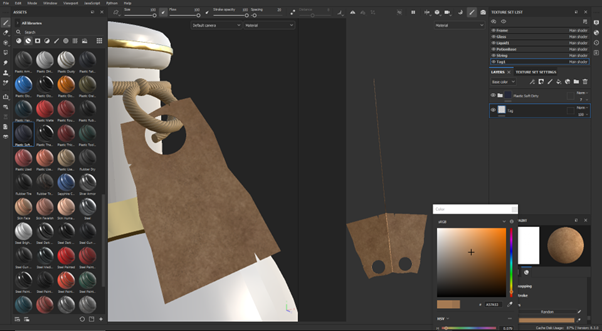
A Wrapped cloth Texture was used to make the String Texture with a bright colour to stand out differently to the Tag. Used a Cardboard Texture with a Worn Fibre Filter to make the Tag look old and give more shades of the same colour.
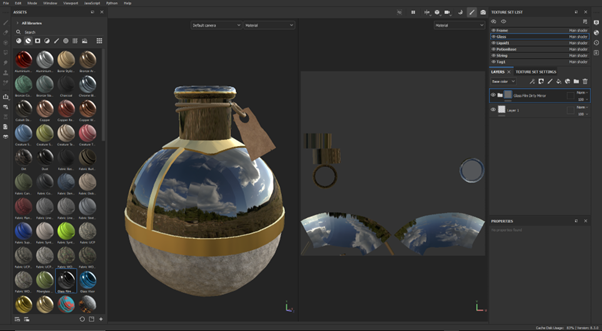
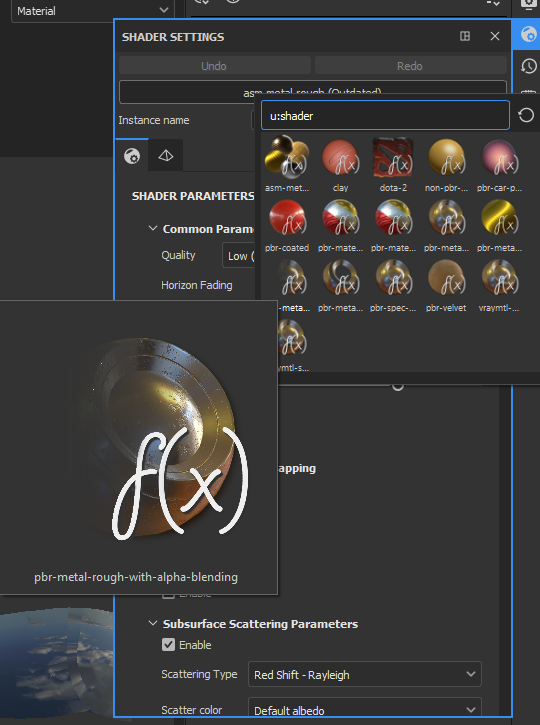
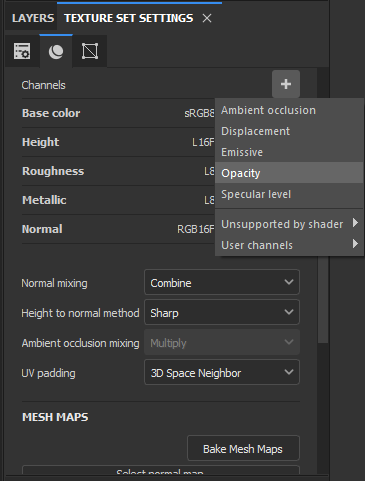
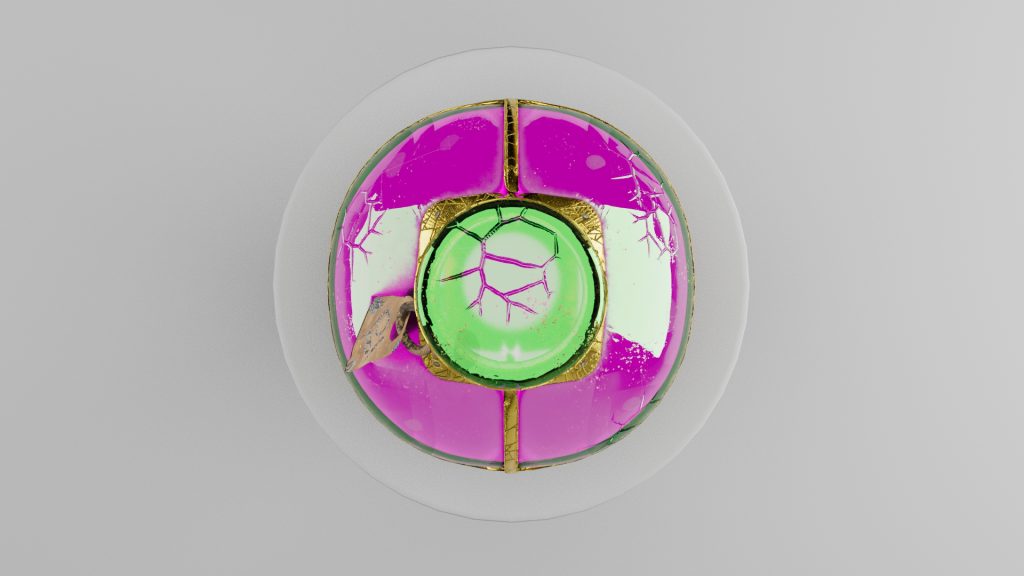
pbr-metal-rough-with-alpha-blending allows me to add Opacity to my Texture Sets. This will intern allow me to see through my Glass Filter and allow me to see the Liquid inside the Potion.
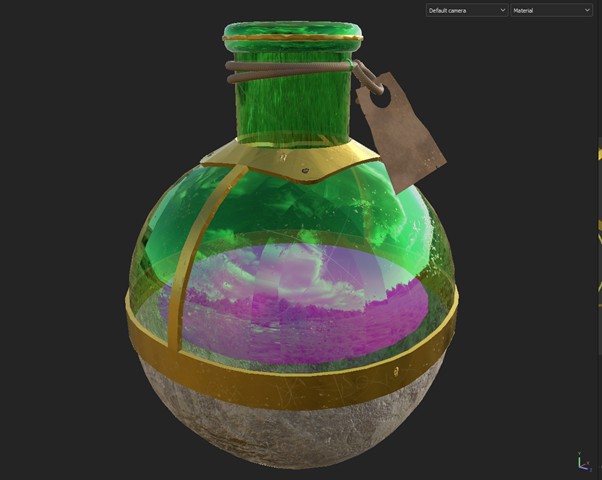
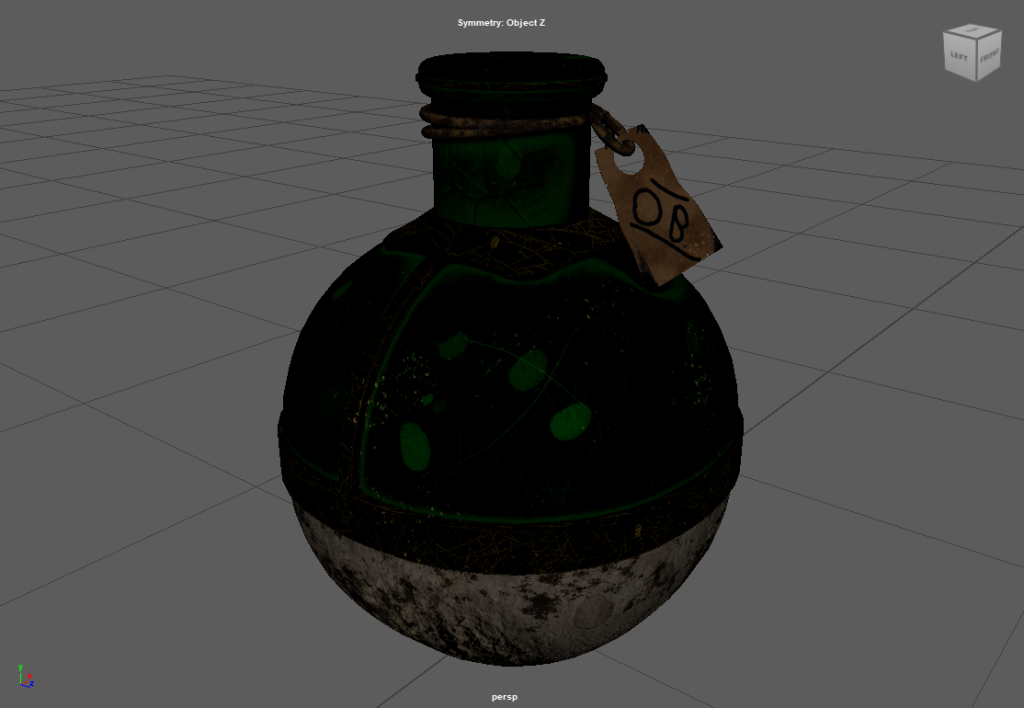
I have changed the Glass to Green to have a more Magical Vibe to it and it I think it looks good with the Purple Liquid, which could be Poison or Health and Mana mixed together. The Liquid part was too small and was stretched once it was returned back into Maya Autodesk
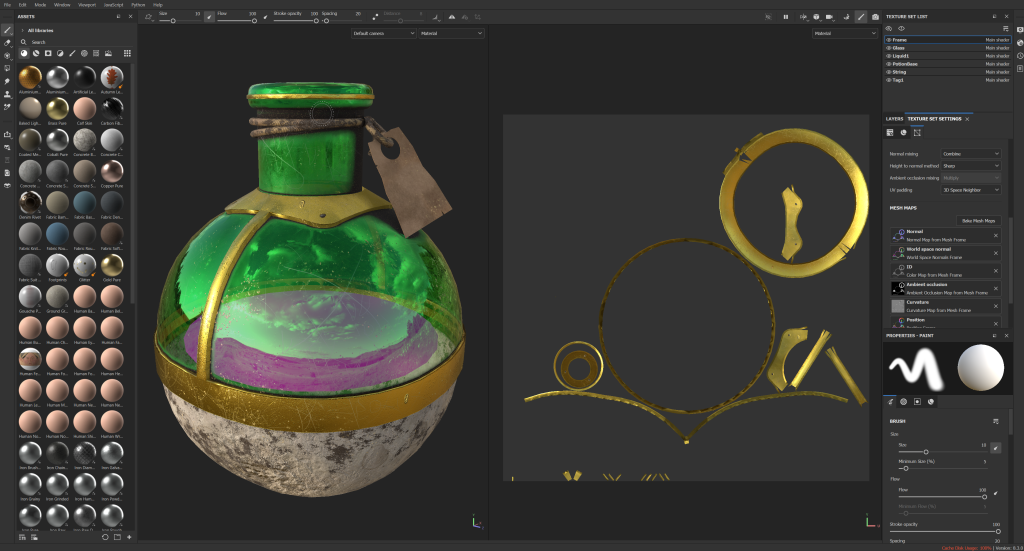
I had to Re-fix the textures, since the textures were stretched. This resulted with a bit of the textures in some places were not rendered in properly. I decided to keep it in because I think it made the Overall Design look cooler.
This made me change my mind from making a ‘Perfect’ Looking Potion, to a Burned, worn down looking one with engravings on the Gold frame.
Maya Autodesk – Baking, Texturing and Studio with Lighting
Beauty Shots